In Git, a tag is a label or reference that is assigned to a particular commit in the Git history. Tags are useful for marking important points in the project’s history, such as releases. It also helps developers during collaboration to indicate when a specific feature or bug fix has been completed. Moreover, it makes it easy to track progress and avoid conflicts.
This article will illustrate the method to show all tags in the “git log”.
How to Show/Display All Tags in Git Log?
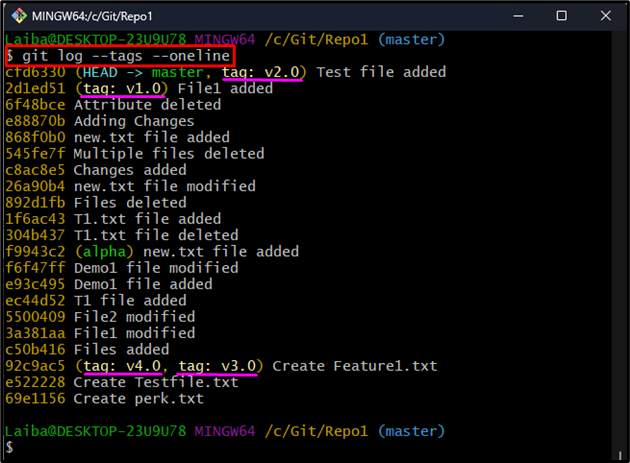
To show all the tags in the “git log”, first, navigate to the desired repository. Then, execute the “git log –tags –oneline” command. Furthermore, the “–no-walk” option can also be utilized with the same command to only display the commits that are directly referenced by the tags.
Step 1: Redirect to Git Directory
First, switch to the particular local repository:
Step 2: Display All Tags in “git log”
Then, run the below-listed command to display all the Git tags in “git log”:
Here:
- “tags” option is used to show commits that are referenced by tags.
- “–oneline” option is utilized to display output in a single line per commit.
In the below screenshot, the highlighted part shows all the Git tags:
Moreover, to only list the commits that are directly referenced by the tags, use the “–no-walk” option in the same command:
Here, the “–no-walk” option is used to tell “git log” to only display the commits that are directly referenced by the tags.
The below output shows all tags in the “git log”:
We have explained the easiest way to show all Git tags in the “git log”.
Conclusion
To show all the tags in the “git log”, the “git log –tags –oneline” command is used. Moreover, the “–no-walk” option can also be utilized in the same command to only display the commits that are directly referenced by the tags. This article illustrated the method to show all tags in the “git log”.


