The Linux kernel provides us with modules to perform network bonding. This tutorial discusses how to use the Linux bonding module to connect multiple network interfaces into a single interface.
Before we dive into the terminal and enable network bonding, let us discuss key concepts in network bonding.
Types Of Network Bonding
There are six types of network bonding. They are:
- mode=0 – This is the default bonding type. It is based on the Round-Robin policy (from the first interface to the last) and provides fault tolerance and load balancing features.
- mode=1 – This type of bonding is based on the Active-Backup policy (only a single interface is active, and until it fails, the other activates). This mode can provide fault tolerance.
- mode=2 – This type of bonding provides features such as load balancing and fault tolerance. It sets an XOR mode performing an XOR operation of the source MAC address with the destination MAC address.
- mode=3 – Mode 3 is based on broadcast policy, transmitting all packets to all interfaces. This mode is not a typical bonding mode and applies to specific instances only.
- mode=4 – Mode 4 or Dynamic Link Aggregation mode create aggregation groups with the same speed. Interface selection for outgoing traffic is carried out based on the transmit hashing method. You can modify the hashing method from XOR using the xmit_hash_policy. It requires a switch with 802.3ad dynamic link
- mode=5 – In this mode, the current load on each interface determines the distribution of the outgoing packets. The current interface receives the incoming packets. If the current interface does not receive the incoming packets, it is replaced by the MAC address of another interface. It is also known as Adaptive transmission load balancing.
- mode=6 – This type of balancing is also known as Adaptive load balancing. It has a balance-transmit load balancing and a receive-load balancing. The receiving-load balancing uses ARP negotiation. The network bonding driver intercepts the ARP replies from the local device and overwrites the source address with a unique address of one of the interfaces in the bond. This mode does not require switch support.
How to Configure Network Bonding on Ubuntu
Let us dive into the terminal and configure network bonding in ubuntu. Before we begin, ensure you have:
- A root or a sudo user account
- Two or more network interfaces
Install Bonding module
Ensure you have the bonding module installed and enabled in your kernel. Use the lsmod command as:
bonding 180224 1
If the module is unavailable, use the command below to install.
Ephemeral Bonding
You can set up a temporary network bonding using two interfaces in your system. To do this, start by loading the bonding driver.
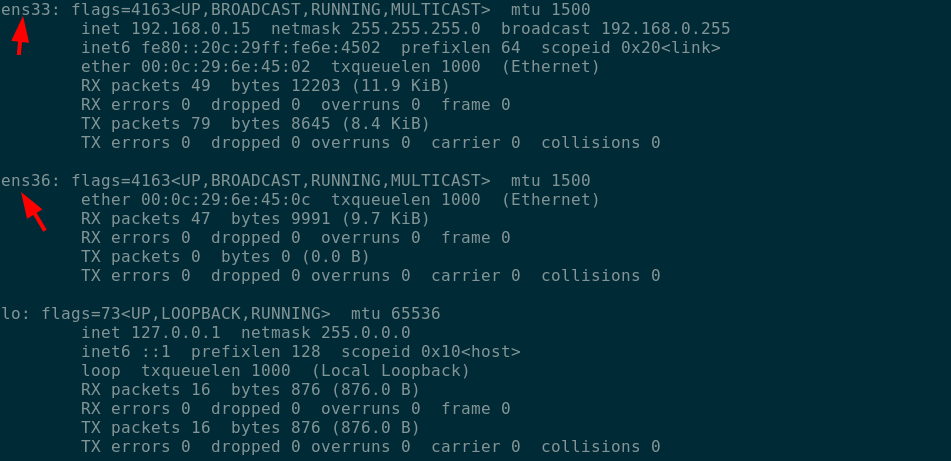
In the next step, let us get the names of the ethernet interfaces in our systems. Use the command:
The above command shows the interfaces in the system. You can find an example output in the image below:
Now, let us create a network bond using the ip command as:
sudo ifconfig ens36 down
sudo ip link add bond0 type bond mode 802.3ad
Finally, add the two interfaces:
sudo ip link set ens36 master bond0
To confirm the successful creation of the bond, use the command:

NOTE: Creating a bond, as shown above, will not survive a reboot.
Permanent Bonding
We need to edit the interface configuration file and add the bonding settings to create a permanent bond.
In the file, add the following configuration.
iface ens33 inet manual
auto ens36
iface ens36 inet manual
auto bond0
iface bond inet static
address 192.168.0.253
netmask 255.255.255.0
gateway 192.168.0.1
dns-search domain-name.local
slaves ens33 ens36
bond_mode 4
bond-miimon 100
bond-downdelay 0
bond-updelay 0
NOTE: Ensure that the interfaces are bond=4 compliant. If not, you can use bond=0 instead. You may also need to take the two interfaces down and enable the bond.
Use the command below to activate the bond.
sudo service restart network-manager
To confirm the interface is up and running, use the command:

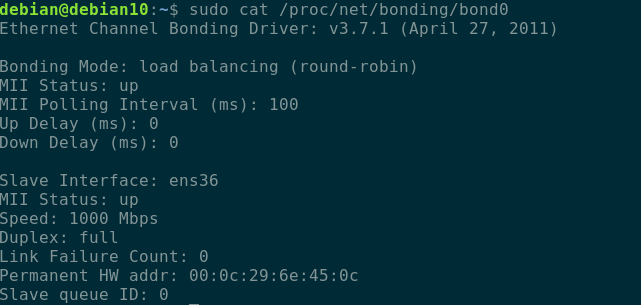
To view the status of the bond, use the command as:
Here is an example output:
In Closing
This guide walked you through how to set up network bonding in Ubuntu and Debian-based distributions. To get detailed information about bonding, consider the documentation.