
Dual Monitor setup is connecting two monitors to your computer or laptop. Most people now require numerous screens or monitors connected to their computer as minimal need for multitasking. We can set up dual monitors in both Windows and Linux. Here I will provide you the procedure on how to set up a dual monitor on Ubuntu (Linux).
Two approaches are provided below to setup a dual monitor on Ubuntu, you can choose the one you find convenient for you.
METHOD 1: How to setup dual monitors on Ubuntu
This method is focusing on setting up a dual monitor if your PC is Ubuntu based:
Requirements
- One external monitor
- PC with Ubuntu (Linux OS) installed
Step1: Firstly, connect your external monitor with your PC.
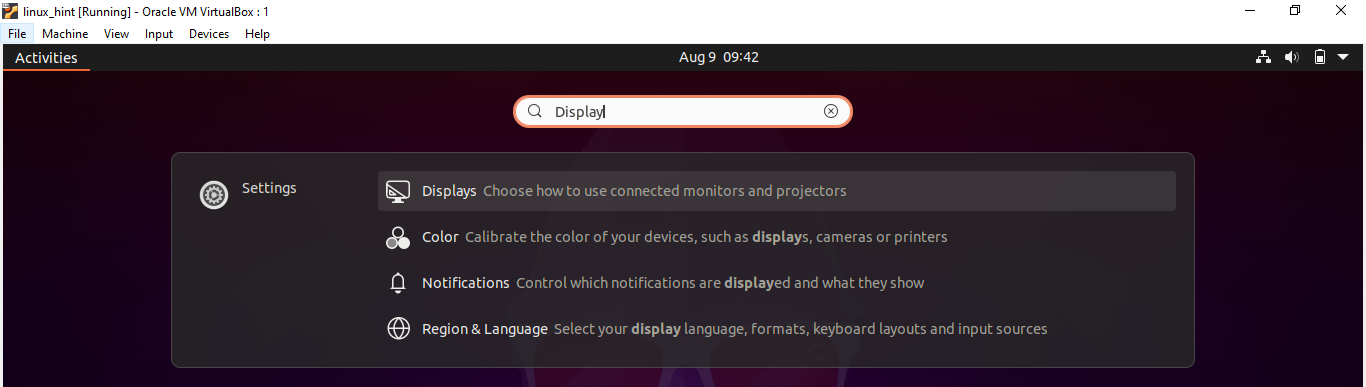
Step 2: Now open the activity overview on Ubuntu.
Step 3: Write Display in the search bar, click on Displays and the display setting will be opened.
Step 4: You can now set the display position of screens by dragging them to the position of your choice.
There are three display modes in Ubuntu:
Join Displays: In this display mode the screen edges will be linked and things can pass from one screen to the other one.
Mirror: It will set the same resolution and orientation for both displays and alike content will be shown on both screens.
Single Display: Only one display is set up, effectively shutting down the other.
Choose any of the displays from above, you can also set resolution, scale or orientation of screens.
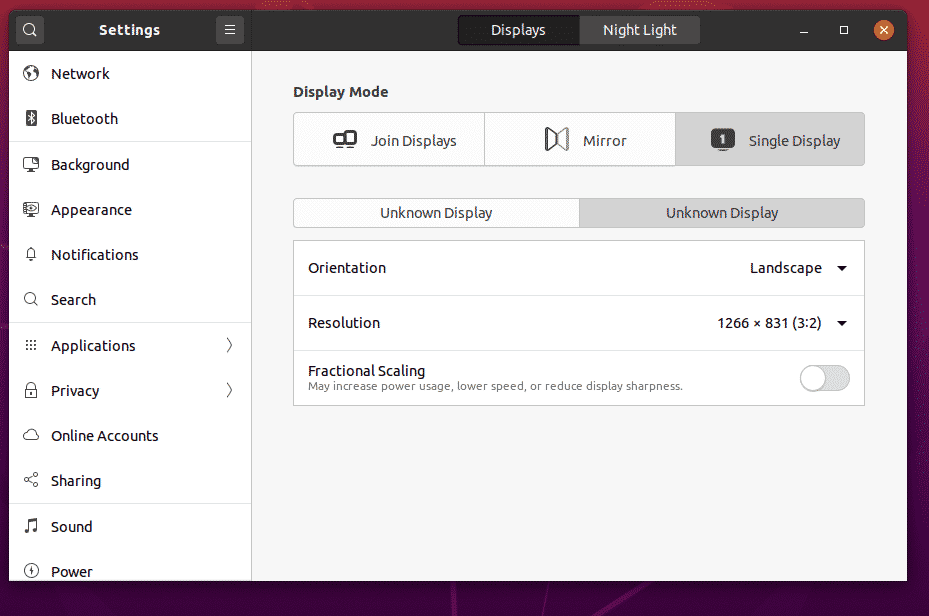
Step 5: Now click on Apply to save the changes.
METHOD 2: How to setup dual monitors on Ubuntu (VirtualBox)
If you are accessing Ubuntu as guest operating system using VirtualBox then follow the below-mentioned approach:
STEP 1: First turn off the virtual machine.
Step 2: Go to the virtual box setting of the particular machine in which you want to set up a dual monitor.
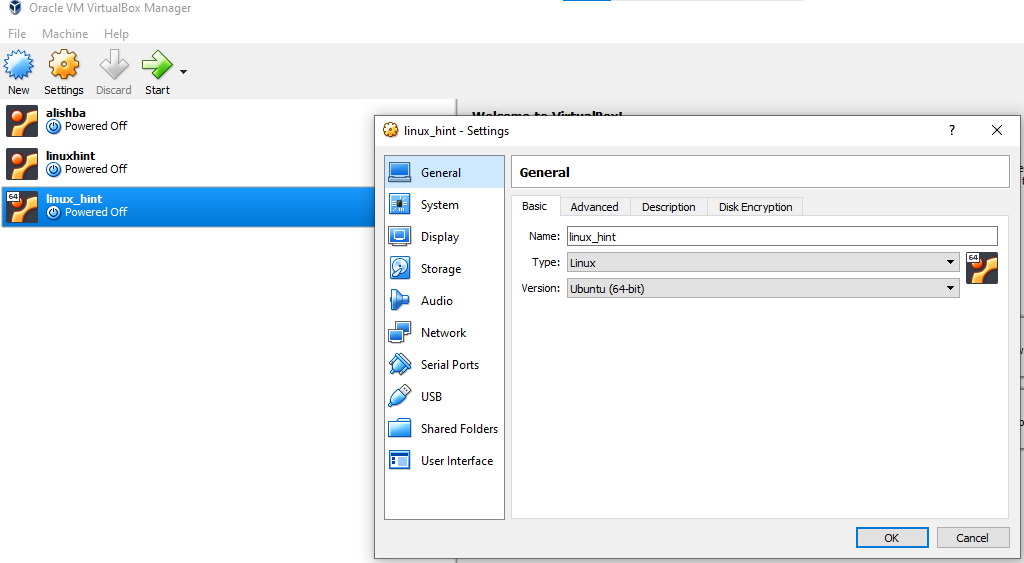
STEP 3: Now click on Display in settings and the display panel will be opened:
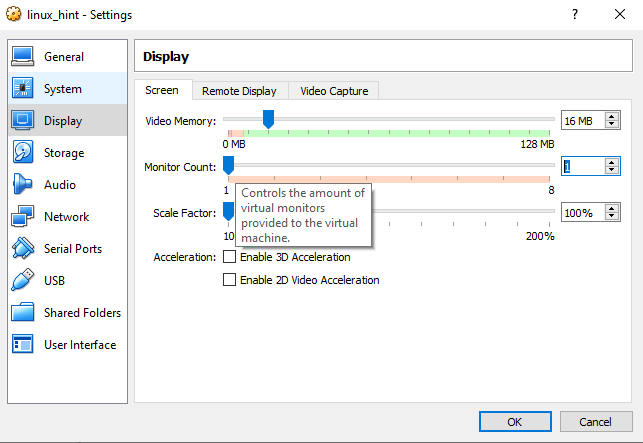
Step 4: Now increase the monitor count to 2 by sliding the bar:
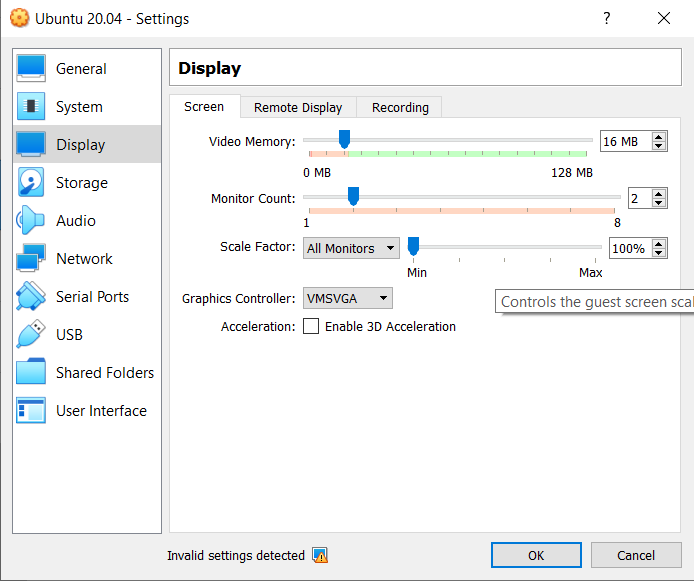
Click on OK to save the changes.
Step 5: Run the virtual machine in which you apply the above changes.
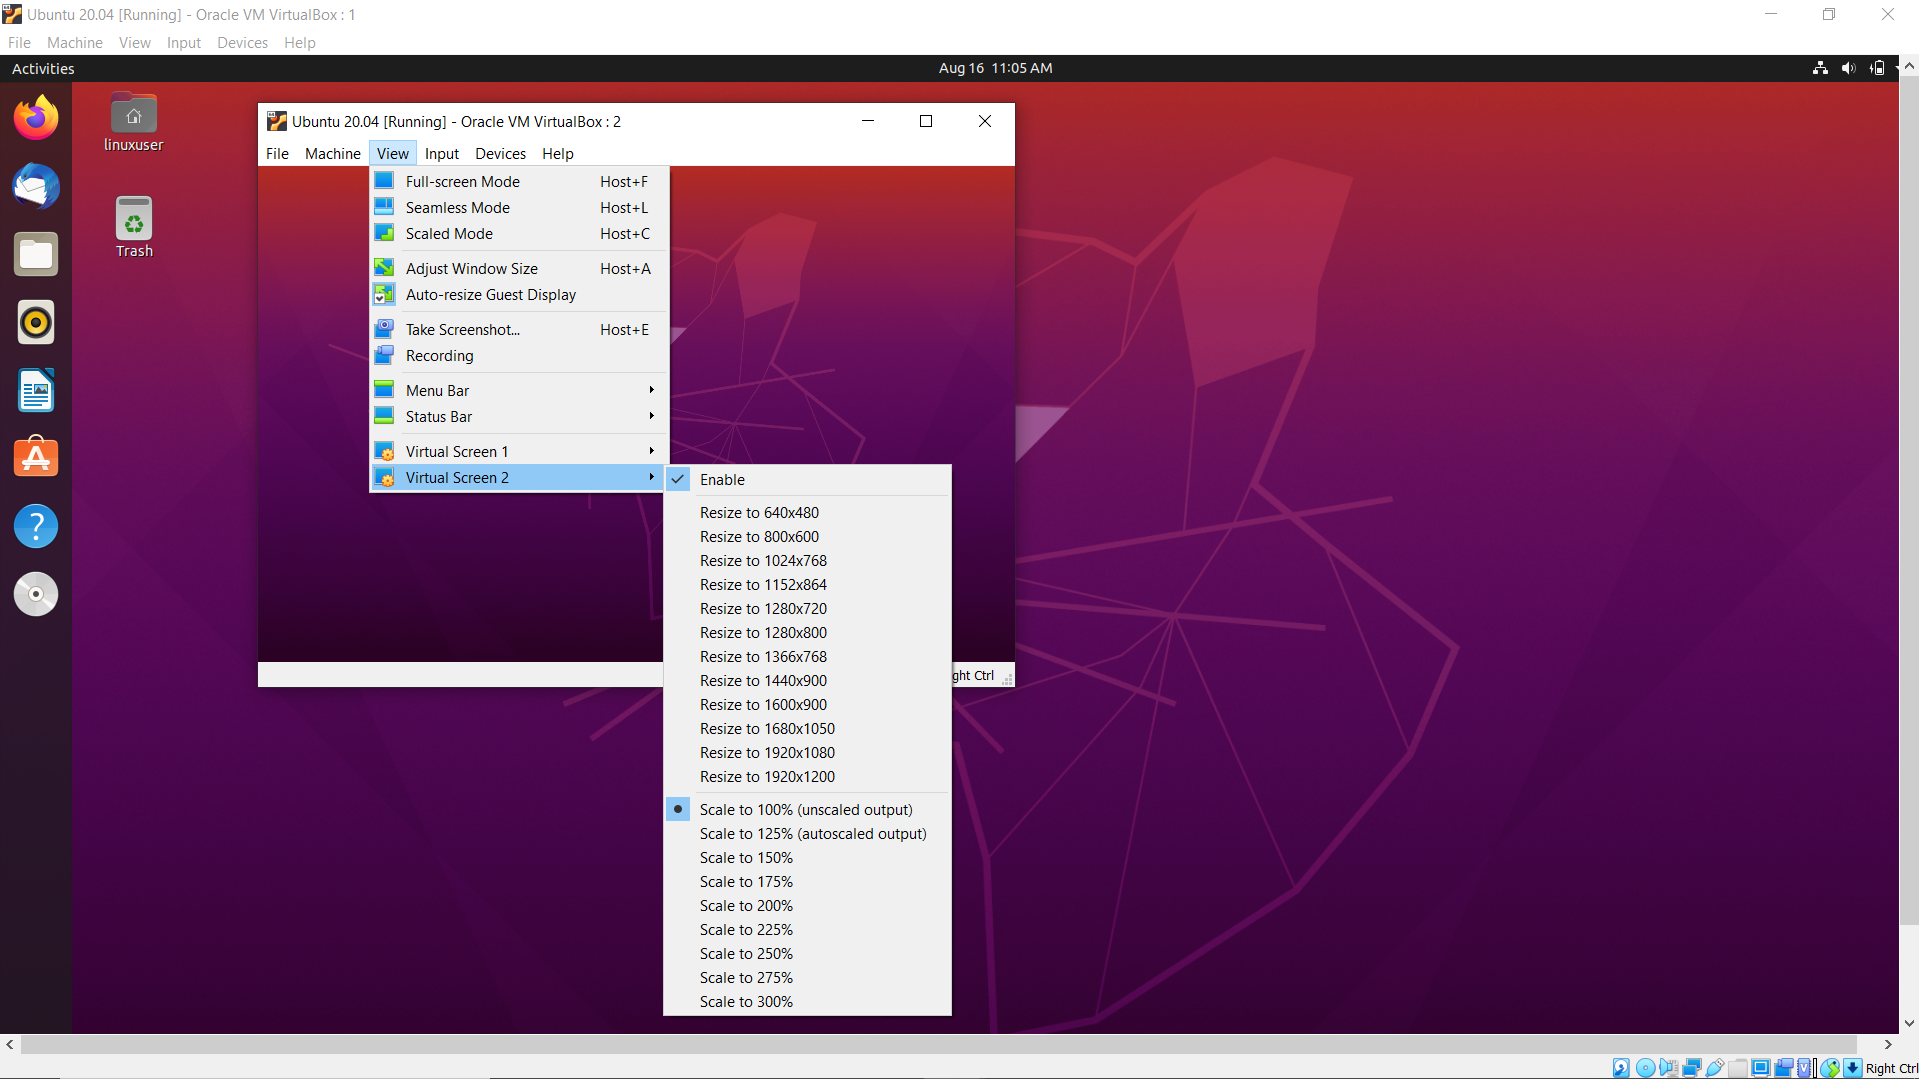
Step 6: Go to the view setting and at the end you can see two virtual Screen 1 and virtual Screen 2 labels.
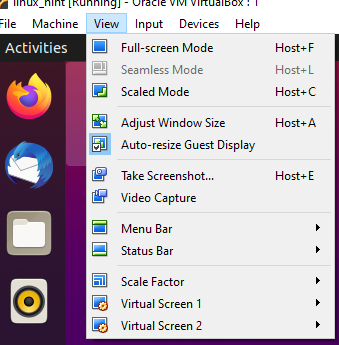
STEP 7: By clicking on Virtual Screen 1 and Virtual Screen 2, two screens will be opened.

Screen resolutions of both screens can be adjusted. If you want to change the screen size of the virtual screen, simply click on the “View” settings then in the drop-down menu hover mouse on the Virtual Screen, a context menu will appear. Now click the preferred size from the menu.
Conclusion
Dual monitor setup makes everything convenient whether you are a programmer or a post-production team member. This write up is about how to set up a dual monitor on Ubuntu. Setting up Dual Monitor is an efficient approach for multitasking, we discussed two approaches in this write up one is through the display setting of virtual box and one is through display setting of ubuntu.