The content of this guide will include:
- Launching an EC2 Instance
- Connecting to the EC2 Instance
- Setting up NginX Server
- Adding inbound Rules for EC2
- Visiting the Hosted NginX Web Server
Step 1: Launching an EC2 Instance
As mentioned in the introduction, the NginX will be set up using the EC2 instances, as these instances work just like a virtual machine and can be made to work like virtual servers. Visit the AWS Console and log in to your AWS account once that is done, click on the “Launch a virtual machine” option under the “Build a solution” section:

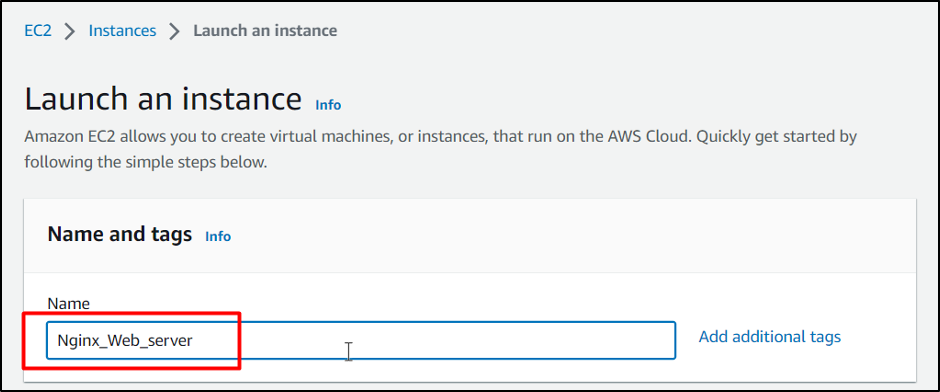
This will take the user to the EC2 creation wizard, which will look like a form. In this configuration, the first section is about the Names and tags. Therefore, provide your EC2 VM with a unique name:
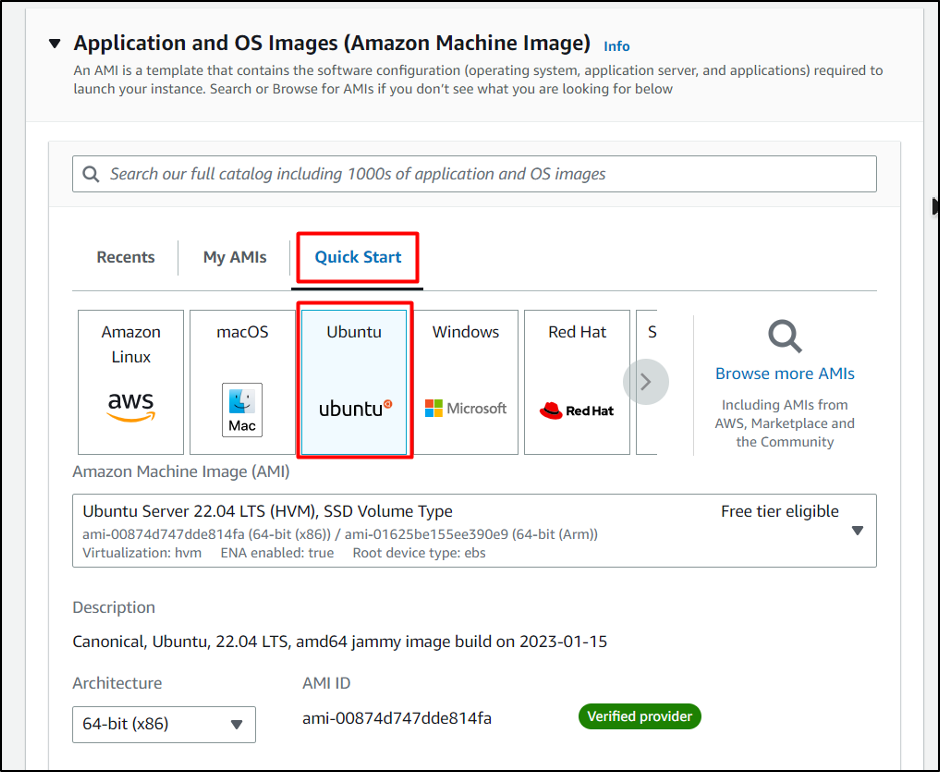
After that, the next section is about the AMI, which stands for Application and OS Image. The AMI is the OS you want to run on your EC2 VM. For this guide, simply go with the Ubuntu AMI from the “Quick Start” template:
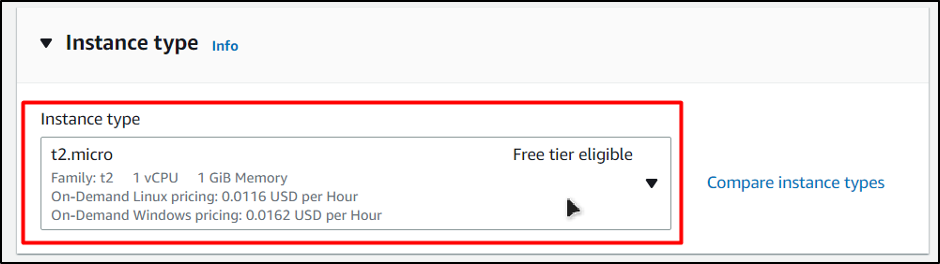
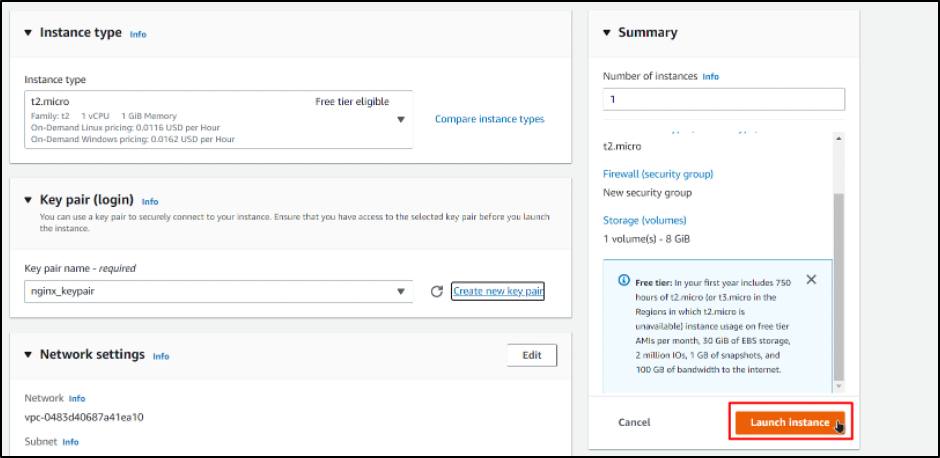
The next section is about the “Instance Type,” which basically defines the resources that you want to attach to your EC2 VM. For this post, simply go with the default one:
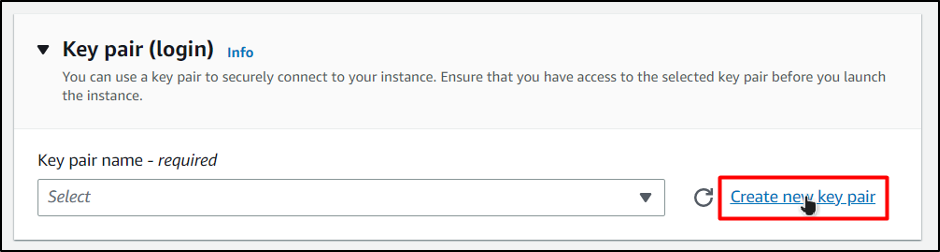
After that, for the key pair section, simply click on the link that says “Create new key pair” to create a new key pair file that will be associated with this EC2 Instance and used for connection purposes:
In the key creation pop-up wizard, simply give your key pair a name and leave everything as default and click on the “Create key pair” button:
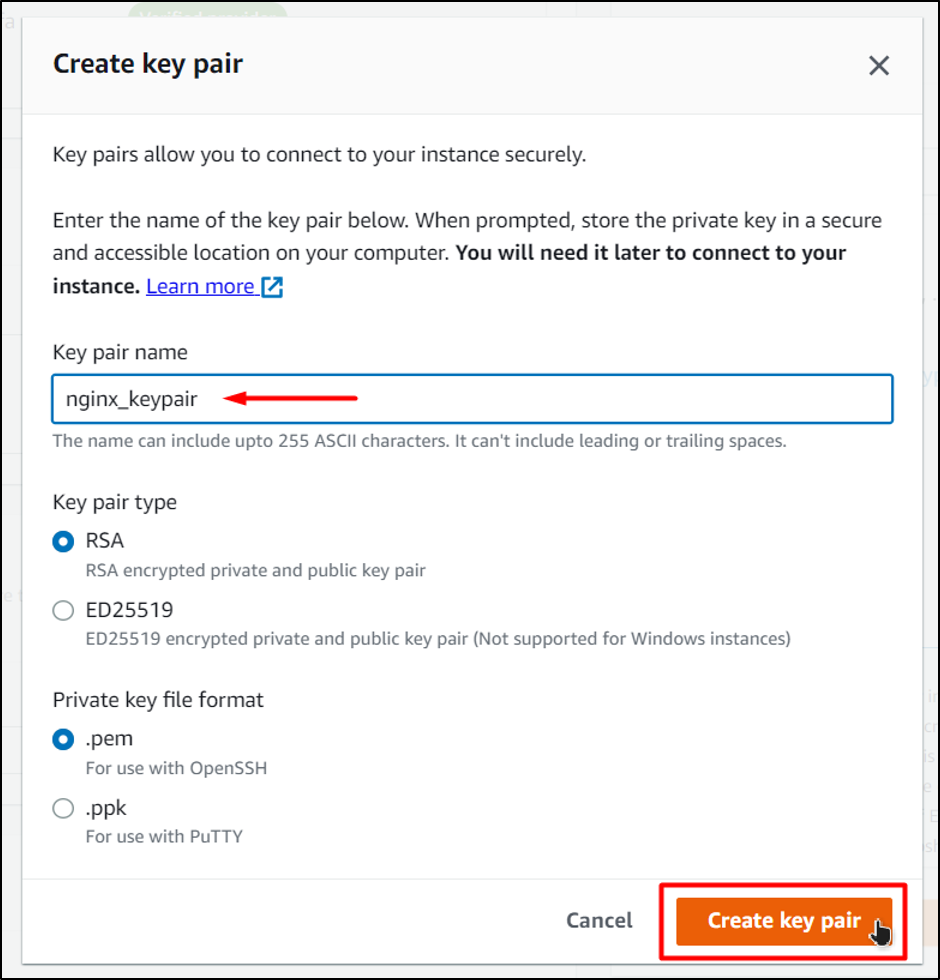
Note: After the creation of the key pair, it will be downloaded onto your PC. Place it in a secure folder as it will be later used for the SSH connection with the EC2 instance.
Then confirm the configurations and launch the EC2 VM. Simply click on the “Launch Instance” button from the “Summary” section on the right-hand sidebar:
When the EC2 VM has been launched, it will show the following prompt on the AWS Console:

You have successfully launched an EC2 VM to deploy your NginX server.
Step 2: Connect to the EC2 VM
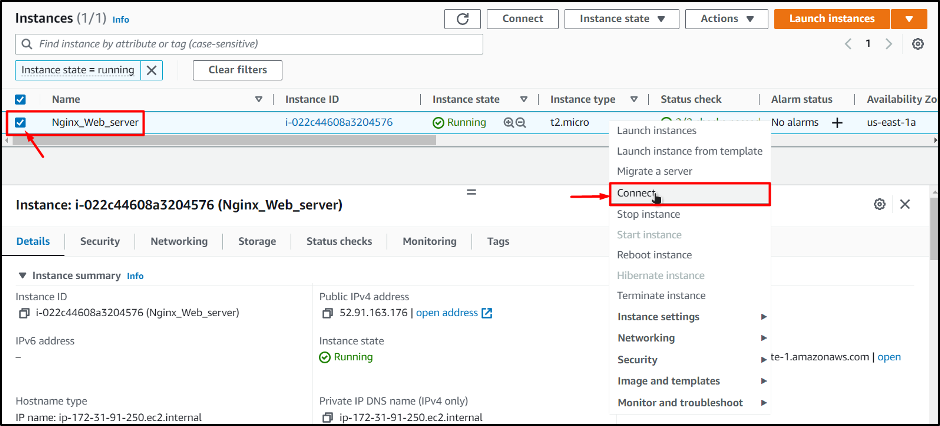
To work with the EC2 virtual machine, we need to be able to connect to it using the SSH connection. For this, head to the EC2 Console from the AWS Console and then, from the Instance listing, select your newly created instance, right-click, and choose “Connect” from the menu:
From the connection page, shift over to the “SSH client” and then copy the last command on the page:
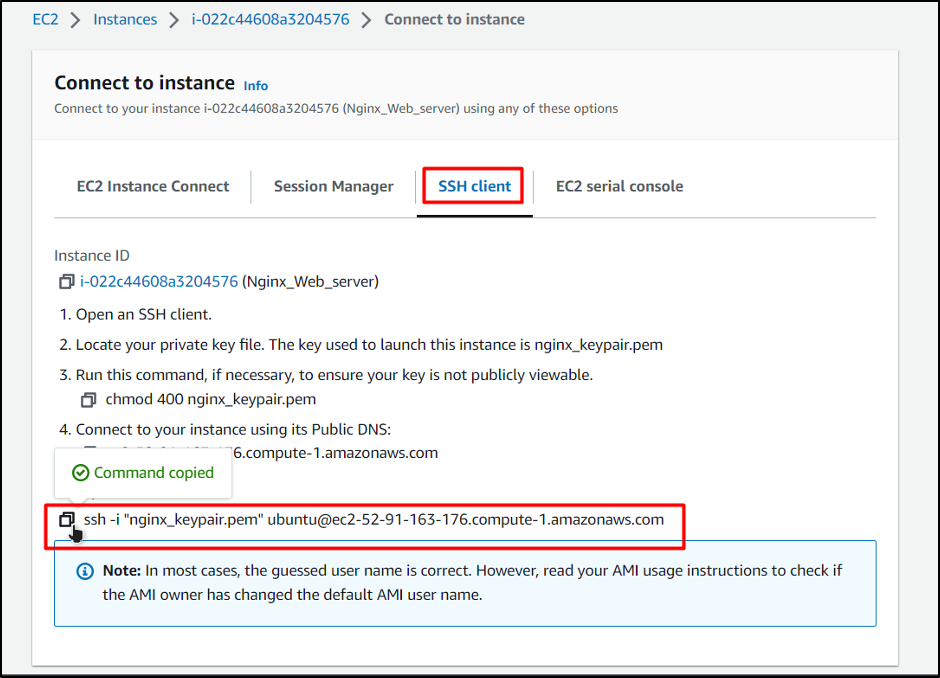
After that, simply paste this command into a Command Prompt or a PowerShell and make sure to replace the name of the key pair with the complete path of the key pair on your local machine:

Press the “Enter” to connect to the EC2 instance:
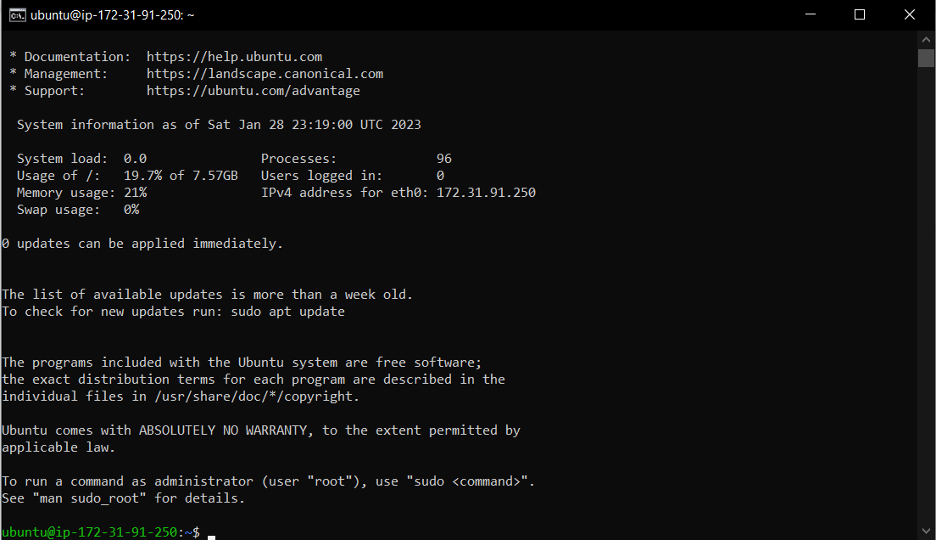
Step 3: Setting up NginX Server
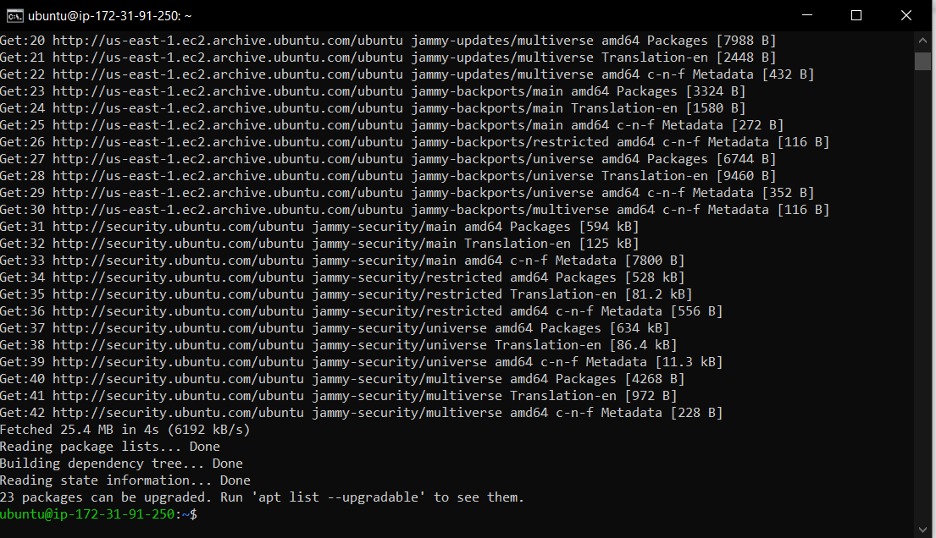
Inside the EC2 Ubuntu virtual, run the following command to first update the apt packages:
This will produce the following result on the SSH terminal:
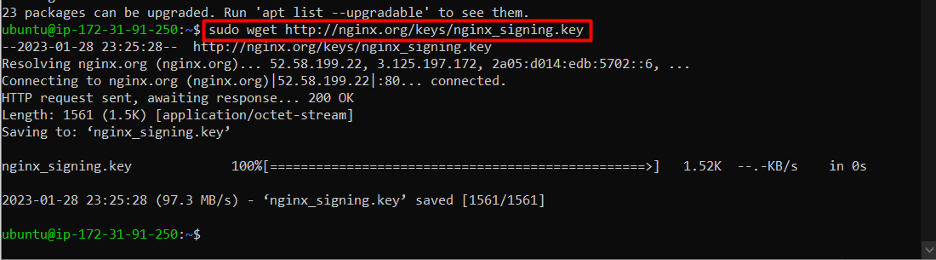
After that, you need to install the Nginx in the EC2 instance. To do that, the first thing is to add the signing keys using the following command:
This will result in the following output:
After that, add the signing key to the repo using the following command:
Upon executing this command, the terminal will show an OK message:

Note: Ignore the depreciation warning
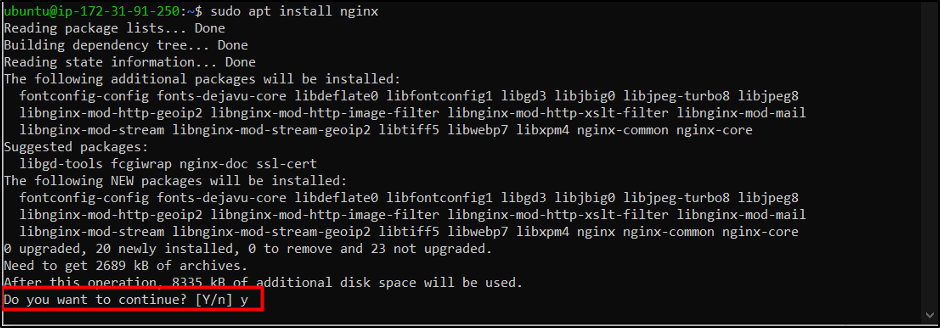
After that, simply install the Nginx using the following “apt install” command:
Type “y” for the confirm download prompt:
After the installation process is done, you need to start the service of nginx with the help of the following command:
After starting the service, verify it using the command:
The SSH terminal will display the following status of the Nginx service:
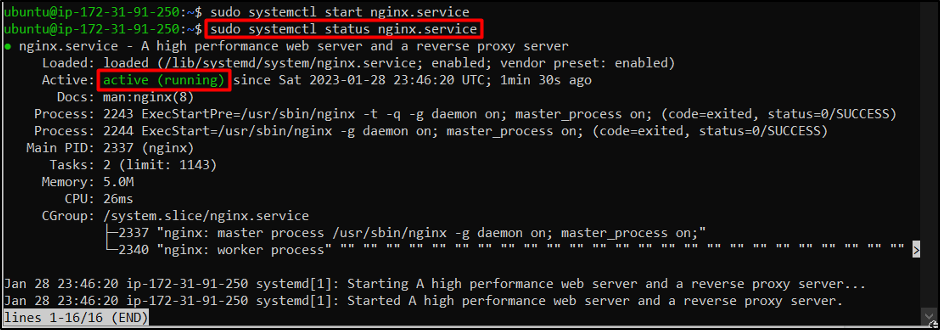
This means that the NginX is successfully installed and set up.
Step 4: Adding inbound Rules for EC2
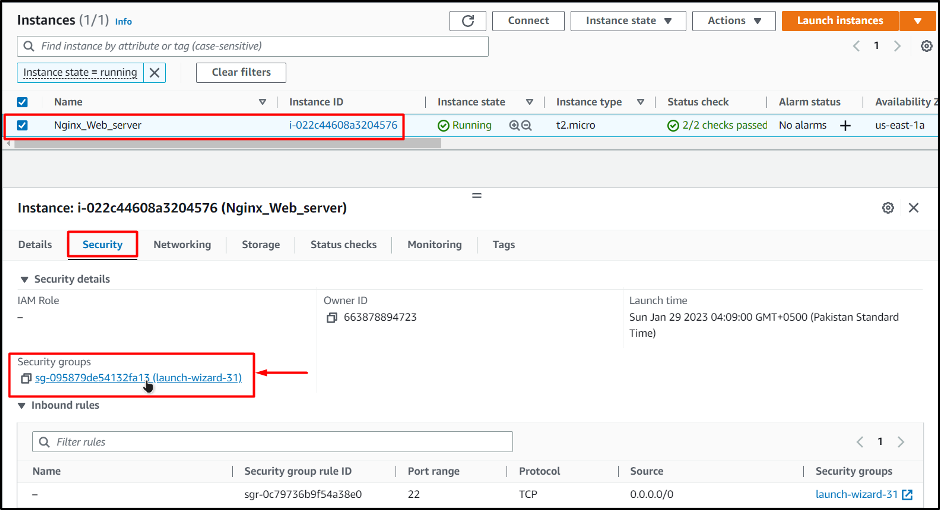
To enable access from outside the AWS platform to visit your Nginx server, you need to configure the inbound rules for HTTP and HTTPS traffic. For this, head back to the EC2 Management console, select your EC2 instance and then click the name of the security group associated with the EC2 instance:
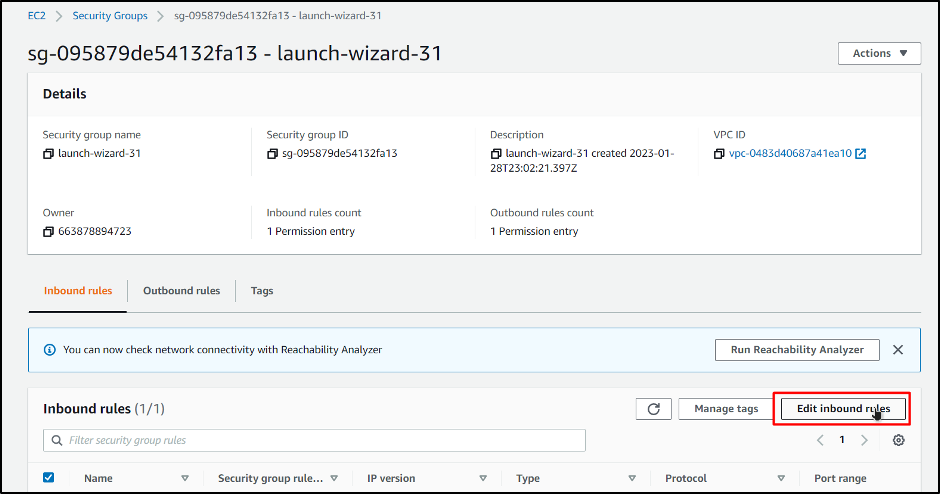
Doing this will take you to the configuration page of that security group. From this page, click on the “Edit inbound rules” button in the “inbound rules” section:
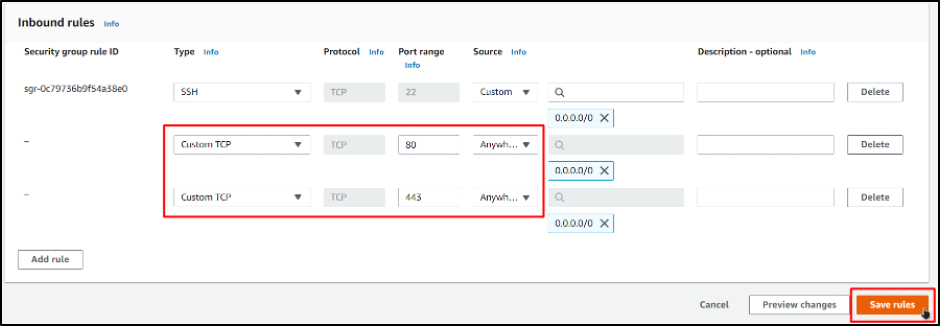
Then add two custom TCP rules for port 80 and port 443, and for the source set it to Anywhere (Make sure to specify your incoming traffic for security purposes), and then click on the “Save rule” button:
You will get the following prompt on the AWS Console:
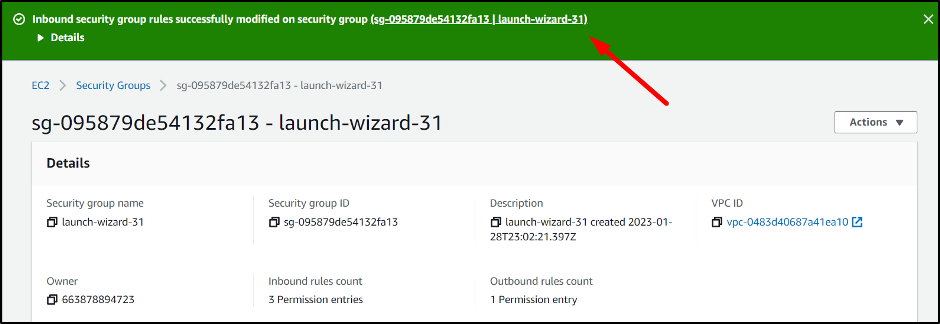
You have successfully added inbound rules for the EC2 VM
Step 5: Visiting the NginX Web Server
Once you have done all of the configurations in the previous step, then you have successfully set up your NginX Web Server and there is the only way of verifying that. Which is to visit the web server and observe the NginX welcome page.
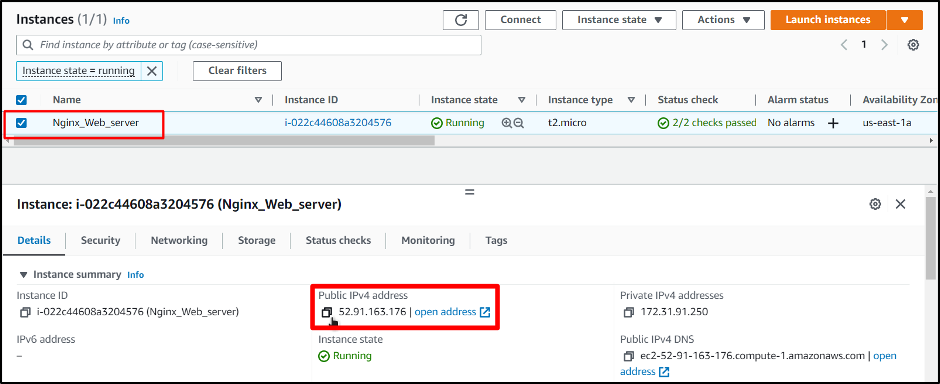
To do this, head back to the EC2 Management Console and then select your EC2 instance and copy the public IPv4 Address:
Paste this Public IPv4 Address in a web browser and press the “Enter” key. The browser will show the following output:
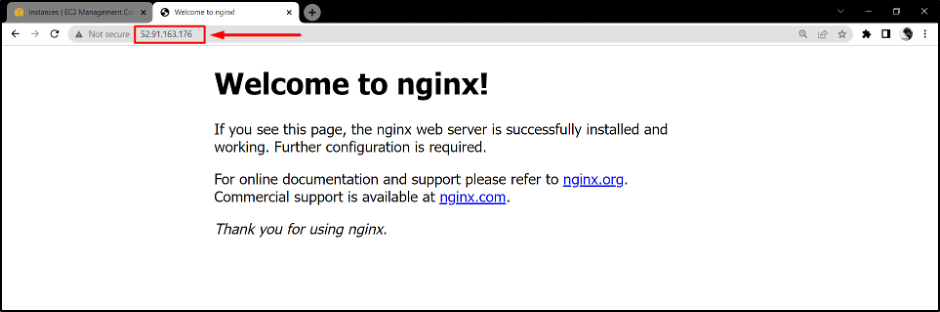
This confirms that your Nginx Web Server is set up for outside access as well.
Conclusion
Setting up NGINX Web Server on AWS is actually quite a task that requires 5 steps. This includes launching an EC2 instance that will be used as a host for our Nginx Web Server, downloading and installing, configuring the Web Server, and allowing traffic access. Now you can start hosting your own applications on the server that you have just configured on AWS.