Access Control Lists (ACL) allow us to manage permissions with additional options than those offered by POSIX permissions (Common permissions we manage with the chmod command).
By reading this tutorial, you will learn the most important setfacl related options.
This document is optimized for both users looking for fast setfacl instructions to implement and for users who are not familiar with ACL, who can find all the needed theoretical content necessary to understand it after the practical section. I also added a table summarizing the setfacl command options described below.
All examples included in this article contain screenshots, making it easy for every Linux user to understand them.”
The Setfacl Command Options
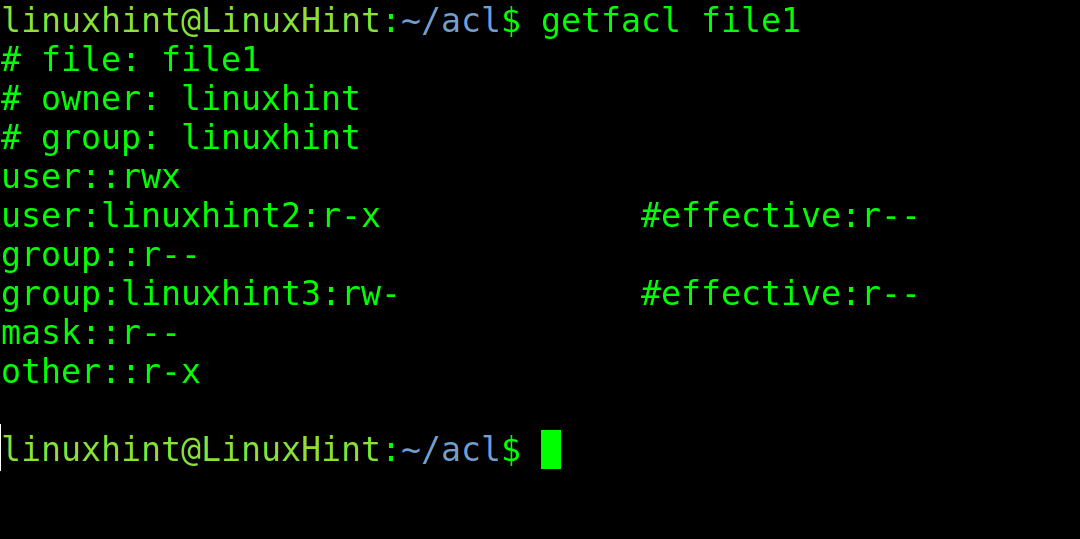
Before starting with the setfacl command, let’s check the current permissions of the file named <file1>. To check the current ACL permissions, execute the getfacl command using the following syntax:
In my case, I execute the command shown in the screenshot below.
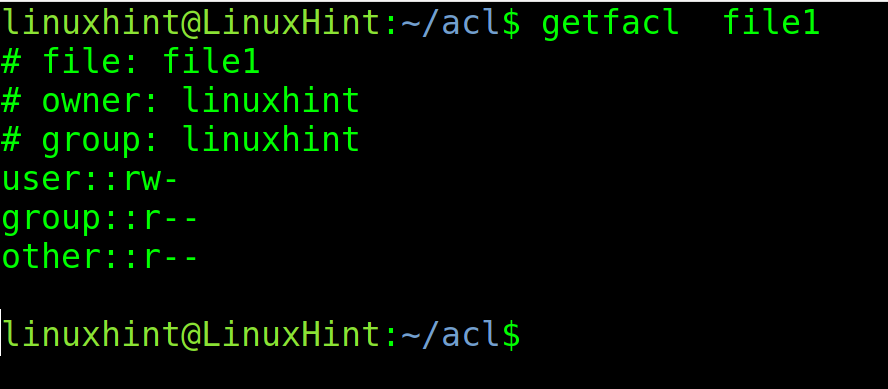
As you can see in the above screenshot, the file has standard POSIX permissions for the owner called linuxhint (reading and writing), for the linuxhint group (reading), and for others (reading). The user and group are linuxhint.
These are the permissions we apply using the chmod command, which allows us to define permissions for the owner, group, and others.
Now let’s say we want to add custom permissions for another specific user using the ACL extended permissions.
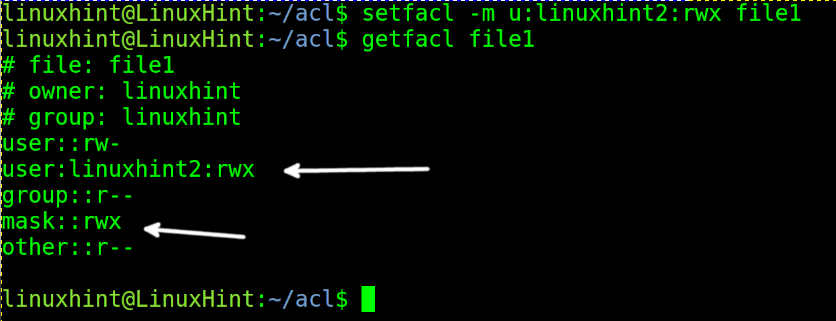
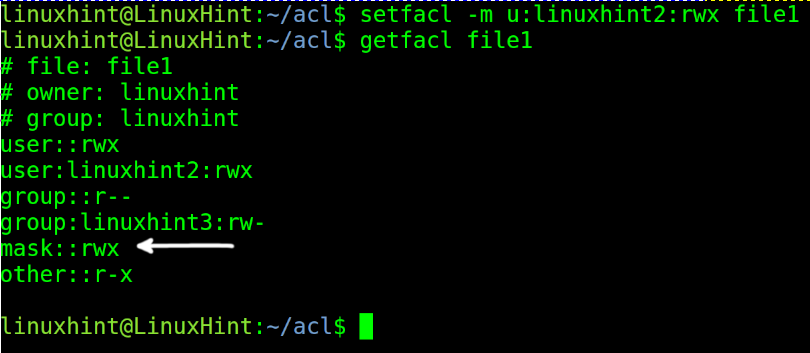
In the example below, I will grant reading, writing, and execution permissions over the same file to user linuxhint2. Then, I run getfacl again to check the changes.
Where:
- setfacl: Invokes the program to manage permissions.
- -m: This flag is used to Modify permissions.
- u:linuxhint2:rwx: Specifies the user linuxhint2 (u:linuxhint2) and grants him reading, writing, and execution permissions (:rwx).
- file1: The target file to which permissions are modified/applied.
NOTE: As you can see in the previous screenshot, additionally to regular permissions, we can see a new user (linuxhint2) with custom permissions was added, and a new line called a mask; this will be explained later below.
But now, let’s assume we want to grant permissions to a different group instead of a different user. The syntax is almost the same, except for the u: option, which must be replaced with g: as I showed in the following figure, where the group linuxhint3 is granted reading and writing permissions. Then I run getfacl to check modifications.
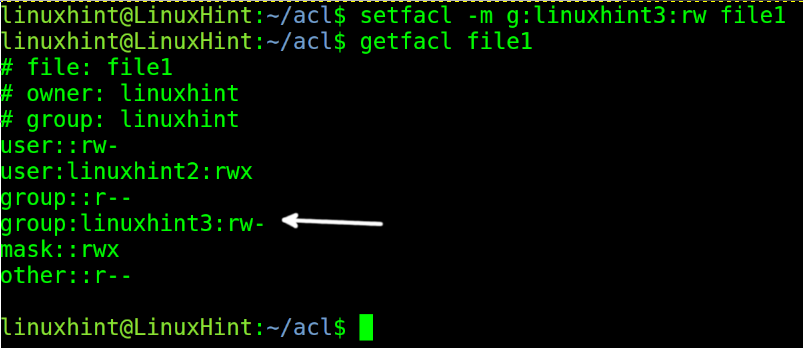
As you can see, a new group (linuxhint3) was added with reading and writing permissions.
Now let’s explain the mask line which appeared after we applied for extended ACL permissions.
The mask allows overwriting permissions for users, groups, or others, except for the owner. If the mask is r, users, groups, and others (Everyone except the owner) with previous effective writing or execution permissions will lose them. The mask limit affects all users except for the owner. It is a function to overwrite existing permissions, limiting them or increasing them.
To modify the mask, you don’t need to specify users or groups; just specify the mask followed by permissions using m:<Permissions> as shown in the following example.
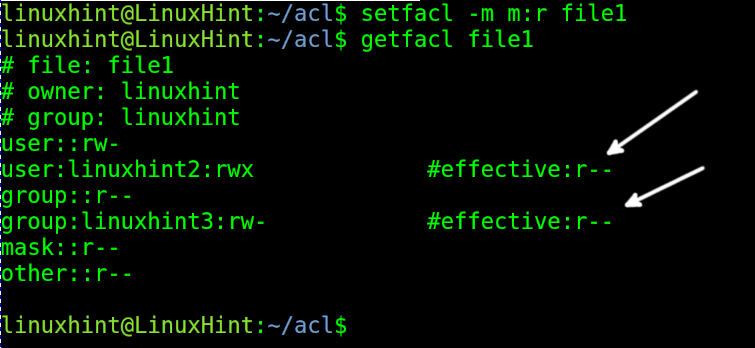
As you can see, after setting a mask with a reading limit, the linuxhint2 user, who previously had reading, writing, and execution permissions, and the group linuxhint3, who had reading and writing permissions, now only have reading effective permission. The mask reading limit overwrote their previous permissions. Only the owner’s permissions remain untouched.
But if the mask is set to read permissions, and you grant a user, group, or other more than reading permissions, the mask will automatically get modified, increasing its limit according to the newly granted permissions. By default, the mask limit can not be lower than an existing granted permissions to other than the owner (We will see how to prevent this later below).
This means if the mask is set to r (Reading), and I grant a user additional writing and execution permissions (rwx), the mask will become rwx.
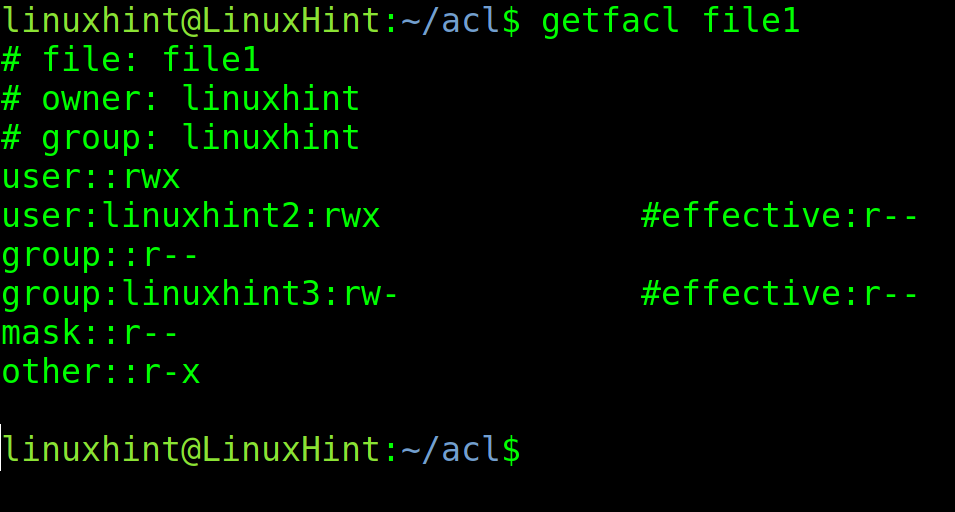
First, let’s see our current scenario, where the mask is r– (Only reading permission).
Now, let’s see what happens if I add execution and writing permissions for the user linuxhint2, who currently has only effective reading permissions (Like everyone except the owner).
As you can see, not only the linuxhint2 user permissions were updated, but the mask too. This is because, by default, the mask represents a limit, and if the limit is exceeded by a new order, it increases.
You can have specific mask permissions and grant additional permissions to a specific user, group, or others without getting the mask modified by implementing the -n flag.
The -n flag instructs ACL to keep the mask unchanged, even if some permissions exceed it.
Let’s see the new scenario, where the mask is set to r–
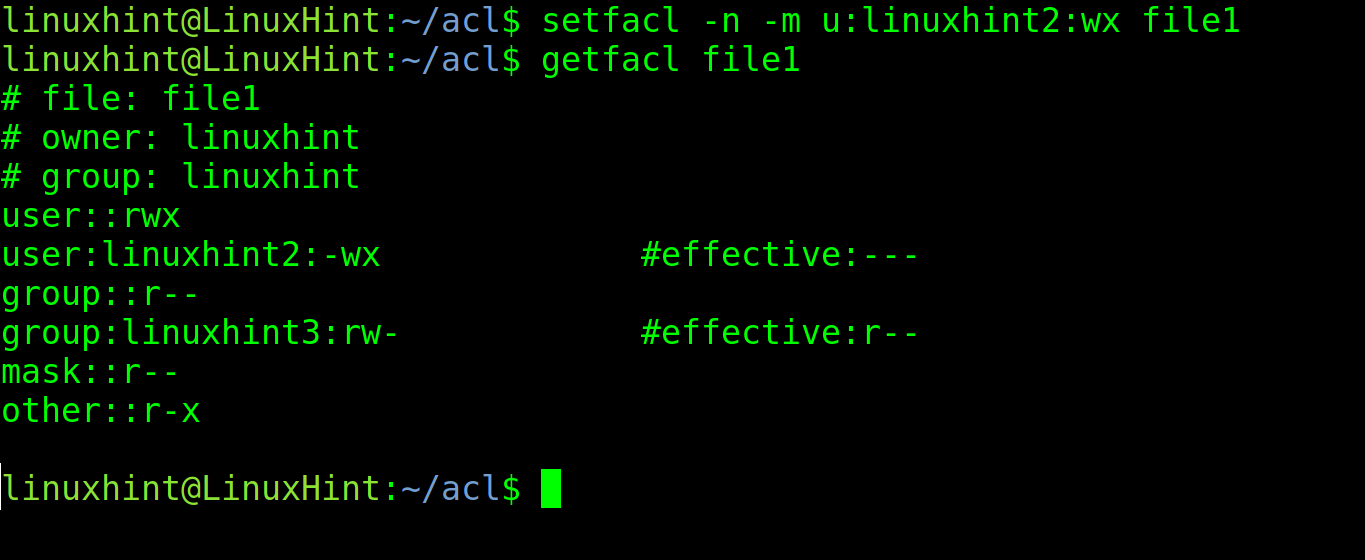
In the example below, the user linuxhint2 is given writing and execution permissions, but the -n flag is implemented to prevent the mask from being changed.
As you can see below, the linuxhint2 user was given writing and execution rights, but the mask remains unchanged as instructed by the -n flag.
The -d flag is used to define default permissions for the content of a directory. This flag does not affect the directory permissions but only the content, including files and subdirectories.
This flag can be useful, for example, to create default permissions for a specific user or group over the content of the directory. When new files are created inside that directory, the defined users or groups get their default defined permissions.
In the current scenario, there is a directory with the following permissions.
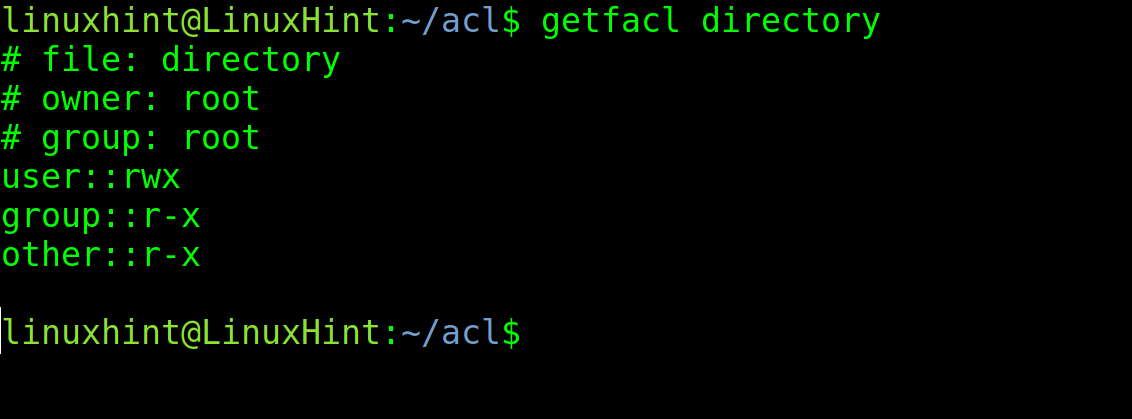
In the example below, Other (All users who are not owners or groups) will be given as default reading permissions for the content of the directory called “directory.”
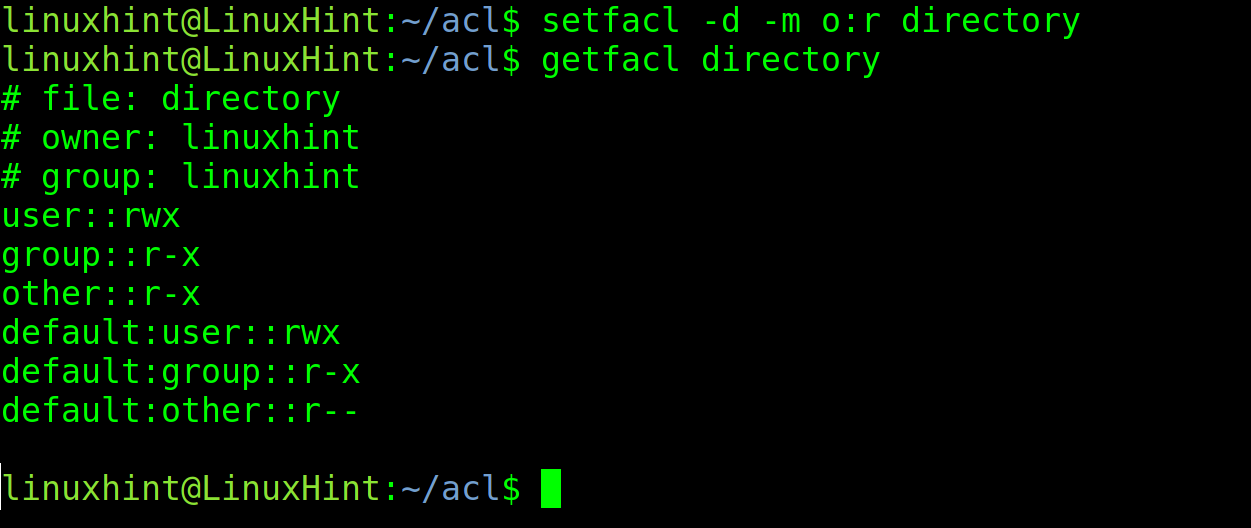
As you can see in the screenshot above, the default permissions for user and group remain, while the default permissions to Other were changed to only reading. Now, if new files and subdirectories are created in the “directory,” Others will be given reading permissions by default.
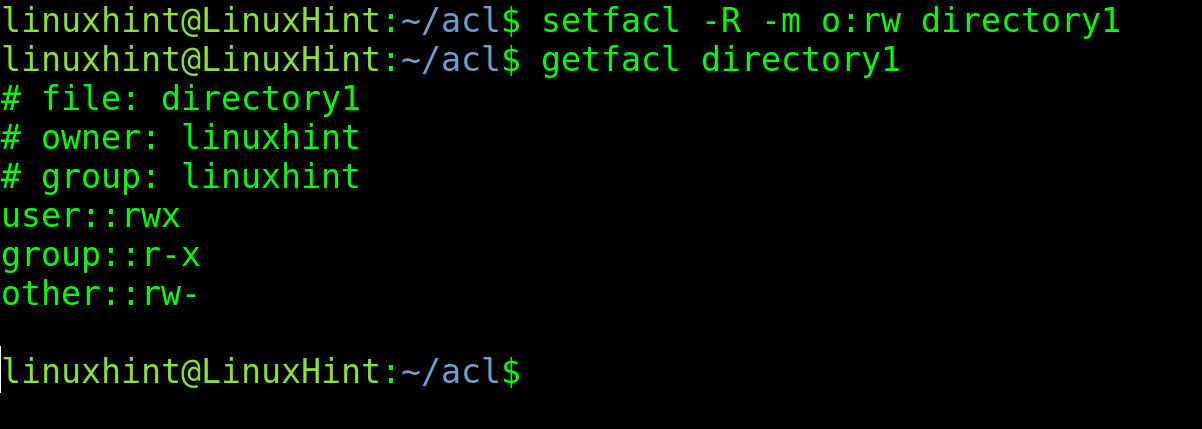
The -R flag allows you to apply ACL rules recursively. When -R is implemented, the defined permissions will affect the specified directory and all its files and subdirectories. This flag is present in many Linux commands for recursive tasks.
The following command gives Other reading and writing permissions for directory1 recursively.
ACL allows you to backup permissions to be restored later.
In the following image, the getfacl command is used to make a recursive backup of the “directory” to a file named “aclpermissions.txt.”

To restore the backup, use the –restore option followed by =<BackUpName>
In my case:

You also can use the setfacl command to copy the permissions from one file to another.
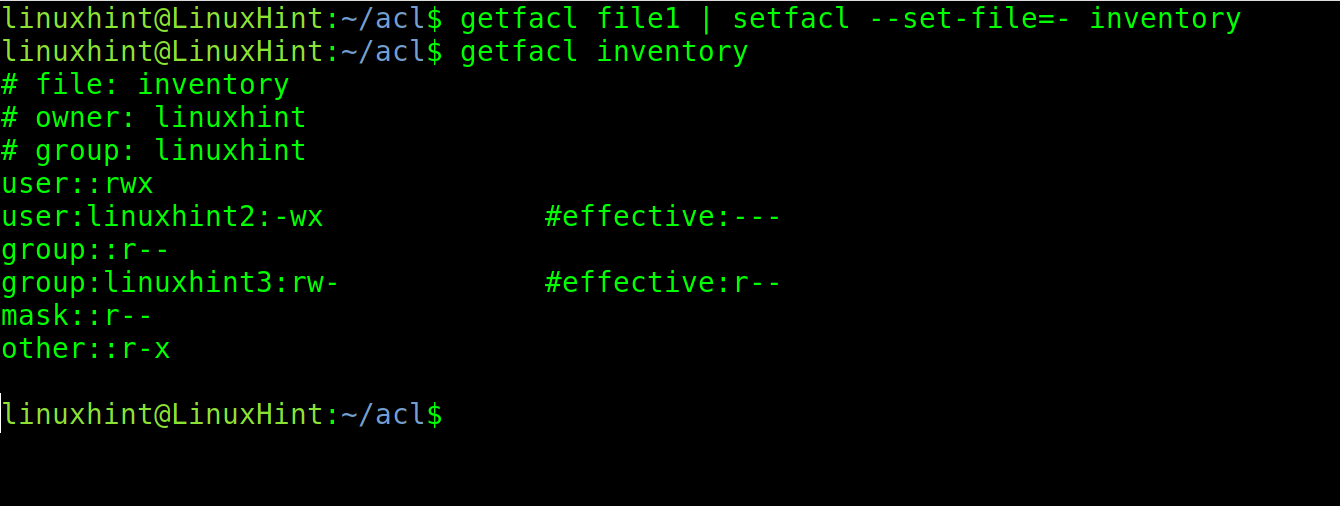
The current scenario for the file inventory is the following:
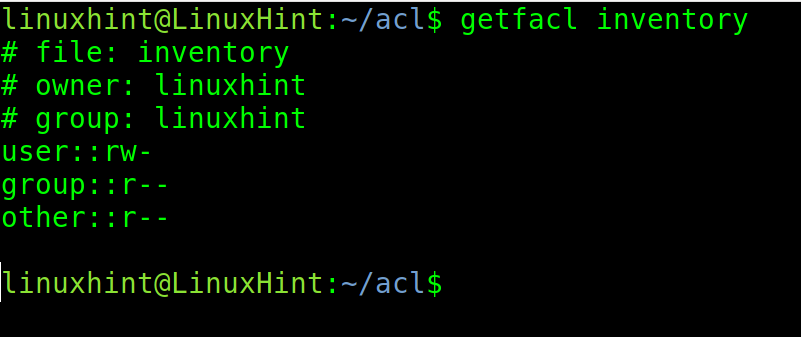
In the following example, I copy the permissions from file1 to a file named “inventory.”
What is an ACL (Access Control List)
An ACL is a Windows native permissions system to manage access to resources like files, directories, partitions, etc. This system is based on objects to which permissions are defined for users, groups, and others, including individually, as shown above.
The permissions are attached to the defined file, directory, or file system defining access for the owner, users, groups, or others.
Difference Between ACL and POSIX Permission
While with POSIX permissions, users can manage permissions for the Owner, Group, and Others, ACL allows the management of custom permissions for everyone, including users and groups.
Additionally, ACL implements new permissions types, like the default permissions explained in this tutorial.
This brings flexibility we can’t enjoy with regular POSIX permissions. Yet, as you can see, both of them work in combination, and their combination brings a strong permissions structure.
The setfacl command is used to set ACL permissions to files, directories, and filesystems.
This is used to specify files, directories, users, groups, or others with the desired permissions when needing to break POSIX limits. The resource owner and processes with CAP_FOWNER have the right to modify ACLs permissions.
The Table Below Summarizes Some ACL Options
| OPTIONS | FUNCTION |
|---|---|
| -m | Modify ACL |
| -x | Remove all ACLRemove ACL |
| -b | Remove all ACL |
| -k | Remove default permissions |
| -R | Applies ACL recursively |
| -L | Follows symbolic links |
| -P | Does not follow symbolic links |
| m: | Define mask |
| –restore= | Restores ACL from a backup file created with getfacl -R |
| –test | Doesn’t apply changes but displays the result |
| -n | Don’t affect the mask |
You can find a lot more information on ACL and the setfacl command at https://linux.die.net/man/5/acl and https://linux.die.net/man/1/setfacl.
Conclusion
As you can see, ACL allows users to customize permissions over POSIX permissions system limits. This is extremely useful when resources need to be shared with specific access types. As you can see, ACL is easy to understand and implement and can be learned by any Linux user independently of their knowledge level. The ACL is a historical exception in which Linux imported a feature from Windows. You can get additional information on ACL on the man page.
Thank you for reading this tutorial explaining how to use the setfacl command in Linux. Keep following our blog for more professional Linux content.