Methods of Setting a New Hostname for a Linux Mint 20.3 System
To set a new hostname for a Linux Mint 20.3 system, you can consider the following two methods:
Method # 1: Temporary Method of Setting a New Hostname
In this method, we will tell you how you can set up a new temporary hostname for your Linux Mint 20.3 system. By “temporary”, we mean that this new hostname will only be there for the current session, and as soon as you will restart your system, its hostname will get back to the previous one. To do this, you will have to perform the steps shown below:
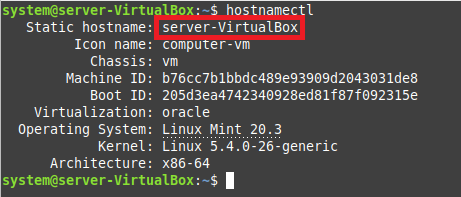
Step # 1: Check the Current Hostname of Your System
Before setting up a new hostname for your Linux Mint 20.3 system, it is good to check the current hostname so that you can set up a different name this time. To check the current hostname of your system, you can run the following command:
![]()
The current hostname of our system is highlighted in the image shown below:
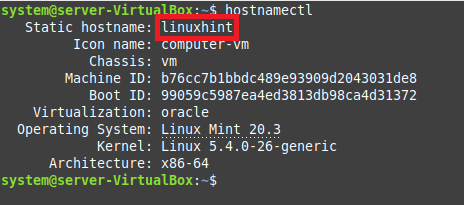
Step # 2: Set a New Temporary Hostname for Your System
Now, for setting up a temporary hostname for your system, you can run the following command:
![]()
When you execute this command, no output will appear on the terminal; however, when you will check the current hostname again with the “hostnamectl” command, then you will realize that it has been changed successfully, as highlighted in the image below:
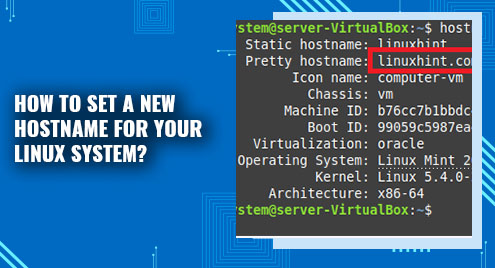
Step # 3: Set a Pretty Hostname for Your System (Optional)
Additionally, you can also set up a pretty hostname for your system by executing the command that follows:
![]()
Again, after executing this command, you will have to run the “hostnamectl” command to confirm that the pretty hostname for your Linux Mint 20.3 system has successfully been set up, as shown below:

Method # 2: Permanent Method of Setting a New Hostname
Now, we will share with you the method with which you can permanently set up a new hostname for your Linux Mint 20.3 system, i.e., this new hostname will persist even after you will restart your system. To achieve this goal, you will have to perform the following steps:
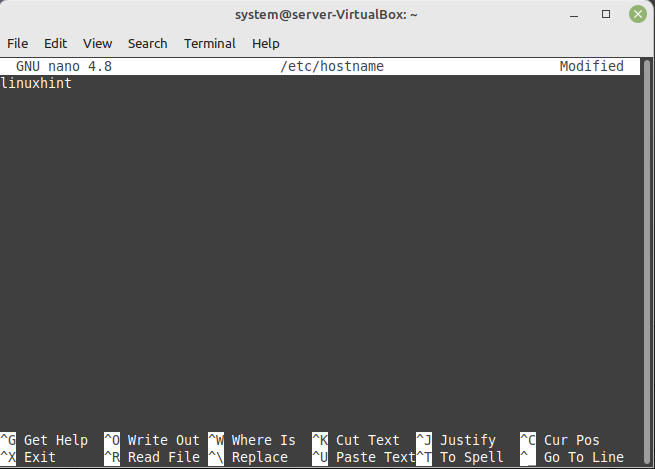
Step # 1: Change the Hostname in the /etc/hostname File
First, you will have to change the hostname in the /etc/hostname file, for which you will have to access it with the command shown below:
![]()
Here, you will be able to see the current hostname of your system as shown in the image that follows:

You will have to change this hostname with a new one and then save your file as shown below:
Step # 2: Change the Hostname in the /etc/hosts File
Now, you have to change the hostname in the /etc/hosts file as well, for which you can access it with the following command:
![]()
Again, you will be able to see the current hostname of your system associated with an IP address as highlighted in the image shown below:

You need to change this hostname with a new one, as shown in the following image and then save your file.

To confirm the change in the hostname, you can run the “hostnamectl” command just like we did in our first method. Moreover, for further confirmation, you can also restart your system and check the current hostname. This time, the new hostname will persist even after restarting your Linux Mint 20.3 system.
Conclusion
This guide was meant to share with you the two methods of setting up a new hostname for your Linux Mint 20.3 system. The first method can be used if you just want to change the hostname of your system temporarily. However, if you wish to change the hostname of your system permanently, then you should make use of the second method.