Setting up the JAVA_HOME is essential when you want to develop the Java-based applications on your Linux system. The JAVA_HOME points to the directory where you install JDK or Java Development Kit.
Hence, it helps the Java applications to locate the libraries and binaries to run appropriately. Furthermore, the JAVA_HOME variable provides JDK with access to every program that requires Java. Although you can configure it right after installing JDK or Java Runtime Environment (JRE), most beginners don’t know its correct approach. So, this quick guide will briefly explain the simplest way to set JAVA_HOME in Linux without hassle.
How to Set JAVA_HOME in Linux
First, navigate to where you installed Java in your system and copy its path. It is the most crucial step because you will set it as the value of the JAVA_HOME variable in the coming steps.
It is usually located in the “/usr/lib/java” directory. However, if you are operating Linux on a virtual machine, the installation directory can certainly be “/usr/lib/jvm”. Go to this directory and enter the “ls” command.

As visible as in the previous image, our installation directory is as follows:
Open the configuration file of your shell using a text editor. The shell configuration file paths are different for all shells. The following are the paths for commonly used shells:
- For Bash: ~/.bashrc
- For Zsh: ~/.zshrc
For example, let’s use the following command:
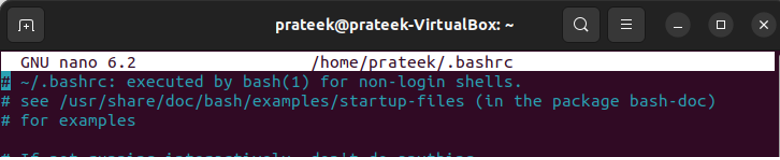
The file will open in a new window. Go to the end of the file and append the following text:
Replace “/usr/lib/jvm/java-11-openjdk-amd64” with the path that you copied in the earlier step.

Once you are done, exit the editor. Now, you can either restart the terminal or enter the command as follows:
![]()
You now successfully set JAVA_HOME. To make sure of it, you can verify it using the following command:

Conclusion
The JAVA_HOME environment variable is essential to every application that runs on Java. However, users need to know its configuration process, so we explained the way to set JAVA_HOME in Linux. The overall method was simple: you must first copy the Java installation path and then export it as the value of the JAVA_HOME variable in your shell’s configuration file.