
We will show you in this tutorial how to set or configure the DNS nameserver using different methods on the Ubuntu system. All configurations have been performed on Ubuntu 20.04 system.
Two different approaches that can be used to set the DNS NameServer on Ubuntu 20.04 Linux system:
- Set the DNS NameServer from Ubuntu Desktop using the Network Manager
- Set the DNS NameServer from command-line using netplan
Method 1: Set the DNS NameServer from Ubuntu Desktop Using the Network Manager
Setting up the DNS NameServer from the Ubuntu desktop using the Network Manager is quite simple and requires no technical knowledge. Just simply follow the below-mentioned steps:
1. Open the system “Settings” window on your system.
2. If you are connected with Wi-Fi then, click on the “wifi” tab. Otherwise, click on the “Network” tab, if you have a “wired” connection.
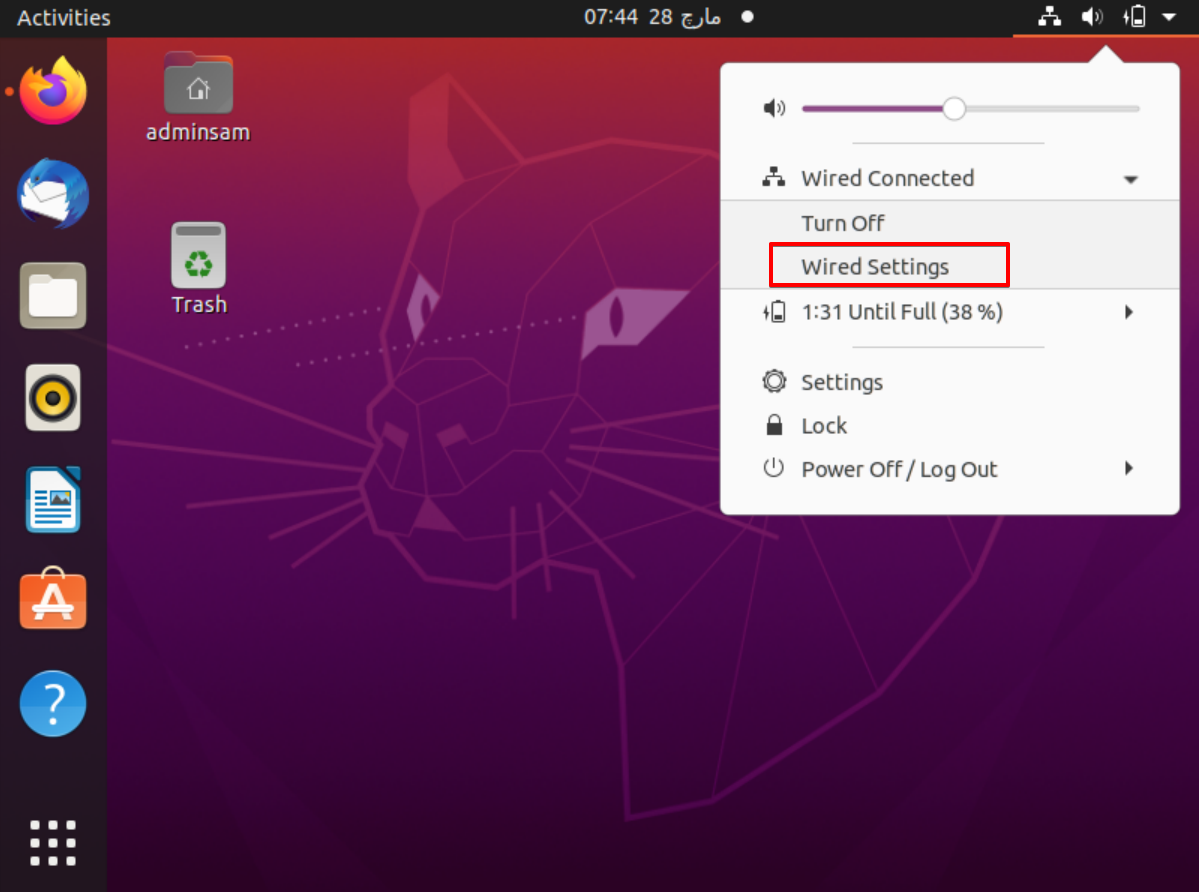
3. The Settings window can also launch from the top-right menu. Click on the drop-down icon and select the “wired settings” option from the displaying list, which is also shown in the following screenshot:
4. Click on the cog icon that is displayed under the “wired” heading to access the Network Manager configurations.

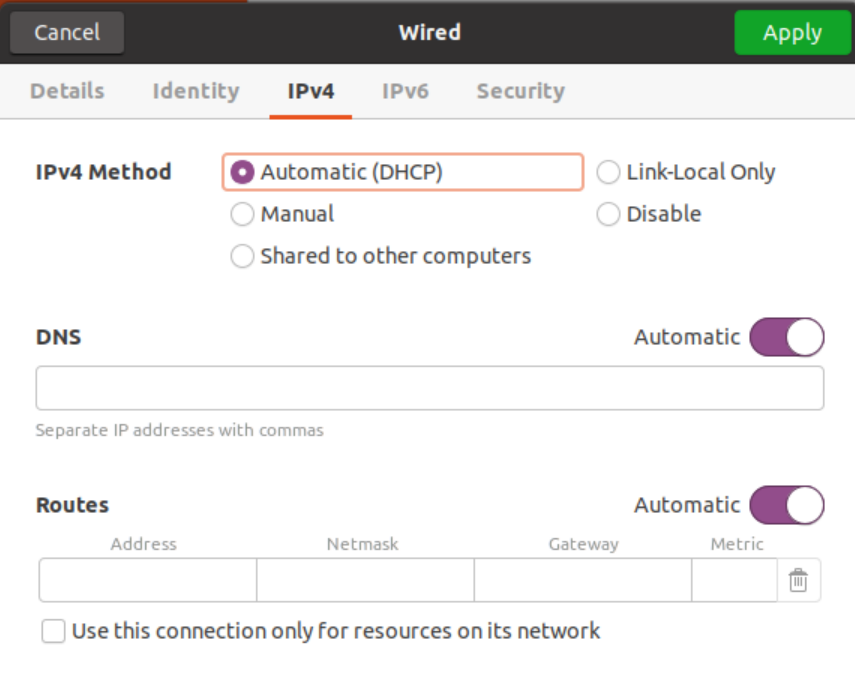
5. Now, go into the “IPV4” settings tab and select the IPV4 method where the default “Automatic (DHCP)” is selected.
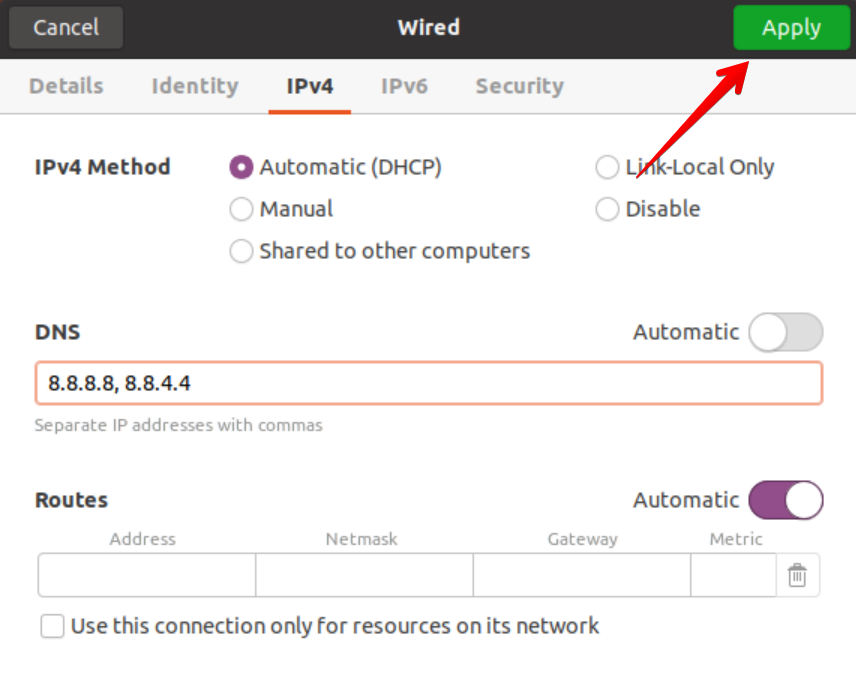
Toggle the automatic button to disable this option and enter the DNS resolver IP address separated by a comma to set the DNS nameserver, which is shown in the following screenshot:
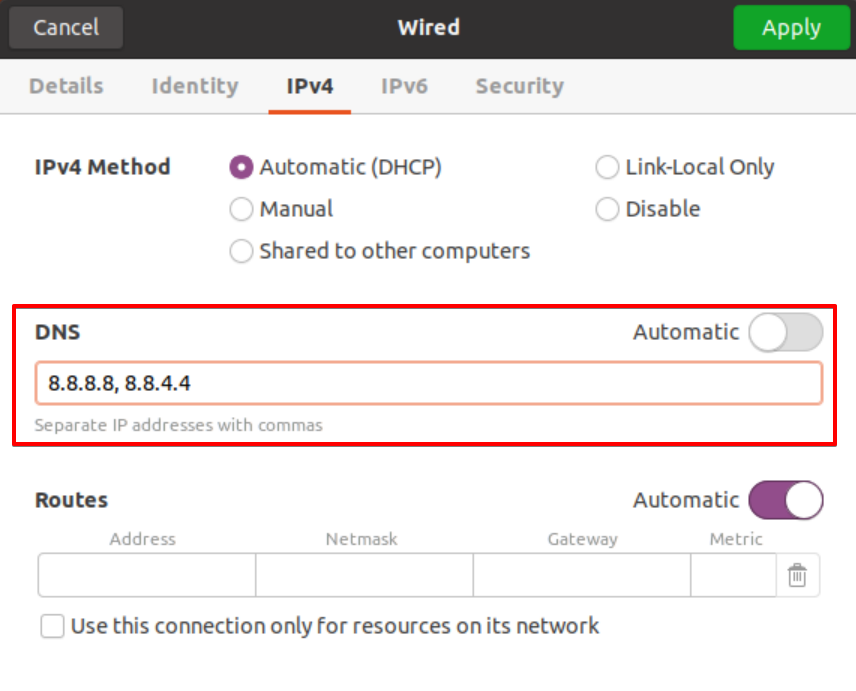
We have used the Google DNS server resolver IP address.
Method 2: Set the DNS NameServer Using Netplan with Network Manager and Static IP
In previous Ubuntu distributions, the DNS resolvers were easily configured using the ‘/etc/resolv.conf’ file, just editing the values and saving the file for use. The systemd-resolved service provides DNS name resolution to local applications or services and this can be simply configured with Netplan, which is the default network management tool on Ubuntu 20.04.
To set the DNS resolvers with the netplan, follow the below-mentioned steps:
1. Open the terminal by running the “ip a” command list with your Wi-Fi/ethernet details. Carefully, note your IP address, netmask, and default gateway from the following screenshot that displays on executing the IP command.
2. Open the netplan configuration file. All netplan configuration files are stored in the /etc/netplan directory. So, open the “/etc/netplan/01-network-manager-all.yaml” file. The file name may vary from one setup to another. Type the below-mentioned command to open this configuration file using the nano text editor.
In this file, you can configure the IP address, gateway, network interfaces, DNS nameservers, and so on.
The general syntax of this configuration file is given below, and it can be modified by a system administrator.
network:
version: 2
renderer: NetworkManager
ethernets:
[device-name]:
dhcp4: false
addresses: [ip-address/netmask]
gateway4: default-gateway
nameservers:
addresses: [DNS_nameserver-1, DNS_nameserver-2]
Here, the following lines of code need to change in this configuration file.
version: 2
renderer: NetworkManager
ethernets:
enp0s3:
dhcp4: false
addresses: [10.0.2.15/24]
gateway4: 192.168.1.1
nameservers:
addresses: [8.8.8.8, 8.8.4.4]

The “192.168.1.1” is the default gateway and the IP address is “10.0.2.15”. Replace your own gateway, netmask, and IP in the above configuration file. More than two DNS nameservers can be defined in a configuration and these nameservers should be separated with a comma. In the above file, “8.8.8.8, 8.8.4.4” are the DNS resolvers for Google. Save the configuration file and exit from this file by pressing “Ctrl+x”.
3. Now, use the following command to apply changes on this file with netplan:

The above command will generate the configuration systemd resolved service.
4. To verify the DNS resolver configuration, use the following command:
The systemd-resolve -status command shows a bundle of information. This is the reason for using the “grep” command to filter the “DNS Servers” string from all details.
The following output shows on the terminal; it means that it verifies the DNS nameserver and is set now.

Set Custom DNS NameServer from Command-line Using Netplan with Networkd
To set the DNS Name Server using the netplan and network, copy the following code in the netplan configuration file:
![]()
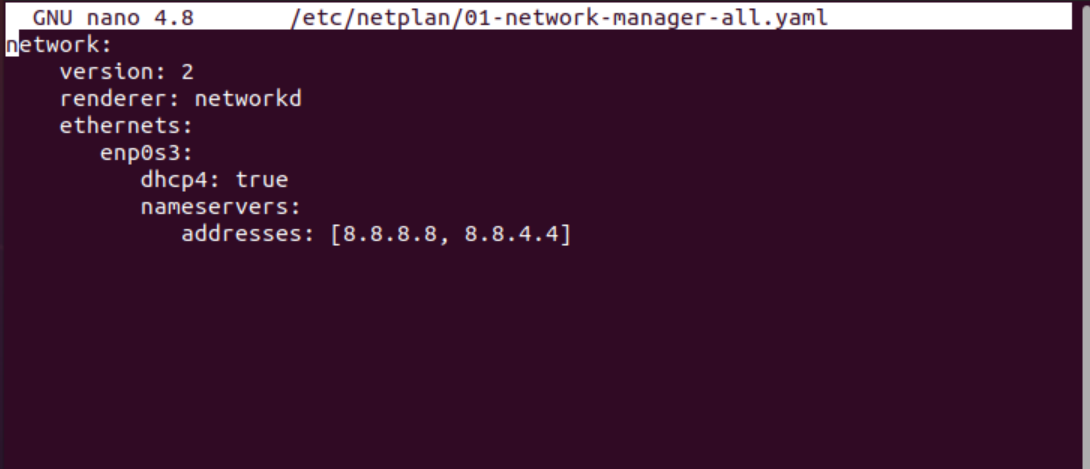
Enter the below-given configurations in this file:
network:
version: 2
renderer: networkd
ethernets:
enp0s3:
dhcp4: true
nameservers:
addresses: [8.8.8.8, 8.8.4.4]
Type the command given below to apply changes with netplan:

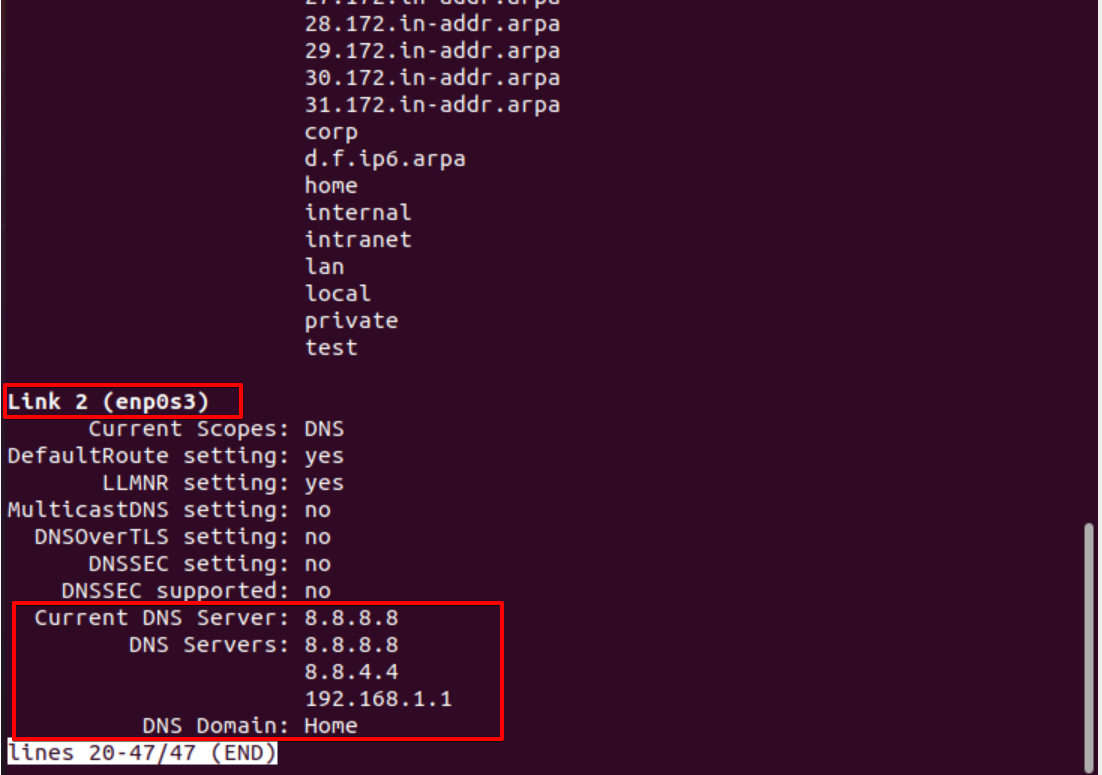
Now, verify the Current DNS nameserver using the following command:
The following output prints on the terminal window:
To again the default DNS configurations or remove the netplan configurations, remove all data and paste the following code in the configuration file:
network:
version: 2
renderer: NetworkManager
Now, apply changes using the following command:
Check the current DNS Nameserver by using the following command:
From the following displayed output, you will notice the default DNS nameserver to be set on your system:

Conclusion:
We have discussed in this article, how to configure the DNS nameserver using the desktop interface and command line. We have also seen how to configure the netplan changes on the Ubuntu system to change the DNS nameserver. You can set the custom DNS nameserver by using the netplan and networkd services as well.