Bitwarden is highly customizable, lightweight, and provides users with an API and browser extension to help users manage their passwords efficiently. Bitwarden also provides a mobile application, allowing you to synchronize all your personal information across all your devices.
A self-hosted password manager is powerful and a better option since you are responsible for all the security and the features you deem fit. In case of compromise, you are in control of what happens to your data.
This tutorial will walk you through how to set up a personal password manager using Bitwarden and Docker.
Let’s get started:
Step 1: Install Docker and Docker Compose
The very first thing we need to do is to set up the server and all the required components. It is recommended you run a Linux server as it has most of the dependencies required, and it is easier to manage than other operating systems.
Before installing Docker and Docker Compose on your server, ensure you have the DNS services and the names configured correctly to set up the password manager on a domain name.
Step 2: Install Docker Engine
Next, start by removing the older versions of Docker and the Docker components. If you have a new server, skip this step:
Next, we need to set up the repositories using the commands below:
The next step is to add the Docker Repository GPG key using the command:
In the next step, set up the repository in the sources.list file using the command:
"deb [arch=amd64 signed-by=/usr/share/keyrings/docker-archive-keyring.gpg] https://download.docker.com/linux/ubuntu \
$(lsb_release -cs) stable" | sudo tee /etc/apt/sources.list.d/docker.list > /dev/null
Finally, update the repositories and install docker:
sudo apt-get install docker-ce docker-ce-cli containerd.io
NOTE: The Docker installation guide provided in this tutorial is for Ubuntu servers. For your specific distro, check the Docker documentation.
Step 3: Install Docker Compose
For the next step, we need to install Docker Compose. Ensure you have the Docker Engine installed as the Docker Compose relies on it to perform its operations:
Add execute permissions to the binary:
Now, you have successfully installed Docker and Docker compose. We can now move to launch the Bitwarden password manager on the server.
Step 4: Launch Bitwarden on Docker
Once all the requirements are met, we can use the provided Bash script to install and configure the Bitwarden.
Use the command below to download and launch the installation script. Before executing, you can review the script and ensure you are comfortable with the actions to be performed:
In the next step, change the script permissions as:
Once you have verified the actions run by the script, launch the installer using the command:
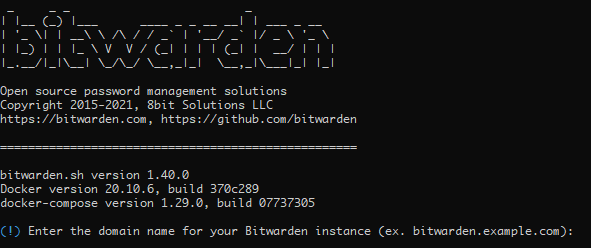
This command should launch the installer script, which will interactively ask you for information as the installation process continues:
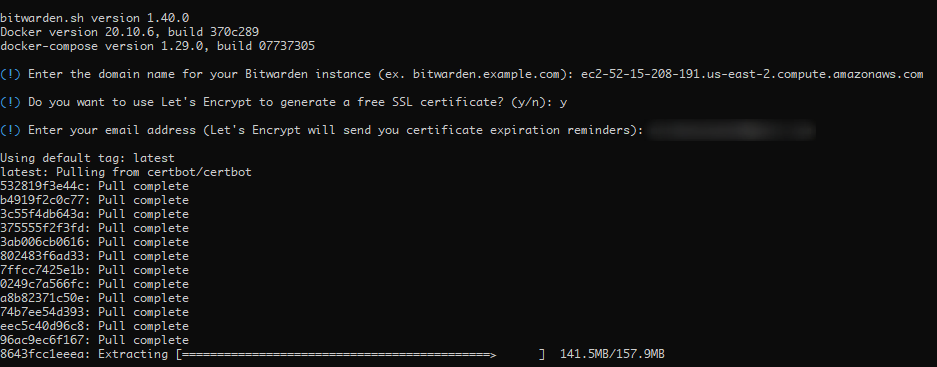
The first step is to set up the domain name for your password manager. The value should be configured in the DNS records of your server.
In the next step, select whether you wish to set up a Let’s Encrypt SSL certificate. Ensure you have a valid domain before selecting this option, as the installation will fail if the domain is incorrect.
Once Docker has pulled and extracted the image, you will be required to provide the Bitwarden installation ID and Key.
Navigate to the following resource to generate your installation ID and password:
Proceed with the installation process and set up an SSL certificate. If you have already generated one, provide the path, or if not, generate a self-signed copy.
Step 5: Run Bitwarden
Once you have everything configured correctly, use the script to start Bitwarden.
NOTE: You can edit the changes and the configuration settings in the ./bwdata/config.yml file.
Now run:
The script above will launch Docker and pull various dependencies—the Docker Compose file, including images such as:
https://hub.docker.com/r/bitwarden/icons
https://hub.docker.com/r/bitwarden/nginx
https://hub.docker.com/r/bitwarden/mssql
https://hub.docker.com/r/bitwarden/api
https://hub.docker.com/r/bitwarden/events
https://hub.docker.com/r/bitwarden/portal
https://hub.docker.com/r/bitwarden/web
And others.
Once all the images are downloaded and extracted, the script will run the Docker and set up the Bitwarden.
Step 6: Configure Bitwarden
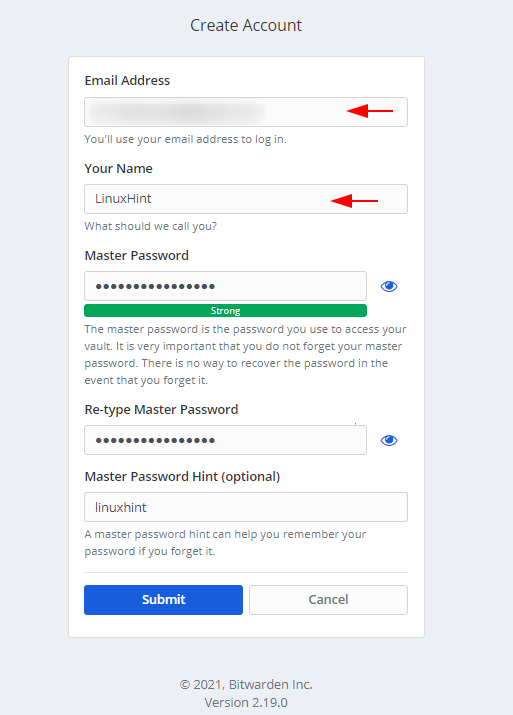
Once the Bitwarden is successfully set up on your server, navigate to the address you set up during the installation and create a new account:
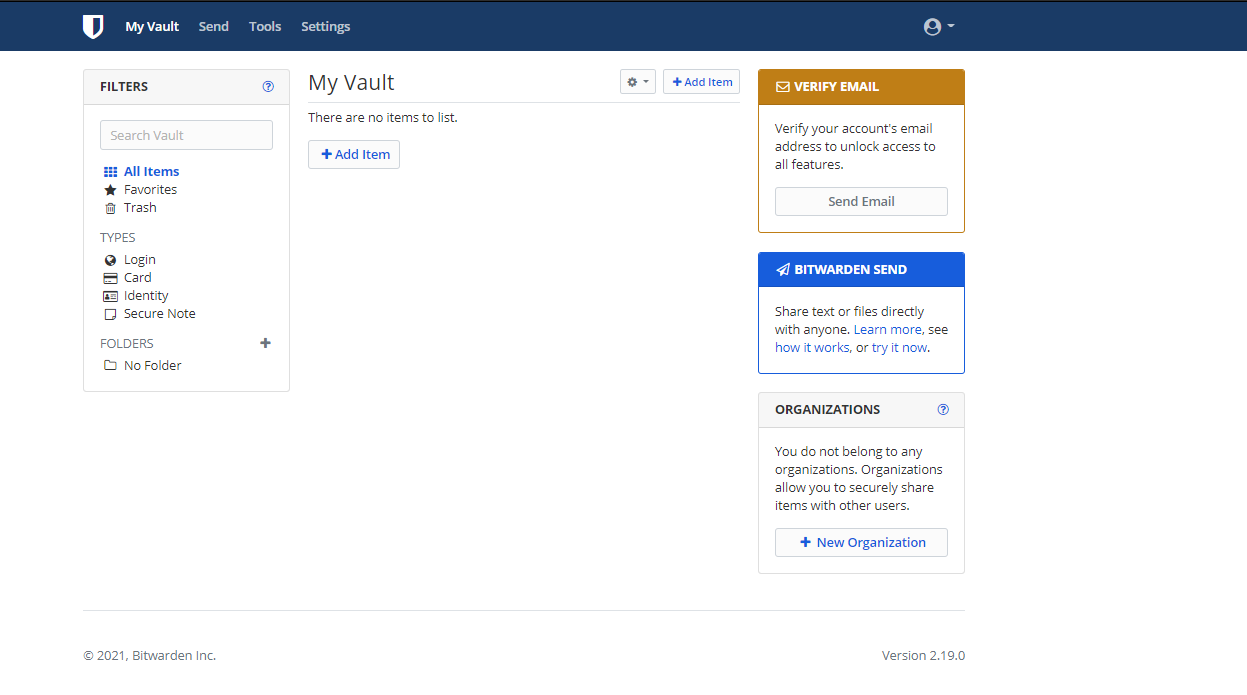
Now that you have created an account, log in to your Bitwarden dashboard to configure the various settings and features.
Conclusion
With that, you have successfully installed and configured the Bitwarden Password Manager on your server. Using the steps in this tutorial, you will have complete control of your passwords and personal information.


