Listing packages on Ubuntu.
As stated before, Ubuntu is an open-source operating system. That means it has various third-party applications developed by the community to aid in various problems we may face in day-to-day life. One such problem may be package detection. These packages can be detected via tools like Synaptic package manager. However, the most commonly used are apt and apt-get commands.
The apt confusion.
First and foremost, we distinguish between apt, aptitude, and apt-get commands. Both deal with linking the Debian management system to the available online repositories. We can think of aptitude as a neural center that is used when we need to see a detailed view of all the packages on our system. APT (Advanced Packaging Tool) is the main command for installing, removing, or managing packages. A package manager embodies various apt commands like apt-get, apt show, apt-cache, etc.
Using the apt command.
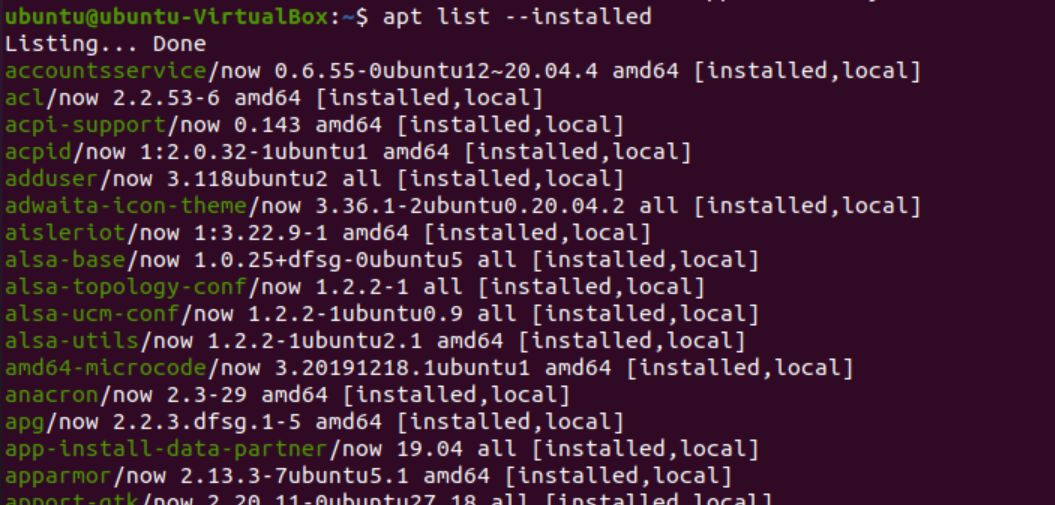
To list the packages available on our system, we type in the following command.

As shown below, we can filter out a class of packages by adding certain modifications to our list command.
We may come across a warning stating: WARNING: apt does not have a stable CLI interface. Use caution in scripts.
The warning dictates the variable nature of apt, which is not happening any time soon. So it is not a big deal.
However, we can instead type if we wish to be on the safe side without the warning appearing.
Which deals with the on-disk installation like on windows.
The command illustrated above shows us the installed packages and additional packages that can be installed. However, we can type if we only wish to view the packages installed on your system.
Determine if a package is installed or not.
We can look up if a certain package is installed on our system or not by using the following command.

The commands mentioned above clearly show that acpid is installed. In the second case, the listing was done; however, we did not find the desired package. That means the package is unavailable on our list and will have to be installed via the main package repository.
When a package is installed, we can clearly see the “[installed]” on the same lines as the package names on the terminal, as shown in the images above.
List packages in sorted order.
To list packages in a pattern, we can use the following set of commands.
$ apt list ‘sort’ or
$ dpkg --list ‘sort’
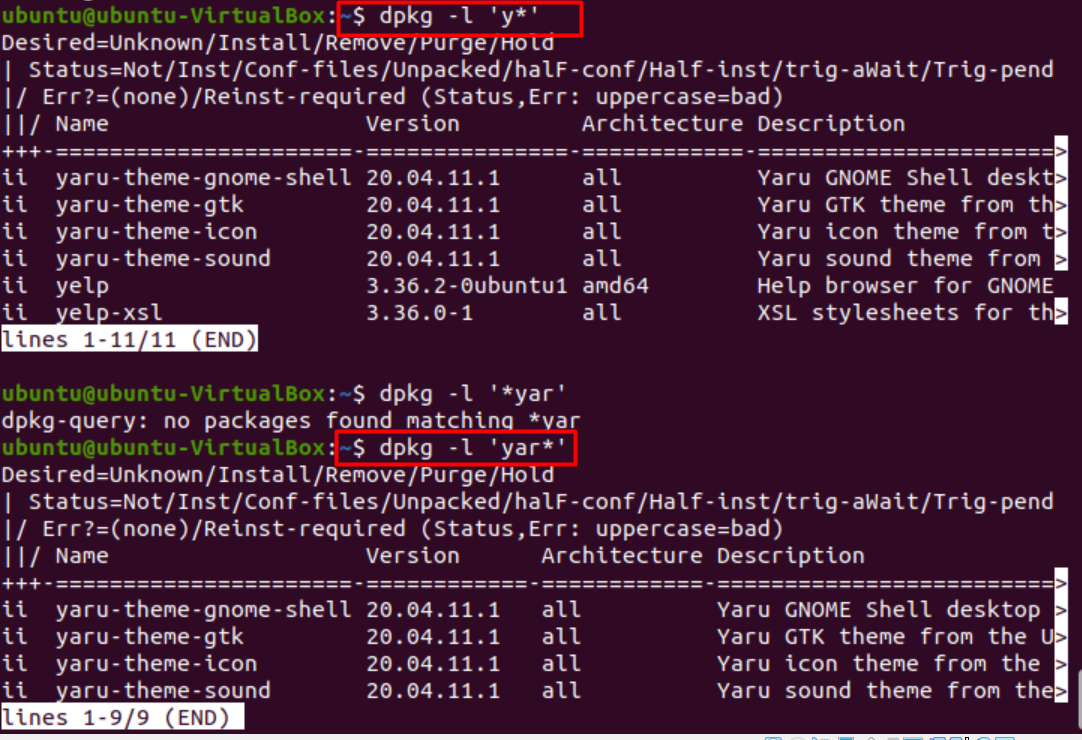
Here “ii” indicates installed packages, whereas “un” indicates uninstalled packages.
Sort packages by date and time of installation.
To sort packages according to the date and time of installation, we simply issue the following command.
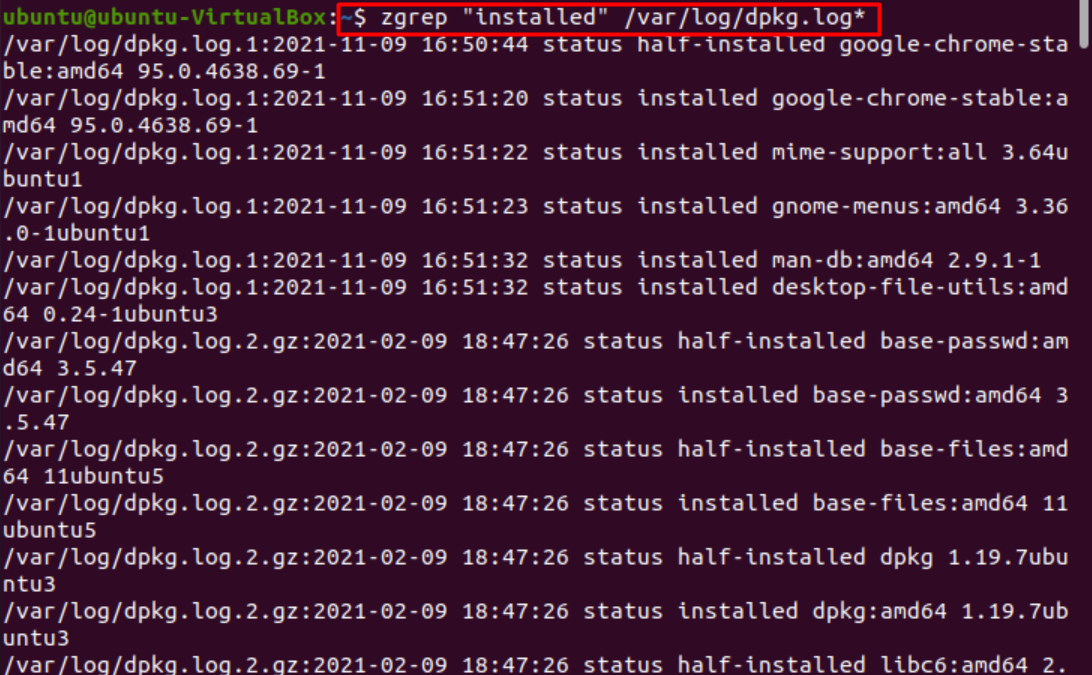
If we want to look for all packages pertaining to a particular keyword, we use the following instruction.
Or

Possible issues encountered during package search.
We may encounter several problems while locating the desired package. These include problems regarding package location or version issues. We will address them one by one.
Unable to locate package error. This error occurs when we download a package that can’t be located. This is the most common error encountered that may arise for several reasons and hamper your installation.

- Error due to incomplete package name. We may have typed in the incorrect package name by mistake. Make sure NOT to repeat or omit the alphabets and keep in mind that Ubuntu is case-sensitive. We also make sure to provide a proper name with the version desired.
- Error due to incomplete path. This error may arise when we try to download the package directly after downloading the .deb package. Please ensure we are in the right directory and provide the absolute path to the .deb package. That should resolve the issue.
- Error due to missing package. It is possible that the package under search is not yet available in the official Ubuntu package directory. We can verify using the apt-cache command. If the package does not pop up, that means we need to download it manually via a third party.
- /etc/apt/sources.list is corrupted or missing. When none of the packages we try to install are installed, it is most likely this error. We first delete the /etc/apt/sources.list file using the following command to resolve this.
Then run.
In the window that appears, check all boxes, and in the “download from” section, select the main server. Then close.

Afterward, we get a warning window. We click the “reload” option to generate the sources.list file.
After the software cache refreshes, your issue should be resolved ad the package will be downloaded.
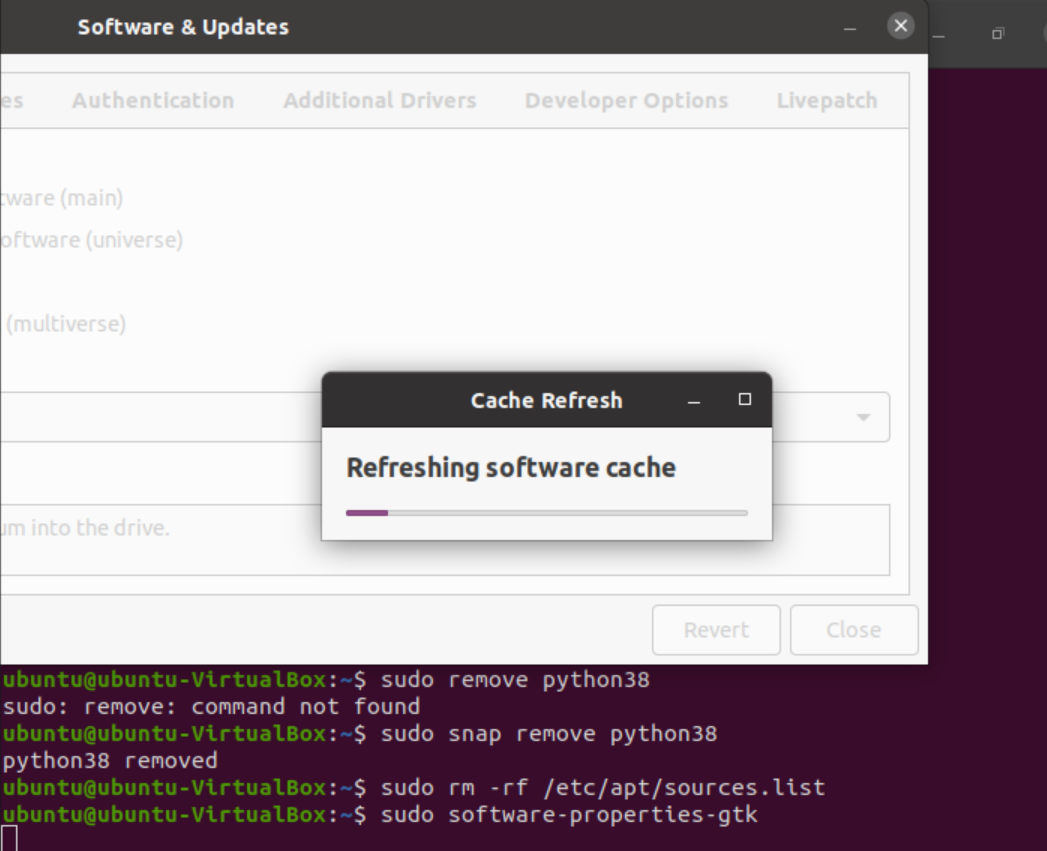
As we can see, the package causing the error is now successfully downloaded.
Your Linux version has reached its limit. In case your version is obsolete and not supported, we can use third-party versions or snap versions of packages to run desired applications.

Conclusion.
In this article, we went through the stages of package location and how to tackle the problems that may arise during the process. We hope we could clear your queries and your issue has been resolved successfully.