The Scikit-Learn pipeline is a potent tool that is used in MLflow to automate the machine learning experiments and workflows. This allows for combining the various data processing and model-training techniques and tracking models’ evolution over time. A robust and effective method for developing and deploying the machine learning models can be produced by merging the MLflow and Scikit-Learn pipelines. Pipelines enhance efficiency, reproducibility, scalability, and traceability in machine learning workflows, saving time and effort, handling large datasets and sophisticated models, and detecting and enhancing models over time.
How to Create a Machine Learning Model
- Import all prerequisite libraries.
- Load the data from different data storage.
- Establish a pipeline that comprises the model training, feature engineering, and data preprocessing operations.
- Fit the pipeline to the data.
- Assess the model’s performance.
- Use MLflow to log the model.
Install the Scikit-Learn Pipelines
Using pip:
Verify the Installation
Run the following command to confirm that Scikit-Learn is installed after it has been set up:

Implementation of Scikit-Learn Pipelines in E-Commerce

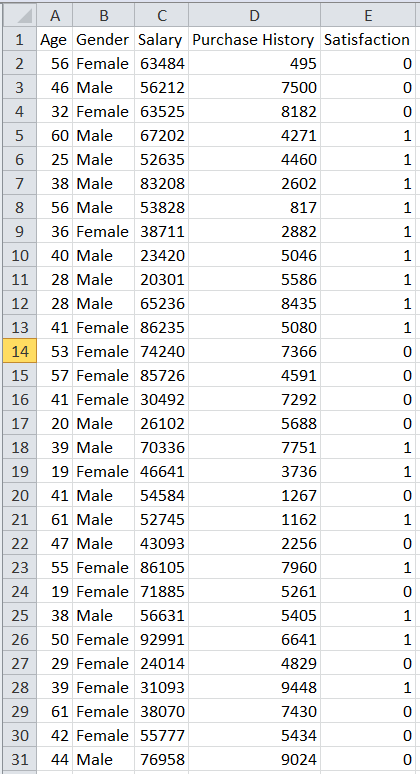
Let’s use a real-world e-commerce like Amazon or eBay dataset as an example and create a Scikit-Learn pipeline to forecast the consumer satisfaction based on the customer’s purchasing history and demographic data. We’ll implement a simplified, hypothetical e-commerce dataset in this example using the features that are listed in the following:
- Age: The customer’s age which is expressed as a numerical value.
- Gender: The customer’s gender (classified as “Male” or “Female”).
- Income: The customer’s (numeric) annual salary.
- Purchase-History: The customer’s overall (numeric) e-commerce platform that purhcases the total amount.
- Customer feedback/Satisfaction: Regarding satisfaction (target variable: binary, 0 or 1).
Step 1: Generate a Synthetic CSV Dataset
Utilizing Python’s “Pandas” package, create a sample CSV dataset for an e-commerce website that has “Age”, “Gender”, “Purchase History”, “Salary”, and “Satisfaction” columns in the dataset. Generate random values for 200 rows in a modest dataset using NumPy. The code to create the synthetic CSV dataset is provided here:
Code Snippet:
import numpy as obj_numpy
# Set a random seed for reproducibility
obj_numpy.random.seed(42)
# Number of rows in the dataset
ds_rows = 200
# Generate synthetic data for Age (numeric)
cust_age_data = obj_numpy.random.randint(18, 65, ds_rows)
# Generate synthetic data for Gender (categorical: 'Male' or 'Female')
cust_sex_data = obj_numpy.random.choice(['Male', 'Female'], ds_rows)
# Generate synthetic data for Salary (numeric)
cust_salary_data = obj_numpy.random.randint(20000, 100000, ds_rows)
# Generate synthetic data for PurchaseHistory (numeric)
cust_purchase_history_data = obj_numpy.random.randint(100, 10000, ds_rows)
# Generate synthetic data for Satisfaction (target variable: binary - 0 or 1)
cust_satisfaction_data = obj_numpy.random.randint(0, 2, ds_rows)
# Create a DataFrame with the synthetic data
Data_frame = obj_panda.DataFrame({
'Age': cust_age_data,
'Gender': cust_sex_data,
'Salary': cust_salary_data,
'Purchase History': cust_purchase_history_data,
'Satisfaction': cust_satisfaction_data
})
Data_frame.to_csv('ecommerce_data.csv', index=False)
Generate a CSV file called “ecommerce_data.csv” with fictitious data in the current directory which allows the end user to modify the rows and values.


Step 2: Create the Dataset
Assuming that the e-commerce dataset is in a CSV file with the “ecommerce_data.csv” name, import the data using Pandas and divide it into features (F) and the target variable (t). The Python Panda’s library is imported as panda_obj which is used for data analysis. It offers numerous functions for importing, modifying, and analyzing the data.
The following line of code loads the dataset using the library’s read_csv() function into the customer_data variable from the ecommerce_data.csv file.
In the third line of code, the features are divided into independent factors to predict the target variable. Pandas removes the “Satisfaction” column from the Customer_Data dataframe using the drop() method, separating the goal variable from the features. Now that the features are in the “F” variable, the target variable is in the “t” variable.
Code Snippet:
# Load the dataset from ecommerce_data.csv to customer_data variable
customer_data = panda_obj.read_csv("ecommerce_data.csv")
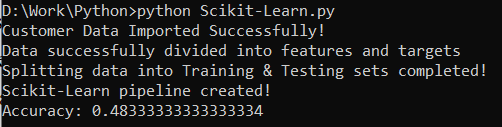
print("Customer Data Imported Successfully!")
# Split the data into features (F) and target variable (t)
F = customer_data.drop(columns=['Satisfaction'])
t = customer_data['Satisfaction']
print("Data successfully divided into features and targets")
Step 3: Divide the Data into Testing and Training Sets
The functions to divide the data into training and testing sets are available in the sklearn.model_selection package. Splitting the data into sets is done in the second line of code. The features, target variable, test size, and random state are the four arguments that are required by the train_test_split() function. The test size is the percentage of the data that will be tested. The random state serves as a seed for random number generators.
By performing this, the data is divided randomly. Since the test size in this instance is set to 0.3, 30% of the data is used for the test. Forty-two (42) are chosen as the random state. This means that although the data is divided randomly, the code always uses the same random split. The training and testing sets are stored in the F_training, t_training, F_testing, and t_testing variables, respectively.
Code Snippet:
F_training, F_testing, t_training, t_testing = train_test_split(F, t, test_size=0.3, random_state=42)
print("Splitting data into Training & Testing sets completed!")
Step 4: Create the Scikit-Learn Pipeline
The first line of code imports the Pipeline, ColumnTransformer, StandardScaler, OneHotEncoder, and SVC modules from the sklearn library. The preprocessing procedures for the categorical and numerical features are specified in the second line of code. The names of the numeric characteristics are listed in the cust_numeric_features list.
As a StandardScaler object, the cust_numeric_transformer variable is used. The numerical features are scaled using this object. The names of the categorical features are listed in the cust_categorical_features list. The OneHotEncoder object is the cust_categorical_transformer variable. This object is used to encode the categorical features. The third line of code creates the column transformer. The column transformer applies the preprocessing methods that are indicated in the preceding step to the individual feature subsets. The fourth line of code contains a description of the pipeline.
The pipeline is composed of the column transformer and the machine learning model. In this case, the machine learning model is a support vector classifier (SVC). Using this code, a pipeline that preprocesses the several feature subsets in different ways can be established. Machine learning frequently employs this technique. It enables us to improve the performance of models by preprocessing the data in accordance with the many sorts of features.
Code Snippet:
from sklearn.preprocessing import StandardScaler
from sklearn.preprocessing import OneHotEncoder
from sklearn.svm import SVC
from sklearn.compose import ColumnTransformer
cust_numeric_features = ['Age', 'Salary', 'Purchase History']
cust_numeric_transformer = StandardScaler()
cust_categorical_features = ['Gender']
cust_categorical_transformer = OneHotEncoder()
data_for_processor = ColumnTransformer(
transformers=[
('AGE->SALARY->PURCHASE_HISTORY', cust_numeric_transformer, cust_numeric_features),
('GENDER', cust_categorical_transformer, cust_categorical_features)
])
model_pipeline = Pipeline([
('preprocess', data_for_processor),
('model', SVC())])
print("Scikit-Learn pipeline created!")
Step 5: Fit and Evaluate the Pipeline
The accuracy_score() function, which measures how well the machine learning models perform, is imported in the first line of code from the “sklearn.metrics” module. The second line of code fits the training data to the model_pipeline. The fit() method accepts two arguments: the features and the target variable. The training data is used by the model_pipeline to determine the associations between the features and the target variable.
On the basis of the test results, the succeeding line of code produces predictions. The features are the only argument needed for the predict() function. The relationships that the model_pipeline discovered from the training data are used to produce predictions for the test data. The model is assessed in the fourth line of code. The actual values and the anticipated values are the two inputs for the accuracy_score() method. The precision of the model, or the proportion of correct predictions, is provided by the function.
Code Snippet:
model_pipeline.fit(F_training, t_training)
t_prediction = model_pipeline.predict(F_testing)
# Evaluate the model
model_accuracy = accuracy_score(t_testing, t_prediction)
print("Accuracy:", model_accuracy)
Step 6: Execute the Code
Here is the successful execution of code using Python. The accuracy of the model is 0.483.
Conclusion
Numerous machine learning methods such as decision trees, logistic and linear regression, and random forests are provided by Scikit-Learn. It also offers preprocessing steps for machine learning data preparation such as scaling and normalization. Scikit-Learn recommends the evaluation and model selection functions for machine learning models including accuracy, precision, and recall.