
If you need to keep a lot of redundant data (i.e., file backups, database) on your computer, then the Copy-on-Write (CoW) and deduplication feature of the Btrfs filesystem can save a huge amount of disk spaces.
In this article, I will show you how to save disk spaces using the Btrfs deduplication feature. So, let’s get started.
Prerequisites:
To try out the examples of this article,
- You must have the Btrfs filesystem installed on your computer.
- You need to have a hard disk or SSD with at least 1 free partition (of any size).
I have a 20 GB hard disk sdb on my Ubuntu machine. I have created 2 partitions sdb1 and sdb2, on this hard disk. I will use the partition sdb1 in this article.

Your hard disk or SSD may have a different name than mine, so will the partitions. So, make sure to replace them with yours from now on.
If you need any assistance on installing the Btrfs filesystem on Ubuntu, check my article Install and Use Btrfs on Ubuntu 20.04 LTS.
If you need any assistance on installing the Btrfs filesystem on Fedora, check my article Install and Use Btrfs on Fedora 33.
Creating a Btrfs Filesystem:
To experiment with Btrfs filesystem-level data compression, you need to create a Btrfs filesystem.
To create a Btrfs filesystem with the label data on the sdb1 partition, run the following command:

Mount a Btrfs Filesystem:
Create a directory /data with the following command:

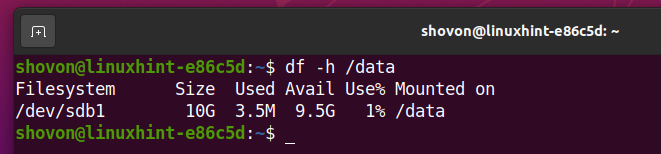
To mount the Btrfs filesystem created on the sdb1 partition on the /data directory, run the following command:

The Btrfs filesystem should be mounted, as you can see in the screenshot below.
Installing Deduplication Tools on Ubuntu 20.04 LTS:
To deduplicate a Btrfs filesystem, you need to install the duperemove program on your computer.
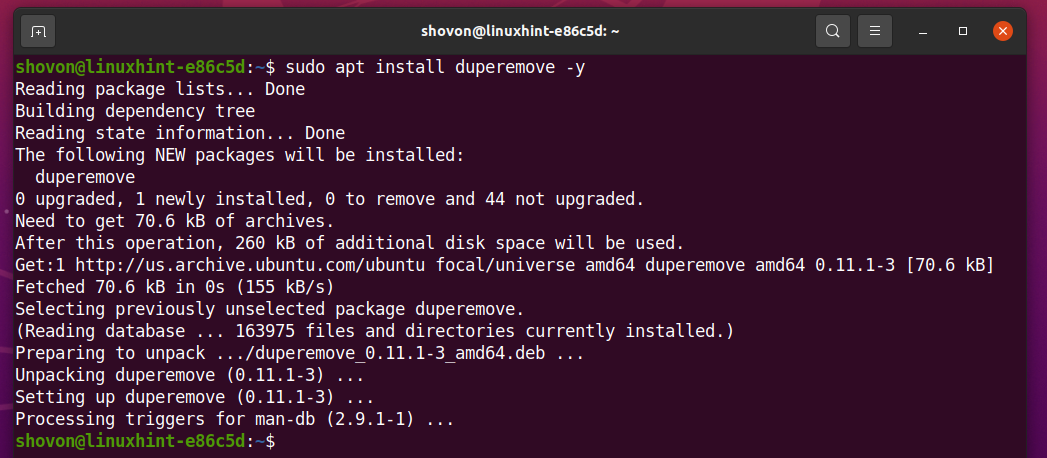
If you’re using Ubuntu 20.04 LTS, then you can install duperemove from the official package repository of Ubuntu.
First, update the APT package repository cache with the following command:

Install the duperemove package with the following command:

The duperemove package should be installed.
Installing Deduplication Tools on Fedora 33:
To deduplicate a Btrfs filesystem, you need to install the duperemove program on your computer.
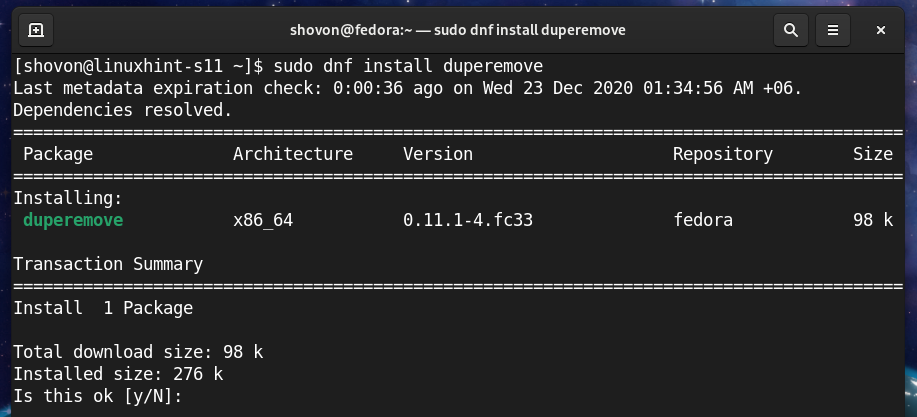
If you’re using Fedora 33, then you can install duperemove from the official package repository of Fedora.
First, update the DNF package repository cache with the following command:

Install the duperemove package with the following command:

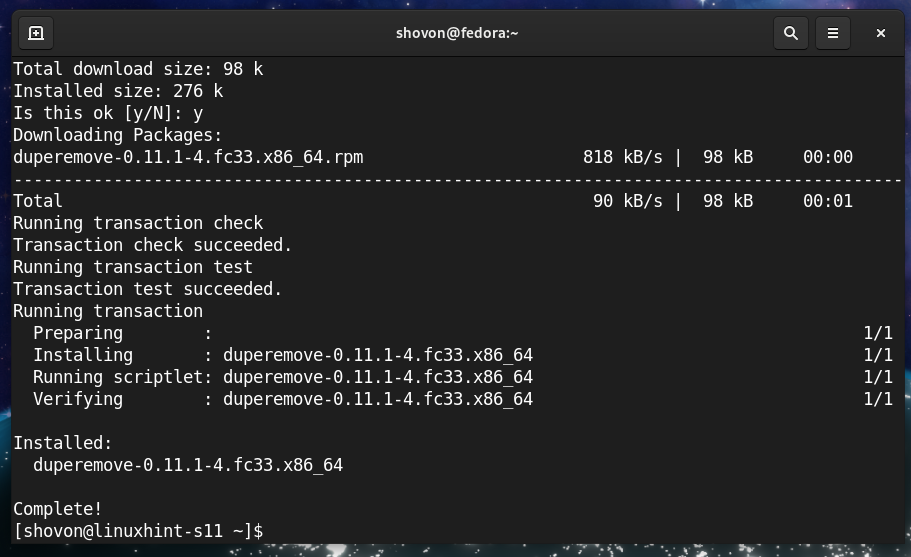
To confirm the installation, press Y and then press <Enter>.
The duperemove package should be installed.
Testing Deduplication on a Btrfs Filesystem:
In this section, I am going to do a simple test to show you how the deduplication feature of the Btrfs filesystem removes redundant data from the filesystem and saves disk space.
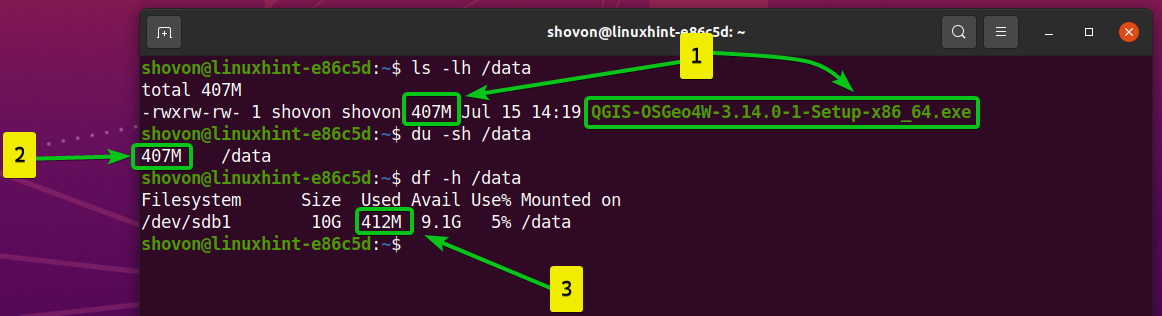
As you can see,
- I have copied a file QGIS-OSGeo4W-3.14.0-1-Setup-x86_64.exe to the /data directory. The file is 407 MB in size.
- The file stored on the /data directory is 407 MB in size.
- Only the file consumed about 412 MB of disk space from the Btrfs filesystem mounted on the /data directory.
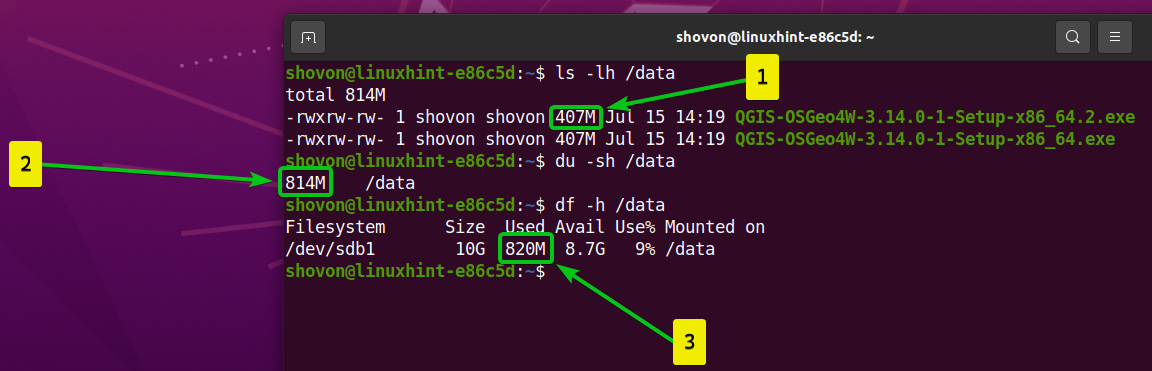
As you can see,
- I have copied the same file to the /data directory and renamed it to QGIS-OSGeo4W-3.14.0-1-Setup-x86_64.2.exe.
- The file stored on the /data directory is now 814 MB in size.
- The files consumed about 820 MB of disk space from the Btrfs filesystem mounted on the /data directory.
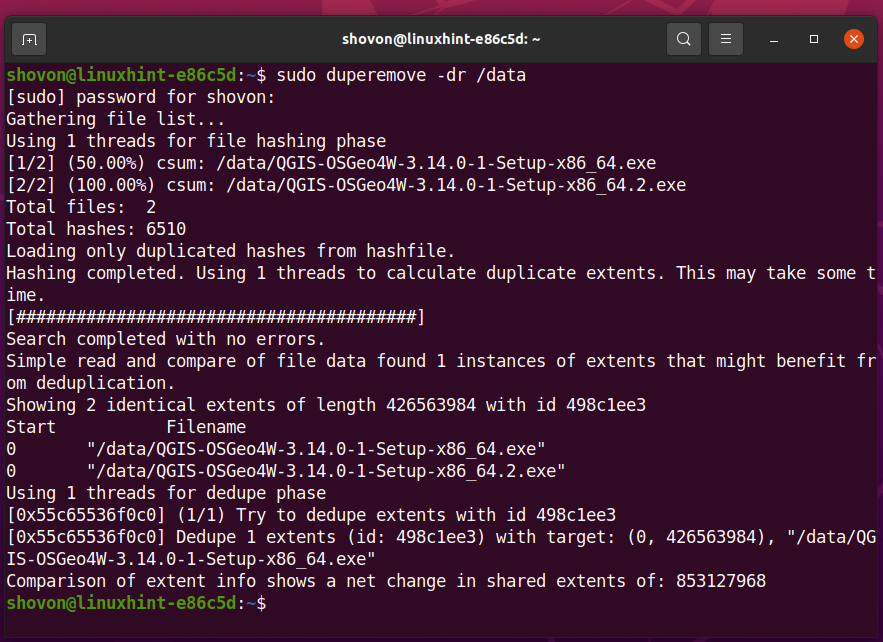
To perform the deduplication operation on the Btrfs filesystem mounted on the /data directory, run the following command:

The redundant data blocks from the Btrfs filesystem mounted on the /data directory should be removed.
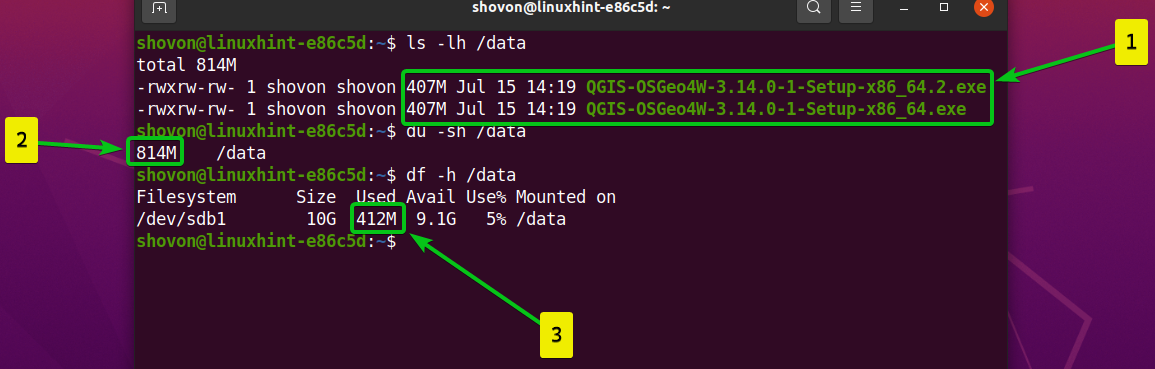
As you can see,
- I have the files QGIS-OSGeo4W-3.14.0-1-Setup-x86_64.exe and QGIS-OSGeo4W-3.14.0-1-Setup-x86_64.2.exe in /data directory.
- The file stored on the /data directory is now 814 MB in size.
- The files consumed about 412 MB of disk space from the Btrfs filesystem mounted on the /data directory.
The duperemove program removed redundant (duplicate) data blocks from the Btrfs filesystem mounted on the /data directory and saved a lot of disk spaces.
Automatically Mounting a Btrfs Filesystem on Boot:
To mount the Btrfs filesystem you have created, you need to know the UUID of the Btrfs filesystem.
You can find the UUID of the Btrfs filesystem mounted on the /data directory with the following command:

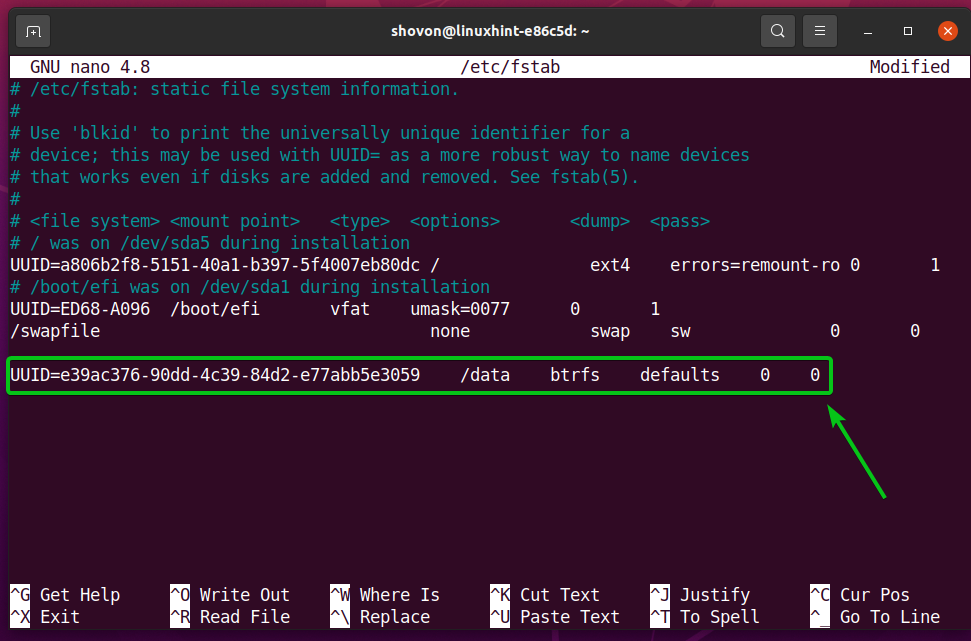
As you can see, the UUID of the Btrfs filesystem that I want to mount at boot time is e39ac376-90dd-4c39-84d2-e77abb5e3059. It will be different for you. So, make sure to replace it with yours from now on.

Open the /etc/fstab file with the nano text editor as follows:

Type in the following line at the end of the /etc/fstab file:
NOTE: Replace the UUID of the Btrfs filesystem with yours. Also, change the mount option and compression algorithm as you like.
Once you’re done, press <Ctrl> + X followed by Y and <Enter> to save the /etc/fstab file.
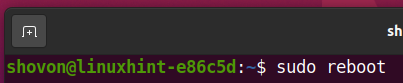
For the changes to take effect, reboot your computer with the following command:
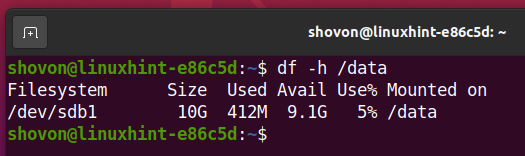
Once your computer boots, the Btrfs filesystem should be mounted in the /data directory, as you can see in the screenshot below.
Automatically Perform Deduplication using Cron Job:
To remove redundant data from the Btrfs filesystem, you have to run the duperemove command every once in a while.
You can automatically run the duperemove command hourly, daily, weekly, monthly, yearly, or at boot time using a cron job.
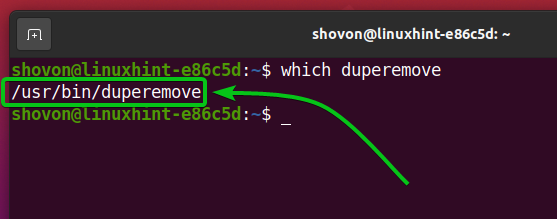
First, find the full path of the duperemove command with the following command:

As you can see, the full path of the duperemove command is /usr/bin/duperemove. Remember the path as you will need it later.
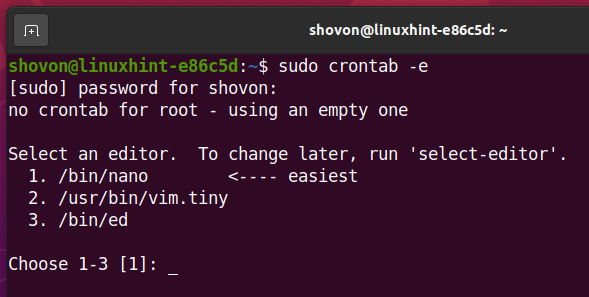
To edit the crontab file, run the following command:

Select a text editor you like and press <Enter>.
I will use the nano text editor. So, I will type in 1 and press <Enter>.
The crontab file should be opened.

To run the duperemove command on the /data directory every hour, add the following line at the end of the crontab file.

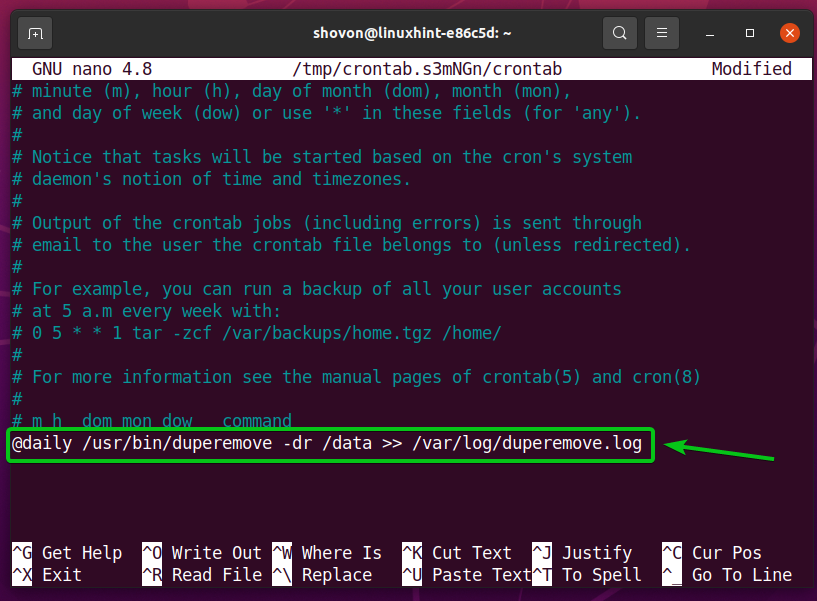
To run the duperemove command on the /data directory every day, add the following line at the end of the crontab file.
@daily /usr/bin/duperemove -dr /data >> /var/log/duperemove.log
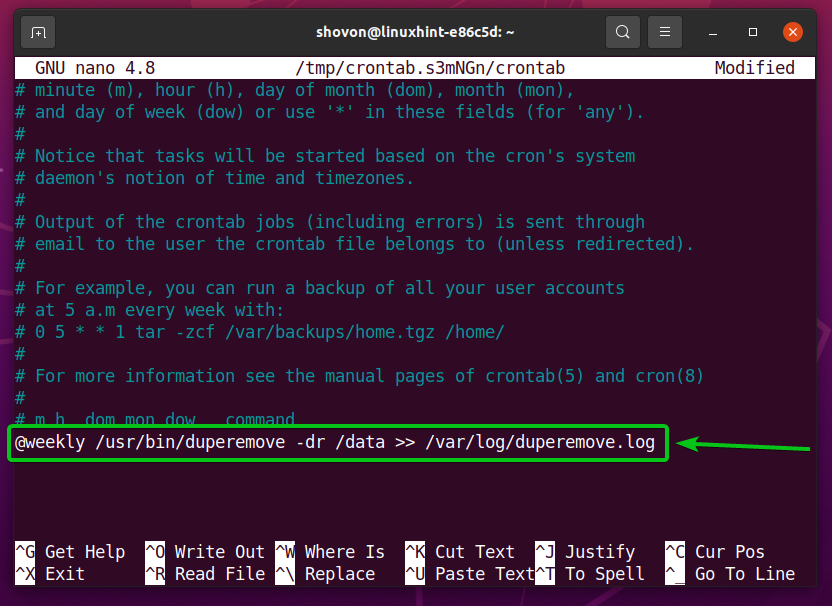
To run the duperemove command on the /data directory every week, add the following line at the end of the crontab file.
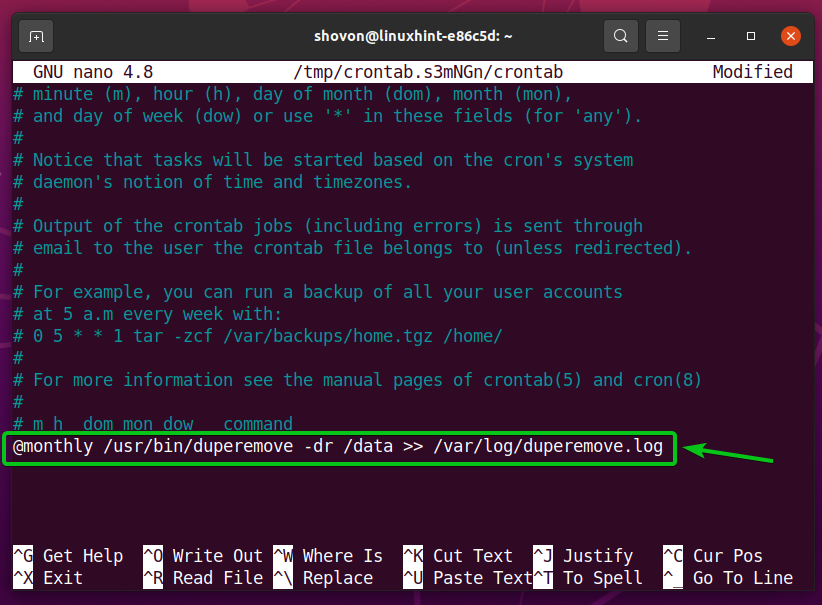
To run the duperemove command on the /data directory every month, add the following line at the end of the crontab file.
To run the duperemove command on the /data directory every year, add the following line at the end of the crontab file.

To run the duperemove command on the /data directory at boot time, add the following line at the end of the crontab file.

NOTE: I will run the duperemove command at boot time in this article.
Once you’re done, press <Ctrl> + X followed by Y and <Enter> to save the crontab file.

A new cron job should be installed.

For the changes to take effect, reboot your computer with the following command:

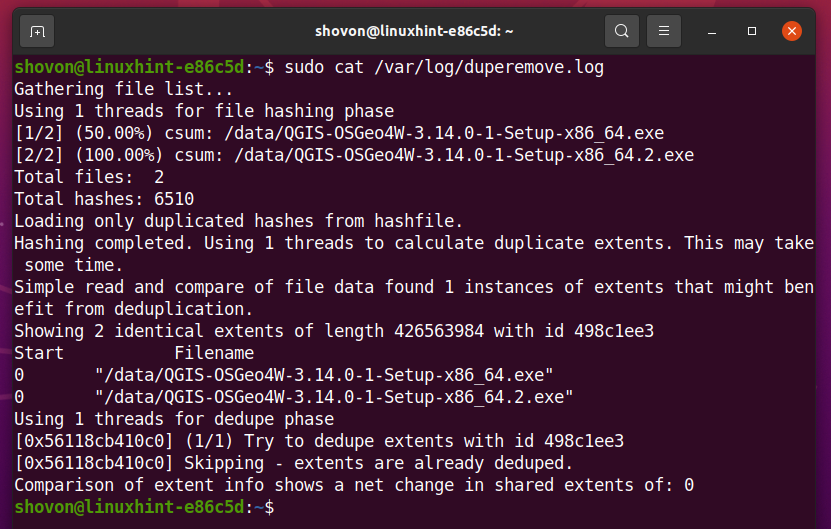
As the duperemove command runs in the background, the output of the command will be stored in the /var/log/duperemove.log file.

As you can see, the /var/log/duperemove.log file contains the duperemove log data. It means the cron job is working just fine.
Conclusion:
In this article, I have shown you how to install the duperemove Brtfs deduplication tool on Ubuntu 20.04 LTS and Fedora 33. I have also shown you how to perform Btrfs deduplication using the duperemove tool and run the duperemove tool automatically using a cron job.