This post will explain the process of running the BAT file from PowerShell.
How to Safely Run a BAT File From the PowerShell Script?
In order to run the BAT file in PowerShell, check out the provided instructions.
Step 1: Create a Batch File
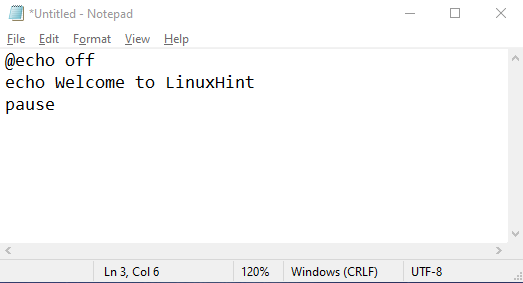
First, let’s create a “BAT” file. To do so, open “Notepad” from the Start menu and write the given script in it:
echo Welcome to LinuxHint
pause
Here:
- “@echo off” command is used to hide the file path specified in the “Command Prompt” console.
- “echo” command is used to print the added text in the output.
- “pause” command prevents the batch file script from closing:
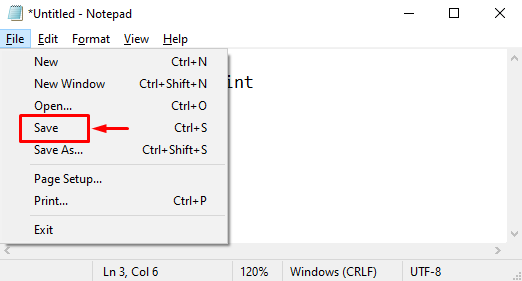
Now, save the script by clicking on the “File” menu and then trigger the “Save” button:
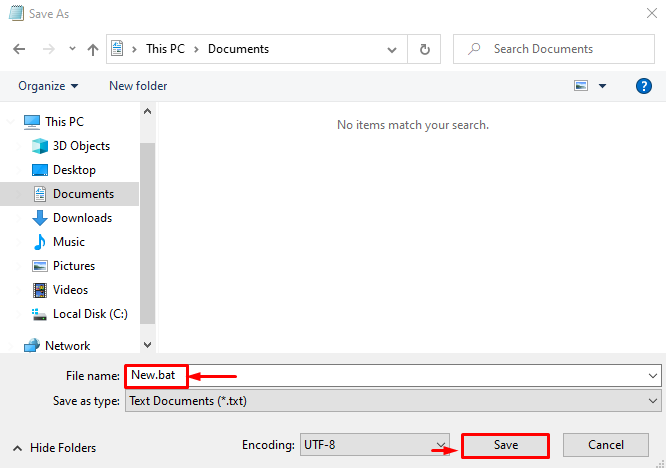
Write the desired file name and make sure to save the file “.bat” extension at the end:
Step 2: Run BAT File
Run the “BAT” from the “PowerShell ISE” program. For that reason, write the call operator “&” and then specify its file path within inverted commas:
Run the created script by clicking on the highlighted icon:
Output
As you can see from the output that the “BAT” file has been executed successfully.
Conclusion
The safest way to execute the “BAT” file is by using the PowerShell script. For this purpose, first, open the “PowerShell ISE”, write the call operator “&”, and then write the file path within inverted commas. Finally, execute the script to run the BAT file. This post has demonstrated a procedure to run the BAT file from PowerShell.


