This post described the way to run multiple SQL statements in MySQL workbench.
How to Run Multiple SQL Statements in MySQL Workbench?
To run multiple commands in MySQL Workbench, follow the provided procedure:
- Launch MySQL Workbench and select a connection.
- Create a new file and database.
- Execute multiple commands, such as the “USE <database-name>”, “CREATE TABLE <table-name>”, and “INSERT INTO <table-name> (col1, col2, ….) VALUE (value1, value2, …)” commands.
- Lastly, verify the created table and its content.
Step 1: Open MySQL Workbench
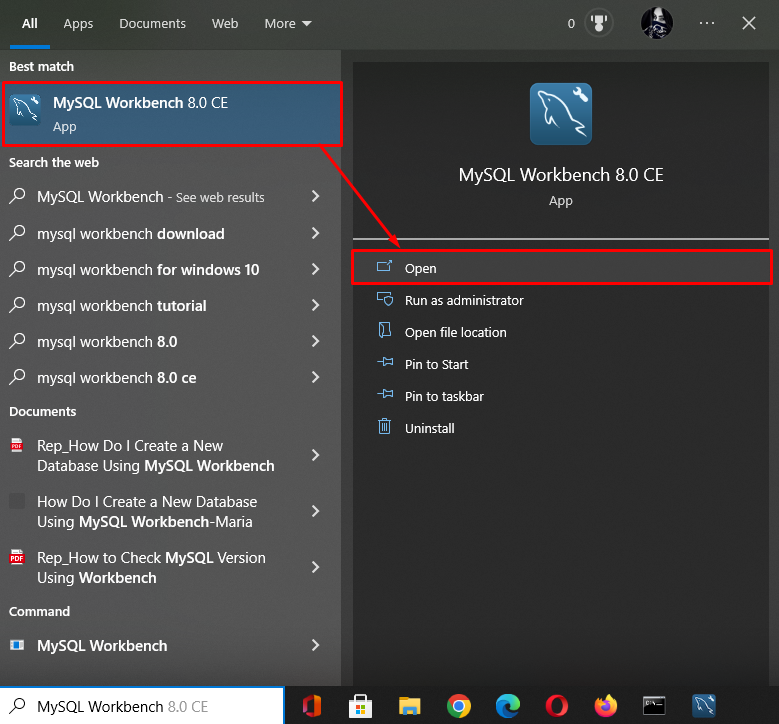
Initially, search and open the “MySQL Workbench” tool through the Startup menu:
Step 2: Select Connection
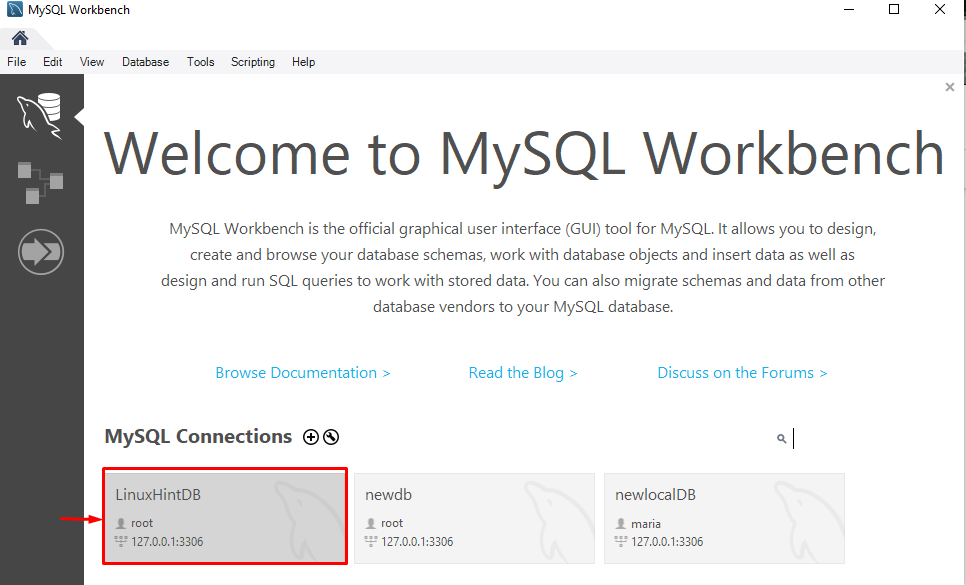
Now, click on the desired existing connection. For instance, we selected the “LinuxHintDB”:
Step 3: Create New SQL File
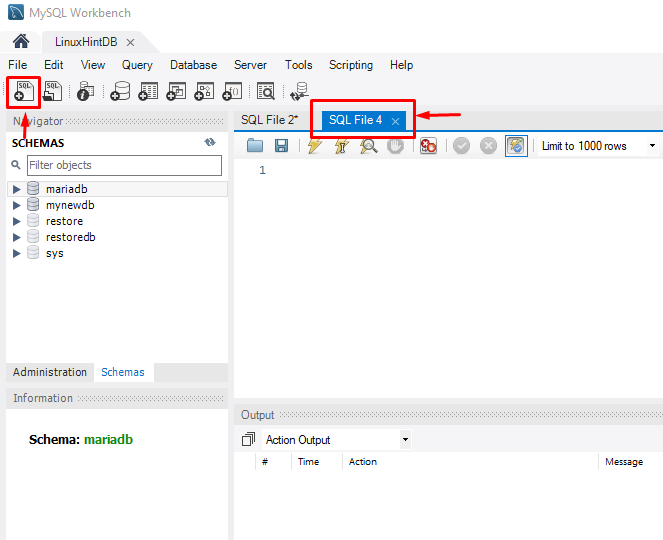
Next, create a new SQL file by clicking on the below-highlighted icon:
Step 4: Create New Database
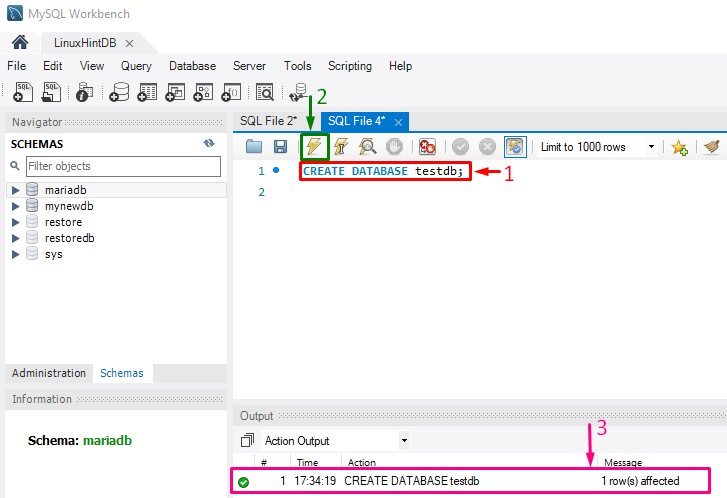
Execute the “CREATE” statement to create a new database in MySQL Workbench:
As a result, a new database “testdb” will be created successfully:
Step 5: Execute Multiple Commands
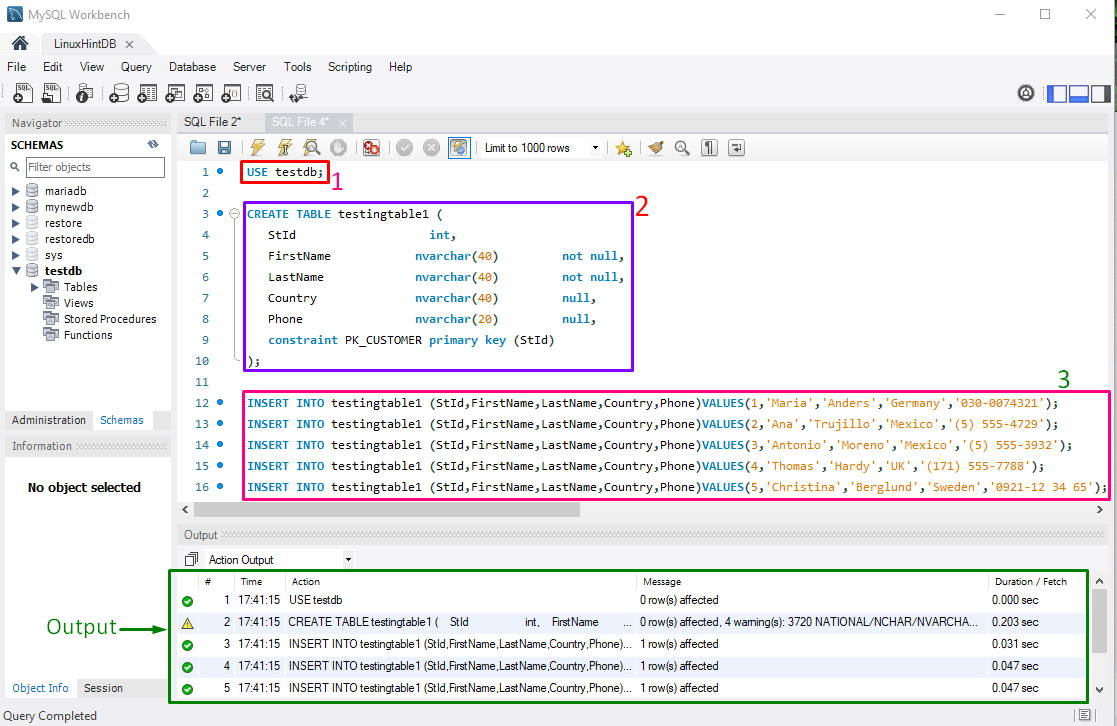
First, change the database through the “USE” command:
After changing the database, the “CREATE” command will be executed to create a new table with the table name, fields name as “StId”, “FirstName”, “LastName”, “Country”, and “Phone”. All specified fields are typed with their suitable data types, null value condition, and set student id “StId” as a primary key:
StId int,
FirstName nvarchar(40) not null,
LastName nvarchar(40) not null,
Country nvarchar(40) null,
Phone nvarchar(20) null,
constraint PK_CUSTOMER primary key (StId)
);
Next, the “INSERT INTO” command will be executed for adding records:
INSERT INTO testingtable1 (StId,FirstName,LastName,Country,Phone)VALUES(2,'Ana','Trujillo','Mexico','(5) 555-4729');
INSERT INTO testingtable1 (StId,FirstName,LastName,Country,Phone)VALUES(3,'Antonio','Moreno','Mexico','(5) 555-3932');
INSERT INTO testingtable1 (StId,FirstName,LastName,Country,Phone)VALUES(4,'Thomas','Hardy','UK','(171) 555-7788');
INSERT INTO testingtable1 (StId,FirstName,LastName,Country,Phone)VALUES(5,'Christina','Berglund','Sweden','0921-12 34 65');
As you can see in the provided screenshot, multiple commands are executed sequence-wise and return the single output:
Step 6: Verification
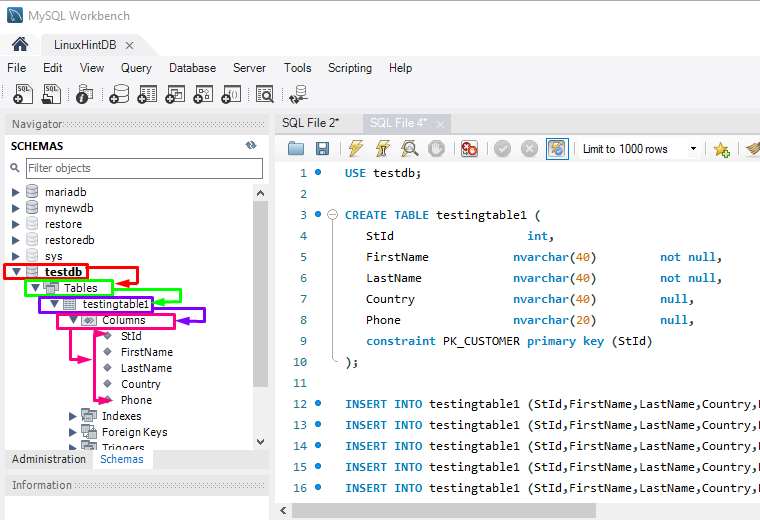
Lastly, to ensure that the newly created table exists in the current database with provided records through the multiple commands, check out the below-highlighted sequence:
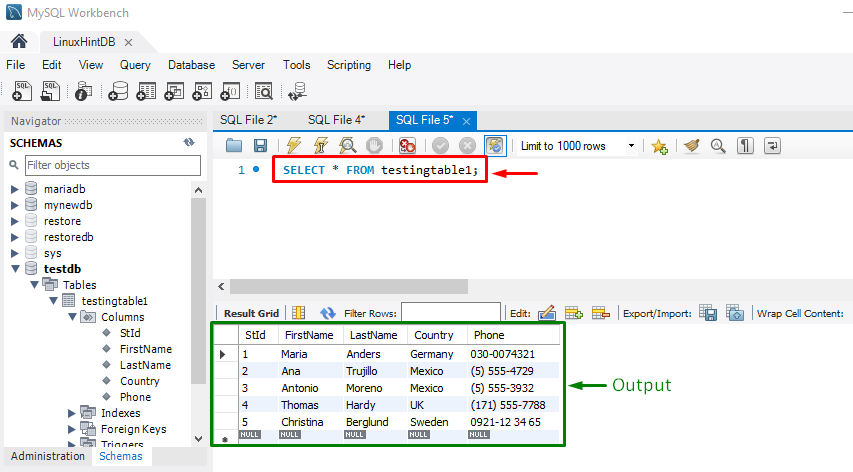
Another way to check whether the table is created with provided content through the multiple commands or not, execute the “SELECT” statement:
That’s all! We have created a table and inserted records by executing multiple SQL queries in MySQL Workbench.
Conclusion
To run multiple SQL queries in MySQL Workbench, first, launch MySQL Workbench and select the connection. Then, create a new file, and create a new database. After that, run the “USE <database-name>”, “CREATE TABLE <table-name>”, and “INSERT INTO <table-name> (col1, col2, ….) VALUE (value1, value2, …)” commands. Lastly, verify the created table. This post described the way to run multiple SQL queries in MySQL Workbench.

