While working on Git, committing is pretty common for developers. When local changes are moved from the staging index to the Git repository, users commit them along with the desired message that points to the data the commit contains for later use. However, sometimes developers need to revert all commit changes and move the HEAD pointer to the initial state. For this purpose, they need to update the reference using the “git update-ref” command.
This post will describe the easiest way of reverting the initial Git commit.
How to Revert Initial Git Commit?
To revert the initial Git commit, implement the following instructions:
-
- Redirect to the Git root directory.
- Check the log history of the current working branch.
- Run the “git update-ref -d HEAD” command.
- Verify it by checking the Git log history.
Step 1: Redirect to Git Root Directory
At first, move to the Git root directory by typing out the “cd” command:
Step 2: View Git Log History
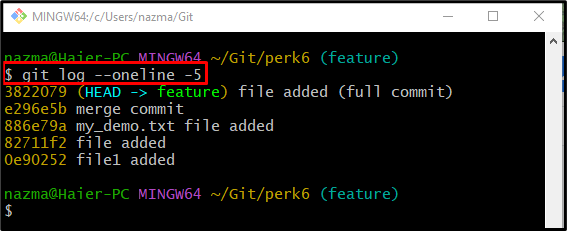
Then, execute the “git log” command to check the log history of the current working branch:
Here, the “-5” indicates that we want to view the specified number of commit SHA-hash:
Step 3: Revert Git Branch to Initial State
Finally, to revert the current working branch to its initial state, run the “git update-ref” command:
In the above-given command, “-d” represents delete operation:
Step 4: Verify Git Log
Lastly, to ensure that the HEAD is moved to the current working branch’s initial state:
According to the below-given output, our current working “feature” branch has reverted to the initial state successfully:
That’s all! We have elaborated on how to revert the initial Git commit.
Conclusion
To revert the initial Git commit, first, move to the Git root directory, then check the log history of the current working branch. Next, execute the “git update-ref -d HEAD” command. Lastly, verify it by checking the Git log history. This post described the method of reverting the initial Git commit.


