The icon size choice varies from user to user, as few prefer to have medium or small icons and few users may want a large icon size. To meet the requirements of various classes of users, this guide intends to provide a procedure to resize icons in Ubuntu.
How do I resize desktop icons in Ubuntu
The extensive functionality of Ubuntu allows you to change the icon size by using various methods. This section intends to provide the possibilities of changing the Desktop icon size on Ubuntu.
Using GNOME-tweaks
The “GNOME tweaks” is a customization tool for GNOME-based desktop environments and it can be used to resize the desktop icon size as well. To do so, follow the steps provided below.
Step 1 (Optional): First, install the GNOME-tweaks using the command written below.
Step 2: After successful installation, execute the following command to open the GNOME-tweaks.
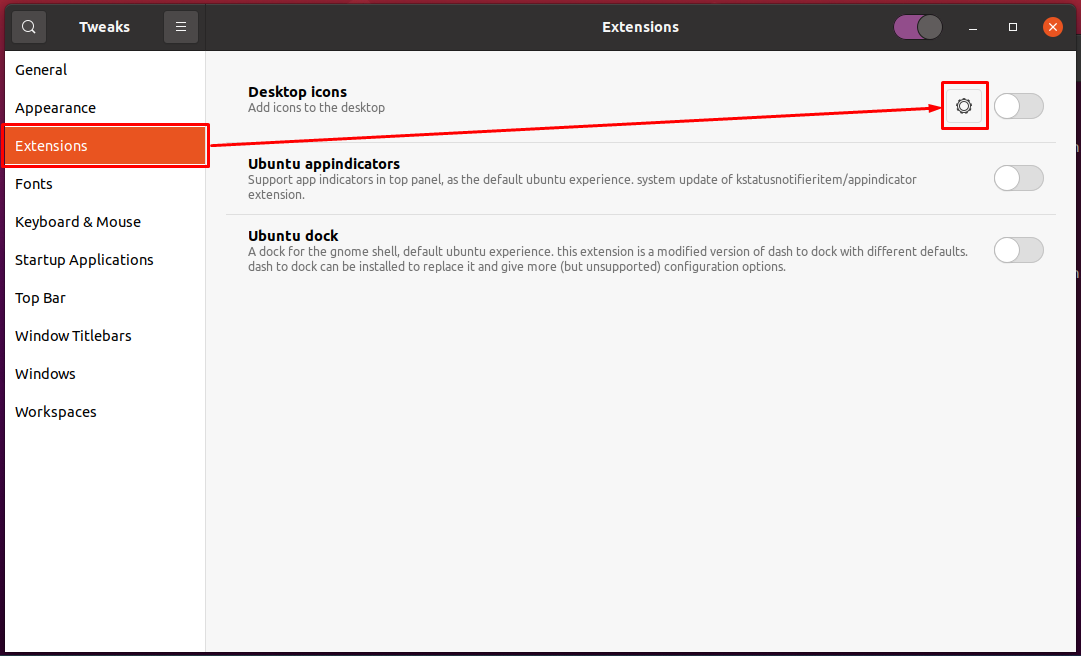
Once it is opened, navigate to the “Extensions” option from the sidebar. Upon clicking it, you would observe that a “Desktop Icons” option is displayed on the right pane of the window. Where you have to click on the settings icon as guided in the following image:
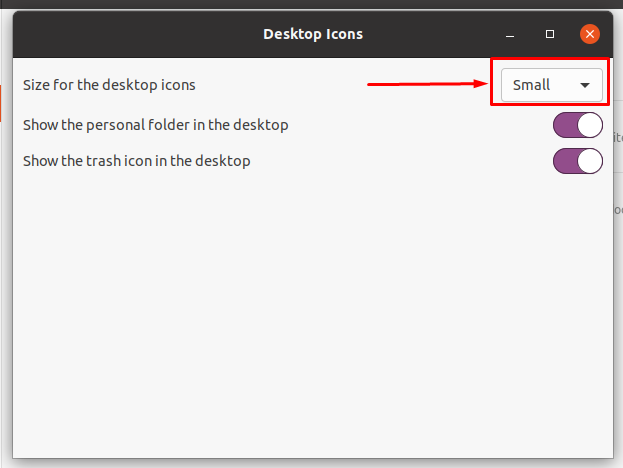
Step 4: Once you have opened the settings of “Desktop icons“. The following window will appear where you can alter the size of the desktop icons varying from small to standard to large.
When you alter the size, you would notice that the desktop icon size would change their sizes accordingly as can be seen below.
Using the command line
By using the GNOME tweaks, you would have changed the size of desktop icons but there are only three variants of sizes available which may not be efficient for a user.
To have more options of sizes, we would guide you to access the icon size settings at the back end.
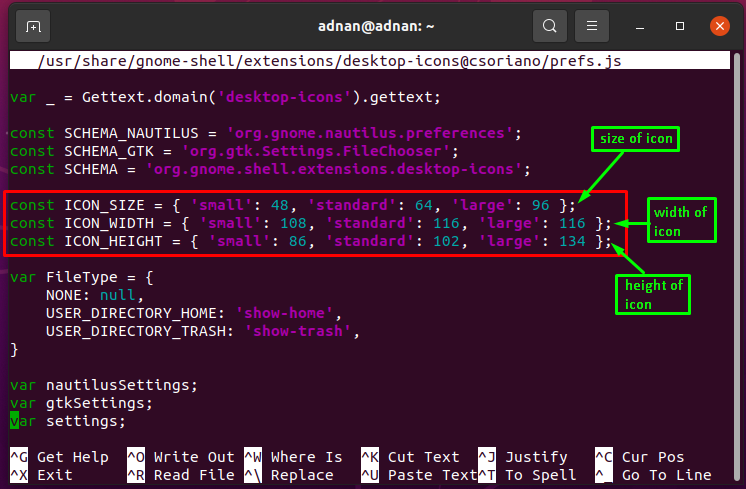
Step 1: First fire up Ubuntu’s terminal (CTRL+ALT+T) and access the prefs.js file using the following command. Once the file is opened in the editor, scroll down until you see “ICON_SIZE“, “ICON_WIDTH“, and “ICON_HEIGHT“.
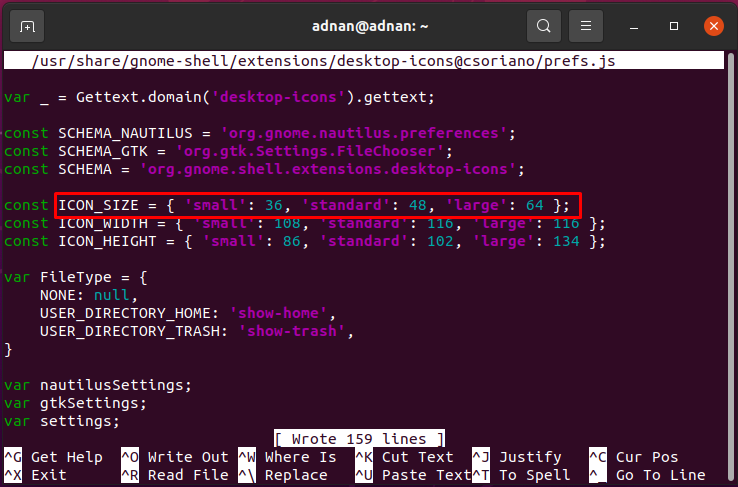
Here you would observe that the default size for the small icon, standard icon, and large icon is 48px, 64px, and 96px respectively. However, we have changed the values as shown in the following image.
Once the changes are performed press “CTRL+S” and “CTRL+X” to save the changes and exit the editor.
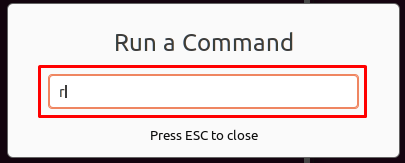
Step 2: After editing the prefs.js file, you must restart the GNOME shell by running the following command in the remote terminal (ALT+F2).
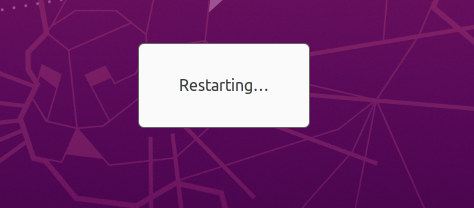
After hitting the enter key, the GNOME shell will be restarted.
After successful restart, the changes will be applied successfully to the desktop icon size inside GNOME-tweaks extensions. In our case, now the desktop icon sizes would be 36px, 48px, and 64px for small, standard, and large respectively.
Bonus Tip
Here, we provide a useful tip that may help you in resolving the errors that you may face while using the desktop extensions pack.
Step 1: First, disable the desktop icon size extensions by issuing the following command.
After disabling, use the following command to create local extensions directory.
Step 2: copy the desktop extensions to the newly created local directory via the following command.
Step 3: Access the metadata.json file to update the UUID (Unique User Identifier) of the local desktop icons extension.
In our case, the update uuid is “desktop-icons@csoriano-local“.
Step 4: Finally, access the prefs.js file of the local desktop extension directory to alter the desktop icon sizes. First, use the below-mentioned command to access the prefs.js file:
Now, enable the local desktop icons extensions by using the command written below.
Step 5: To adapt the changes, restart the gnome-shell from the remote terminal (ALT+F2) by using the “r” in the command box.
After successful restart, your system will adapt the desktop icon sizes as you put in the local desktop icons extensions.
Conclusion
In Ubuntu, desktop icons can be resized using the GNOME-tweaks or using the command-line interface. The command-line method basically accesses the extensions of GNOME-tweaks from the back end. The GNOME tweaks allow you to resize the icons in three various sizes, i.e., small, standard, and large. However, the command line allows you to set the custom size, height, and width of the icons as per the user’s requirement. Moreover, we have also described the procedure to add local desktop icons extensions to avoid any errors/hurdles caused while using the system desktop icon extensions.

