Resizing the multiple images in Linux at a time sounds crazy, but it’s possible. You can do it with a few commands. In this guide, we will give you a brief information on resizing all images in a folder. We also recommend that you read this guide if you want to resize all the images through a single command.
Resize All Images in a Folder (for Linux)
You can perform this task with ease with the help of mogrify, a command-line tool. It is a part of ImageMagick which you can use for editing, converting, and viewing images.
First, install the mogrify through the following command:
If you want to edit a single image, then you can use the following command. Make sure to open the directory that contains the image and make it as the current directory of the terminal. In this case, the image is available in the Downloads directory. That’s why we executed the additional following commands:
ls
Mogrify -resize 500x <image_name>.jpg

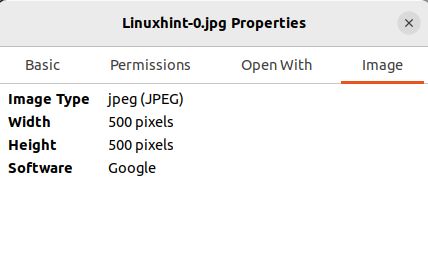
Let’s quickly check the changed image size. Open the directory and right-click on the file to open Properties. Here, you will get the details related to the image size.

If you want to use the batch resize option, open the terminal and execute the following command:
Replace the word <directory> with the directory name that contains the images. Now, use the cd command to open <directory> as the current directory in a terminal.
ls
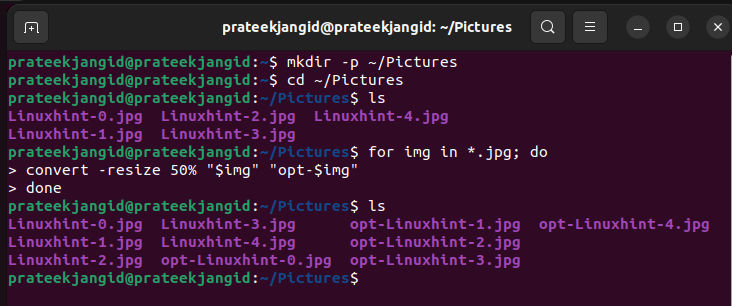
Now, run the follwoing command to make changes in all images:
After executing the previous command, type the following that contains the new image size (50%) and prefix of the new images (opt):
>done
Once you are done, you can use the ls command to check out the available images. As you can see in the previous image, the system has resized all images using opt as a prefix in their names.
Conclusion
It was the complete information about how to resize all images in a Linux folder. We executed the commands in Ubuntu to demonstrate the methods briefly. Resizing an image can be good because it can reduce the size of an image to make it shareable on the different platforms. Either you can resize every image differently or resize them all together in a single-size format. In the previous samples, we reduced the size of the images to 50%, depending on the requirements. Hence, we recommend you change the numbers according to your needs. We included the simplest methods so that you don’t need to make unnecessary efforts to resize the image.

