This study will demonstrate how to reset HEAD in Git.
How to Reset HEAD in Git?
When users work on a shared repository, at some point, they realize that the data or the added information is not correct, and it needs to be modified. If that’s the case, you may require removing many lines from their files and resetting them. In simple words, you can say that it is needed to reset the changes that were just made. This technique is known as “reset to HEAD”.
To understand the working of the above-discussed technique, let’s move to the below-provided instructions.
Step 1: Navigate to Git Repository
First, navigate to the Git local repository using provided command:
Step 2: Check Log
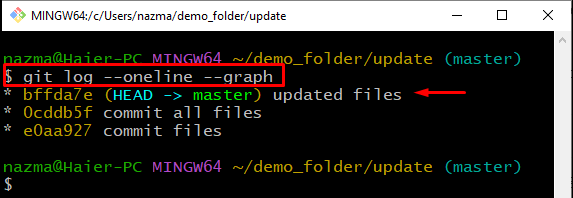
Then, execute the “git log” command to check the current branches and their commits:
Below output indicates that we have only one branch named “master” and currently HEAD is placed at the most recent commit “bffda7e” with the message “update files”:
Step 3: Reset HEAD
Now, reset the HEAD position to the previous commit by utilizing the “git reset” command. Here, we have used the “–hard” option, which will leave the untracked files of the current working directory:
As you can see, the position of HEAD is changed and reset to the previous commit:
Step 4: Check Log
Again, check the log status to verify the changed position of HEAD:
That’s all! We have efficiently explained the method of resetting the HEAD in Git.
Conclusion
To reset the HEAD in Git, first, open the Git Bash terminal and navigate to the Git local repository. Then, check the current branches of the Git local repository and their commits using the “$ git log” command. After that, execute the “git reset –hard HEAD^” command to reset the position of HEAD. In this study, we have demonstrated the procedure of resetting HEAD in Git.


