This guide discusses the method of resetting the develop branch to the master branch.
How to Perform Reset Operation on Develop Branch to Master?
Follow the provided procedure to reset the develop branch into the master branch:
- Go to the Git repository.
- Show the local branches list.
- Switch to the “develop” branch.
- Merge, commit and override the added changes by running the “git merge –no-commit master” command.
- Execute the “git checkout –theirs master .” command for checking out from develop to the master branch that contains the new rebased commits.
- Verify the resetting operation through Git log history.
Step 1: Switch to Root Directory
At first, execute the “cd” command and move to the specified repository path:
Step 2: Show List of Branches
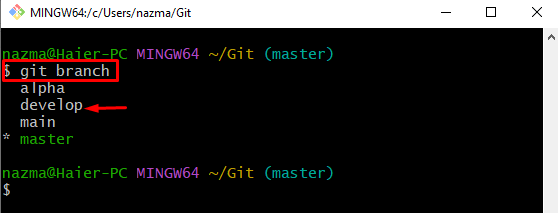
Use the “git branch” command to list all existing local branches:
From the below-given list, we have selected the “develop” branch:
Step 3: Move to “develop” Branch
Now, switch to the target “develop” branch with the help of the following command:
Step 4: Merge and Commit Changes
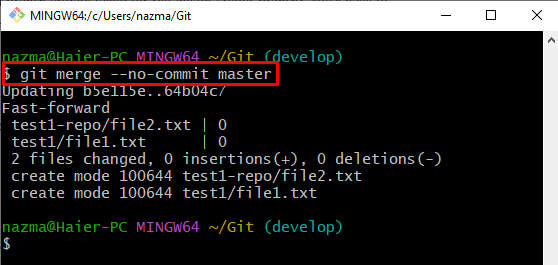
To merge and commit the added changes, the below-stated command can be used:
In the above-stated command, the “–no-commit” option is used to override the added results:
Step 5: Switch to “master” Branch
After that, switch to the “master” branch through the provided command:
Here, the “–their” flag refers to the target branch that contains the new commits which are rebased:
Step 6: Verify Reset Operation of “develop” Branch to “master”
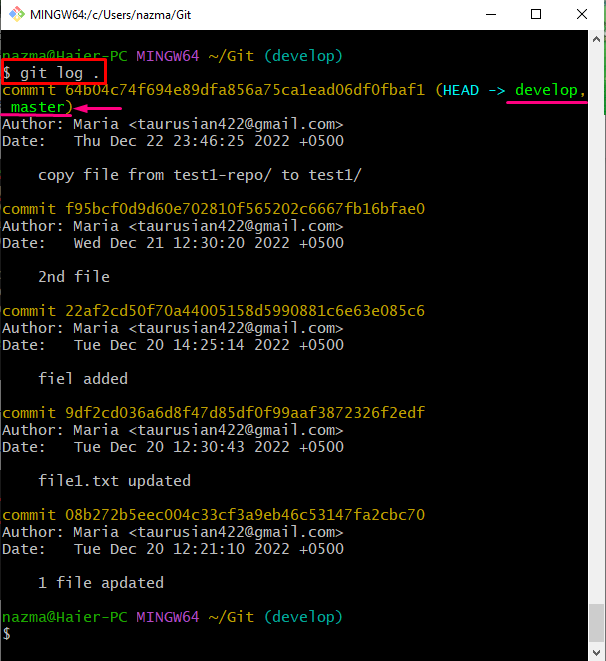
Lastly, ensure whether the develop branch is reset to the master by running the “git log .” command:
According to the below-given output, the develop branch is reset to the desired branch successfully:
We have efficiently provided the process of resetting the develop branch to the master branch.
Conclusion
To reset the develop branch into the master branch, first, go to the Git repository and check the list of all local branches. Then, switch to the “develop” branch, run the “git merge –no-commit master” command to merge, commit and override the added changes. Next, to contain the new commit to master, which is rebased in the develop branch, execute the “git checkout –theirs master .” command. This guide illustrated the process of resetting the develop branch to the master branch.


