This article will discuss the method to remove the file from the Git staging area/index.
How to Delete a Stage File in Git?
Follow the steps below to remove a file from the staging area:
- Go to the Git desired directory.
- Create and track a new text file.
- Check the repository’s status.
- Execute the “$ git rm –cached <file-name>” command to remove the particular file.
Step 1: Move to Git Repository
First, execute the provided command to the Git local repository:
Step 2: Make New Text File
Now, generate a new text file in the working directory using the “touch” command:
Step 3: Add Changes to Staging Index
Next, run the “git add” command to add all made changes to the Git staging index:
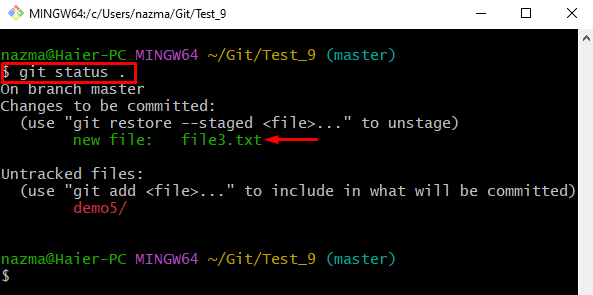
Step 4: View Repository Current Status
Then, to view the working repository status, run the “git status .” command:
Step 5: Remove File From Staging Area
Finally, remove the file that exists in the Git staging index by executing the “git rm” command with the “–cached” flag and particular file name:
Here, the “–cached” flag is used to remove the file from the Git repository and move them to the working directory as an unstaged file:
Step 6: Verify Deleted File From Staging Area
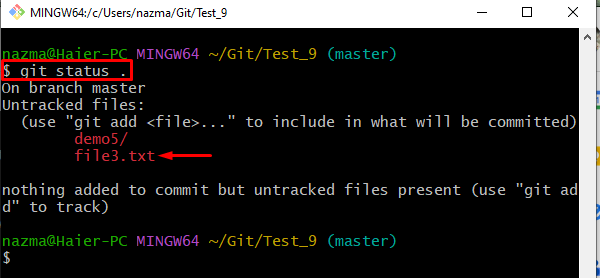
Lastly, to ensure the deleted file is untracked successfully, run the “git status .” command:
As you can see, the particular removed file from the Git repository has become untracked successfully:
That’s it! We have explained the method to delete a stage file in Git.
Conclusion
To remove a file from the staging area, go to the Git desired directory, create and stage a new text file. Then, view the repository’s current status. After that, execute the “$ git rm –cached <file-name>” command to remove the particular file. Lastly, ensure the deleted file by checking the status. This article explained the procedure to remove the file from the Git staging area/index.


