This write-up will discuss the procedure of deleting a particular file from the Git repository rather than removing it from the local file system.
How to Delete a File From a Repository Without Removing it From the Git Local File system?
If developers want to remove a particular file Git repository rather than deleting it from the local File system, follow the below-given instructions:
- Go to the particular repository.
- Display the current repository list of content.
- Select the particular file.
- Use the “git rm –cached <file-name>” command.
- Ensure the deleting process by checking the status of the Git repository.
Step 1: Redirect to Required Repository
Execute the “cd” command and switch to the particular Git repository:
Step 2: Display Content List
Now, show the content list of the working directory by executing the “ls” command:
Here, we have selected the highlighted file for removing the operation:
Step 3: Remove Selected File
Then, use the “git rm” command to remove the desired file from the current directory:
In the above-stated command, the “–cached” option is used to delete the file from the Git local repository. As you can see, the file is deleted successfully:
Step 4: Display Status
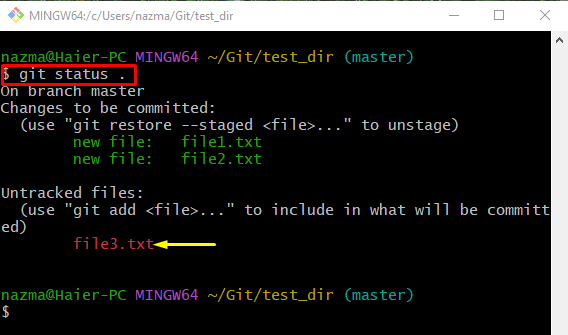
After that, view the repository status to ensure the deleting process through the following command:
According to the below-given output, the file is deleted from the repository and placed into the working directory:
That’s all! We have elaborated on deleting a file from the repository without removing it from the Git local File system.
Conclusion
To remove the desired file without deleting it from the local File system, first, go to the particular repository and check the list of content. Then, select the file and execute the “git rm –cached <file-name>” command. Lastly, ensure the deleting process by checking the Git repository. This write-up illustrated the method of deleting a particular file from the Git repository rather than removing it from the local File system.


