This blog will describe:
- How to remove the Directory From Unstaged Area?
- How to remove the Directory From Git Local Repository?
So, let’s start!
How to Remove the Directory From Unstaged Area?
Unstaged files or directories have not been added to the staging area and are not ready to commit changes. To remove untracked directories from the Git repository, first, open the Git repository and execute the “git clean -f -d” command.
For this purpose, check out the following steps.
Step 1: Open Git Terminal
First, open the Git terminal from the Start menu:

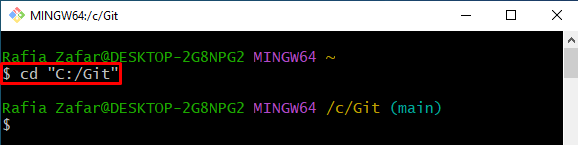
Step 2: Move to Git Repository
Next, use the “cd” command to move to the Git local repository:
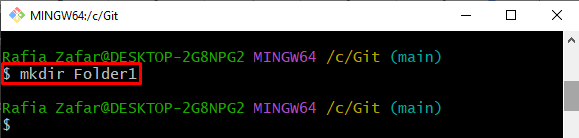
Step 3: Create New Directory
Create a new directory in the Git repository through the provided command:
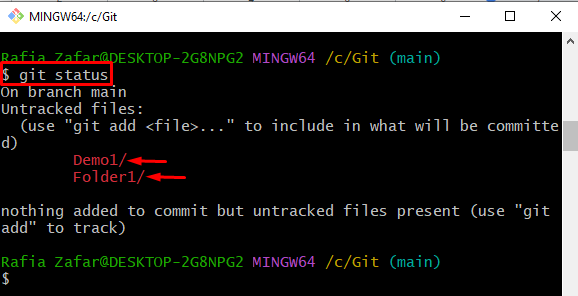
Next, verify whether the new directory is added to the untracked list or not using the “git status” command:
Step 4: Remove Untracked Directories From Git Repository
Remove the untracked directories from the Git repository by utilizing Git “clean” command. The option “-f” is used to remove directories forcefully, and the “-d” option is added to remove directories along with the file:
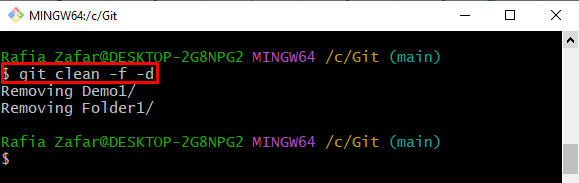
Next, verify whether the directory is removed or not by checking the Git repository status:
The below output indicates that the directory is removed successfully:
How to Remove the Directory From Git Local Repository?
To remove a tracked directory that was added in Git local repository, utilize the “git rm -r” command.
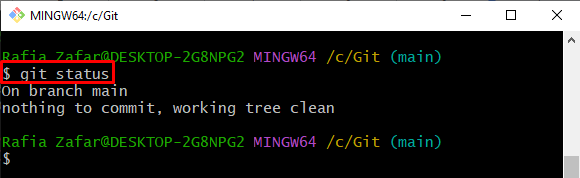
Step 1: Check Git Status
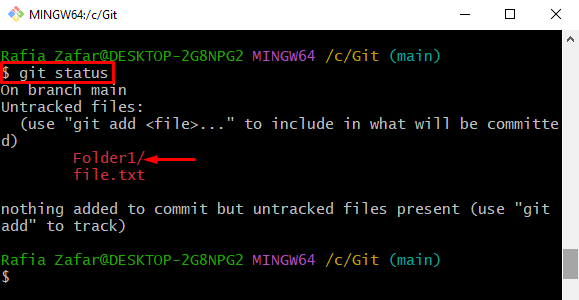
Firstly, execute the Git “status” command to check if any directory exists in the staged or unstaged area:
The “Folder1” is an untracked folder which means that the directory has not been added yet to the repository tracking index:
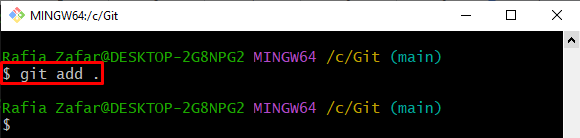
Step 2: Add Directory to Staging Area
To add the repository to the staging area, follow the below-provided command:
Step 3: Commit Directory
Next, commit the tracked directory using the provided command. This will add the directory to the local repository:

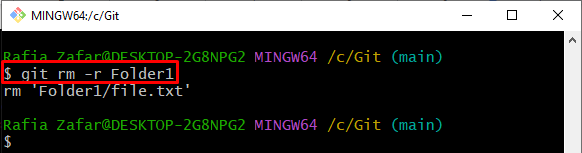
Step 4: Remove Directory From Git Local Repository
Lastly, remove the directory by utilizing the “git rm” command. Here, the “-r” option is utilized to remove the directory recursively:
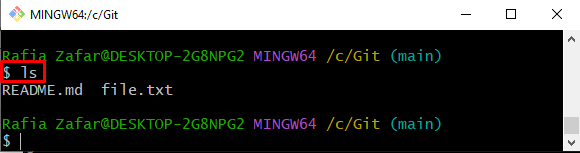
To verify whether the directory is removed or not from the local repository, utilize the “ls” command:
The below output indicates that the directory is successfully removed from the Git repository:
We have taught you the procedure to remove a directory from the Git local repository.
Conclusion
To remove the directory from the Git repository, first, open the Git local repository. Next, to remove untracked directories, execute the “git clean -f -d” command. Whereas to remove the tracked directory from the Git local repository, use the “git rm -r <Directory Name>” command. This write-up has demonstrated how to remove a directory from a Git local repository.