Git is an essential tracking tool for everyone, which is easy to use. Developers can add multiple files to their repository and delete them from the Git local repository if they don’t need any more, even publish one. It can be needed when publishing unintentionally sensitive content, e.g., files containing API keys or login credentials and many more.
This post will discuss the easiest way of removing committed files after pushing in Git.
How to Remove Committed File After Push in Git?
Try out the below-given steps to delete the committed file from the repository after pushing in Git:
-
- Redirect to the required repository.
- Display the existing content of the current repository.
- Check the remote URL and fetch the GitHub server updated version.
- Push all local content to the particular remote repository.
- Use the “git rm –cached <file-name>” command to remove the desired file from the local repository.
- Use the “git push” command.
Step 1: Switch to Required Repository
First, navigate to the desired Git repository by typing out the “cd” command:
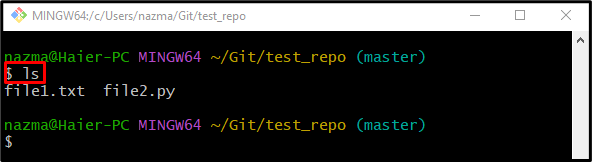
Step 2: List Content
Then, execute the “ls” command to check the current working repository available content:
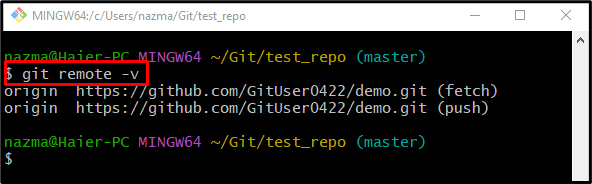
Step 3: View Remote List
To view the remote URL list, use the “git remote” command:
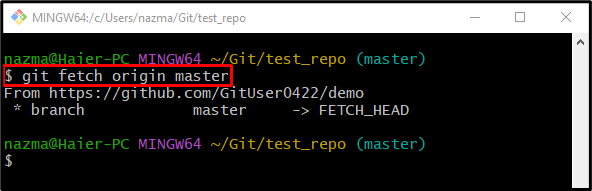
Step 4: Download Updated Remote Content
To perform the push operation, users need to download the updated content of the remote repository with the help of the “git fetch” command:
Here, the “origin” is the name of the remote URL, and “master” is the name of the branch from which needs to fetch the remote content:
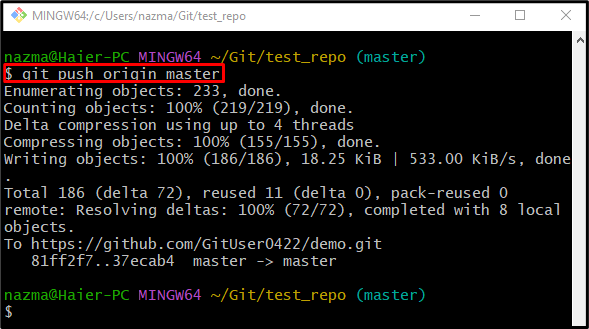
Step 5: Push Local Changes
Next, execute the “git push” command to push all locally added changes to the GitHub server:
As you can see, we have successfully pushed the updated local content to the remote repository:
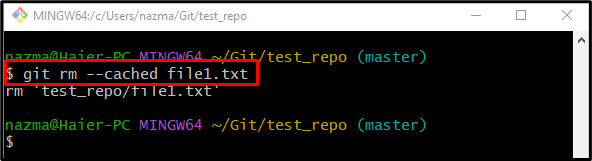
Step 7: Remove Particular File
Finally, remove the desired file from the local repository which is pushed to the GitHub server:
In the above-stated command, the “–cached” option is the synonym of the “staged” flag. According to the below-provided output, the specified file is removed successfully:
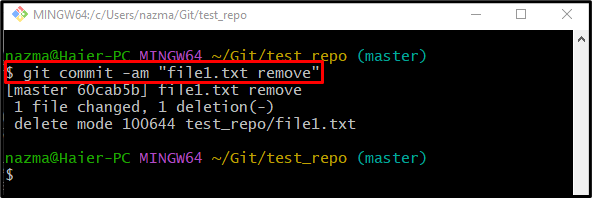
Step 8: Commit Changes
Now, to update the current working repository with added changes, use the “git commit” command along with the “-am” flag for all changes and desired commit message:
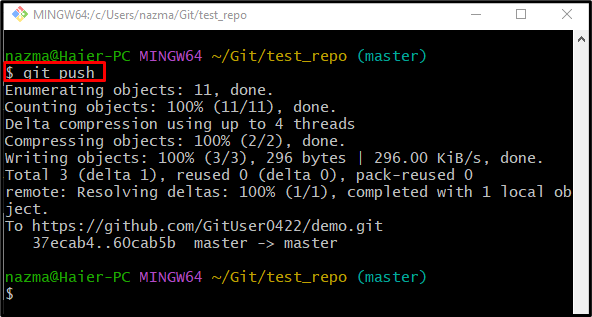
Step 9: Update Remote Repository
Lastly, use the “git push” command to remove the file from the GitHub server that was pushed previously:
That’s all! You have learned the method of removing the committed file after pushing in Git.
Conclusion
To remove the committed file from the repository after pushing in Git, first, move to the required repository and then list its content. After that, view the remote URL and fetch the GitHub server updated version, and push all local content to the particular remote repository. Next, delete the particular file from the local repository and execute the “git push” command. This post described the way of removing committed files after pushing in Git.