Developers prefer an independent versioning system, such as Git, to track project files and folders while working as a team. Git enables users to make changes, update files, and remove or delete files or changes. The added changes can be staged or unstaged. Staged changes indicate that the file is placed in the staging area after or before changes. On the other hand, unstaged changes indicate the file exists in the working directory, and changes are made to it.
This manual will illustrate the method of removing changes from the staging area in Git.
How to Remove Changes From Staging Area in Git?
Whenever you make changes in Git projects, you add them to the Git repository side by side. For instance, you have created a file in the Git repository and tracked it from the working directory to the staging area. Then, the file is updated, and all changes are added to the repository.
Things are going fine in such a scenario until you realize that the changes made are not related to the projects, and it is required to remove them from the staging area. To perform this operation, utilize the “$ git reset –staged <file-name>” command.
Let’s move to the below-provided instructions to understand the above-discussed concept!
Step 1: Move to Git Directory
First, navigate to the Git local directory with the help of provided command:
Step 2: List Directory Content
Execute the “ls” command to display the existing content of the Git directory:
Step 3: Track File
To track a specific file from the working directory to the staging area, run the provided command, and specify the file name:
Step 4: Open and Update File
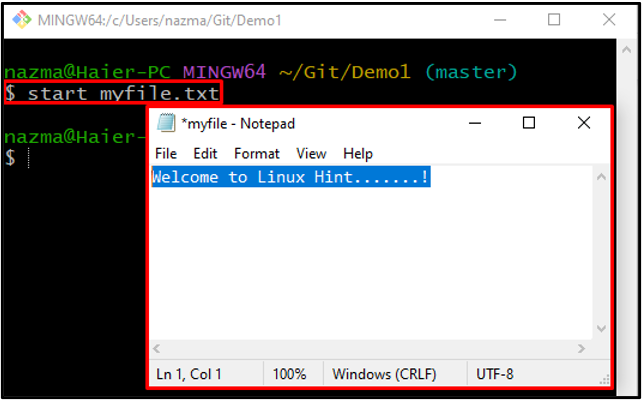
Now, open the file using the “start” command:
As you can see, the specified file will be open in our default text editor. Add some text in the opened file and save it:
Step 5: Add Changes
Next, execute the “git add” command to track all changes made to the Git directory:
Step 6: Check Directory Status
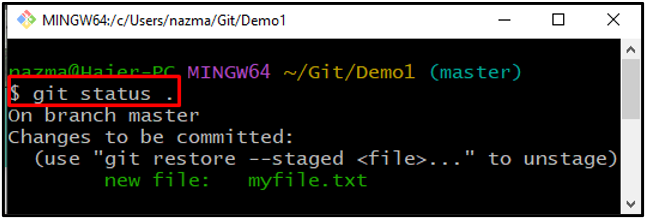
Check the Git directory’s current status using the “git status” command:
As you can see, currently, some uncommitted changes exist in the staging area:
Step 7: Reset Staging Area
Finally, execute the “git restore” command to remove the changes from the staging area:
Here, we have used the “–staged” option, which represents the staged area:
Step 8: Check Status
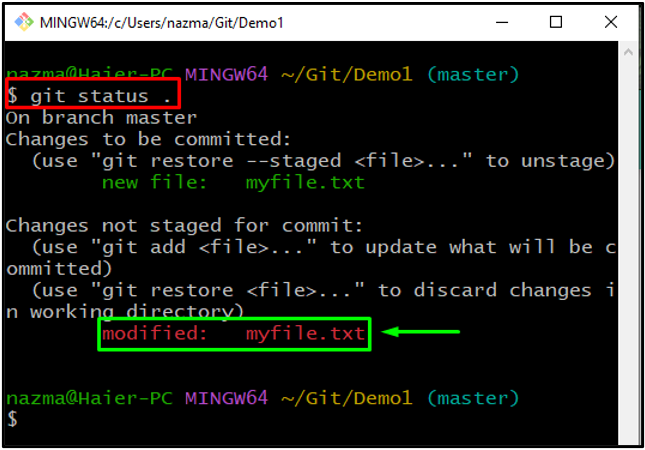
Lastly, check the Git repository status:
The given output signifies that the changes made at the staging area in the “myfile.txt” are successfully removed:
We have provided the easiest way of removing changes from the staging area in Git.
Conclusion
To remove changes from the staging area in Git, move to the Git directory and track the existing file first using the “git add <file-name>” command. Then, open it, make changes, and save it. Now, execute the “$ git add .” command to update the changes to the directory. Next, check the directory status and remove the modifications by utilizing the “$ git reset –staged <file-name>” command. This manual illustrated the method of removing changes from the staging area in Git.


