Getting started
Before we get into solutions for this problem, let’s highlight some of the main discussion points in this guide.
You can use many tools to reduce the size of your PDF file, but we will narrow down your options into a list of the best ones.
- Using an online file compressing tool
- Using a command-line utility
- Using a graphical tool
Our focus will mostly be on carrying out these solutions on Ubuntu, but the process should be fairly similar for other operating systems or Linux distros. So, without any further ado, let’s get into it.
Using an online file compressing tool
If you aren’t someone who needs to compress PDF files very frequently, then using a reliable online tool without having to install anything on your computer is the best way to go.
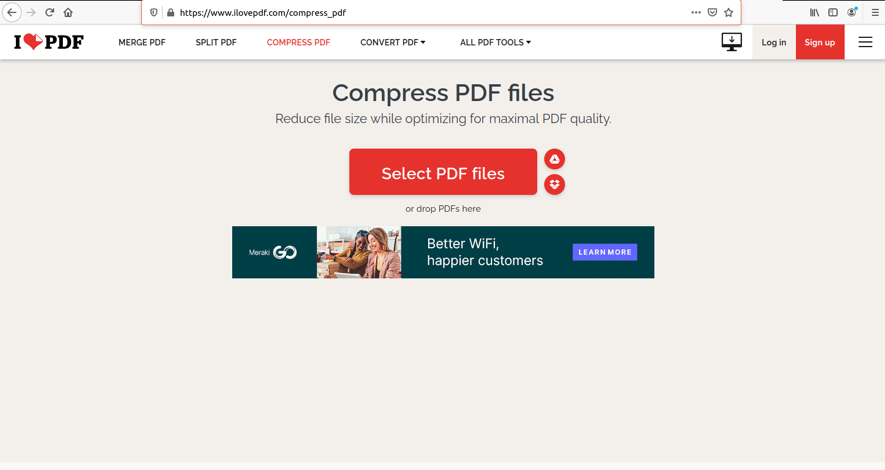
There are many websites out there that can perform compression tasks online and for free, but ILovePDF is best by test. Therefore, it gets to be our top recommendation for compressing PDF files online. Click here to visit their compression tool. You should see something like the image below.
The first step is to select the file you wish to compress. Having done that, the website will now ask you to select a compression to quality ratio. There are three options; we recommend the balanced one with good quality and good compression. You can obviously sacrifice one for the other if it suits your needs.
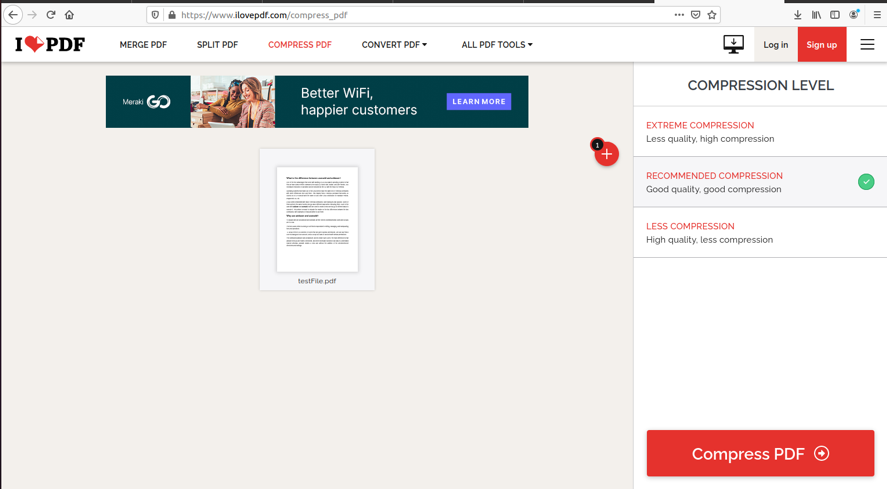
The final step is to click the Compress PDF button simply, and you should be finished within a few seconds.
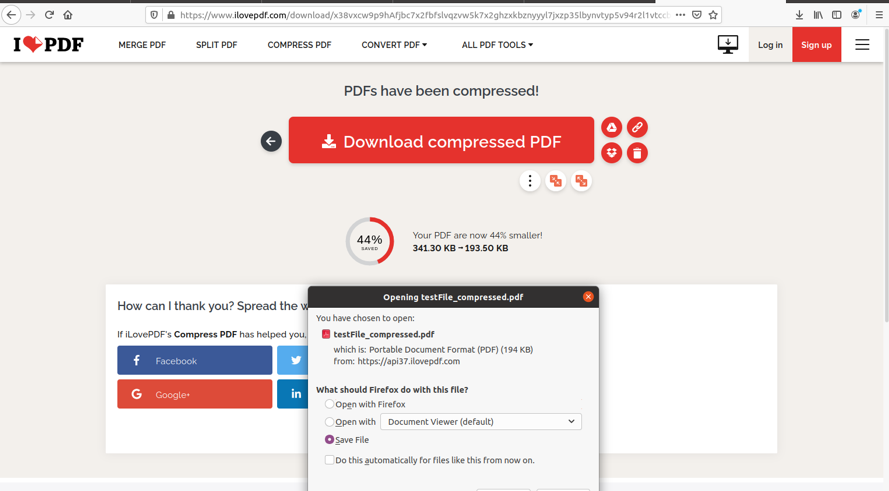
In the next window, the website displays how much they have compressed your file. In our case, the size has gone down by 44%, from 341KB to 193KB, which is a pretty decent result. As we mentioned earlier, you can reduce the size even further by choosing another compression ratio.
With that being said, we have fully covered how you can reduce the size of your PDF files through an efficient and reliable online tool. Make sure to try this method if you are likely only to compress files occasionally.
Using a command-line utility
Now we move on to more proper and sturdier methods of compressing PDF files. By that, we mean programs that you can install on your Ubuntu system and have them stay there for frequent use. First, we will look at a very handy command-line utility that gets the job done well.
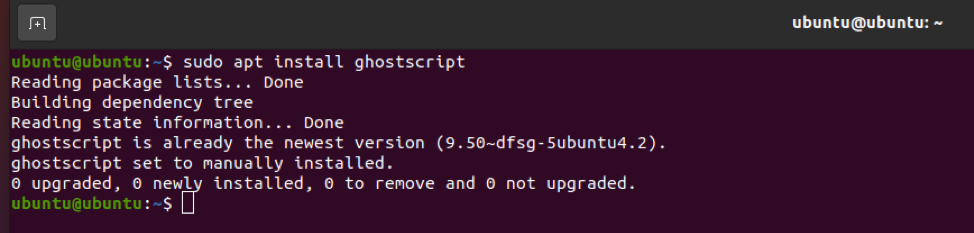
A program that serves as the interpreter for the PostScript language and PDF files, Ghostscript is usually preinstalled in many Linux distributions. We will now demonstrate how to use this tool, but first, you should check if your system has it installed or not by running the command below. (If it is not preinstalled, the command will install it once you run it.)
Open a new Terminal session through the activities menu or press Ctrl + Alt + T on your keyboard. Execute the following command once done.
The next step contains all the technicalities of the matter. We will run a command that specifies the input and output PDF files and the compression ratio. First, change your current directory to where your PDF file is placed.
The command below may seem intimidating but worry not, as we will explain each part of it shortly.
Here, first of all, you must change output.pdf to whatever filename you want the compressed file to have and testFile.pdf to the name of your to-be-compressed PDF.

In this command, the dPDFSETTINGS parameter decides the compression level of the file. Therefore, it also controls the quality of the output PDF. Following are the options you can select for this parameter.
- /prepress – this is the default option which gives higher quality (300 dpi) but large size as well (low compression, high quality)
- /ebook – this is the option if you want medium quality and medium compression. Creates output PDFs that are balanced in terms of quality and compression (150 dpi)
- /screen – this option gives a low-quality output (72 dpi) but very high compression
Once the command is executed, the tool will create the output file side by side with the input in the same directory.
Using a graphical tool
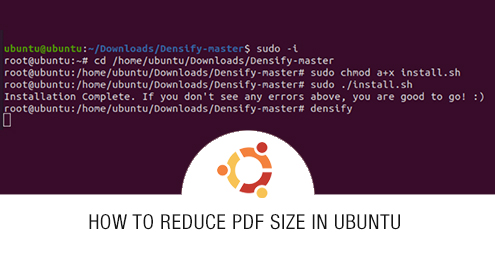
Those who aren’t fluent in the shell can use this convenient GUI version of Ghostscript, called Densify. Click here to visit the Github page from where you can download it. The installation instructions are given on the website; however, you can also follow along, as shown with the image below.
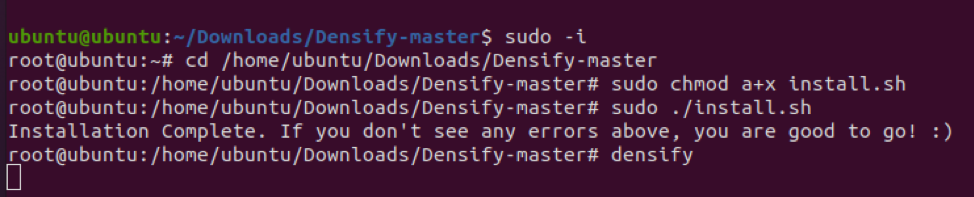
First, we enter as root, and then we run the install.sh script. Finally, when you run densify by typing it in the Terminal, the GUI application should start.
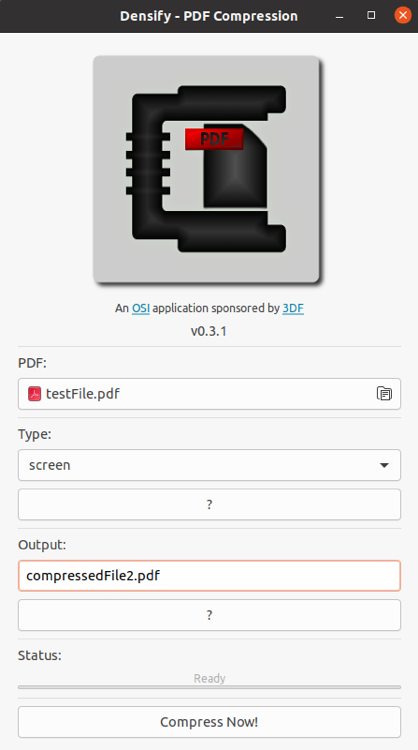
As you can see, we have selected our input test file, selected a compression type (same parameters as described earlier for Ghostscript), and finally entered a filename for the output PDF file. With that being done, all that’s left to do is hit the Compress Now! button and obtain the compressed output.
Conclusion
With our final recommendation out of the way, we conclude this guide. We saw three reliable ways to reduce the size of our PDF files in Ubuntu – an online tool, a CLI utility, and a GUI tool. Hopefully, this article turned out to be of great assistance to you folks.