This article explains how you can add a new column to an existing Redshift table without disrupting anything else in the database structure. We assume that before going through this article, you have knowledge of configuring a Redshift cluster.
Brief Recap of SQL Commands
Let’s briefly review the basic five types of SQL commands to find out which type of command we will need to add a new column to a table.
- Data Definition Language (DDL): DDL commands are mostly used to do structural changes in the database like creating a new table, removing a table, making changes to a table like adding and removing a column, etc. The major commands associated with it are: CREATE, ALTER, DROP, and TRUNCATE.
- Data Manipulation Language (DML): These are the most commonly used commands to manipulate data in the database. Regular data entry, data removal, and updates are done using these commands. This includes INSERT, UPDATE, and DELETE commands.
- Data Control Language (DCL): These are simple commands used to manage the user permissions in the database. You can allow or deny a particular user to perform some kind of operation on the database. Commands used here are GRANT and REVOKE.
- Transaction Control Language (TCL): These commands are used to manage transactions in the database. These are used to save the database changes or to discard specific changes by returning to some previous point. The commands include COMMIT, ROLLBACK, and SAVEPOINT.
- Data Query Language (DQL): These are simply used to extract or query some specific data from the database. A single command is used to carry out this operation, and that is the SELECT command.
From the previous discussion, it is clear that we will need a DDL command ALTER to add a new column to an existing table.
Changing Table Owner
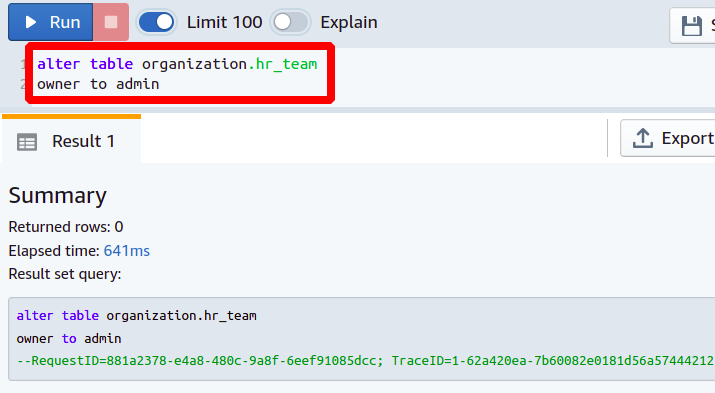
As you probably know, each database has its users and a different set of permissions. So before trying to edit a table, your user must own that table in the database. Otherwise, you don’t get permission to change anything. In such cases, you must allow the user to perform specific operations on the table by changing the table owner. You can choose an existing user or create a new user in your database and then run the following command:
owner to < new user>
In this way, you can change the table owner using the ALTER command. Now, we will see how to add a new column to our existing database table.
Adding a Column in the Redshift Table
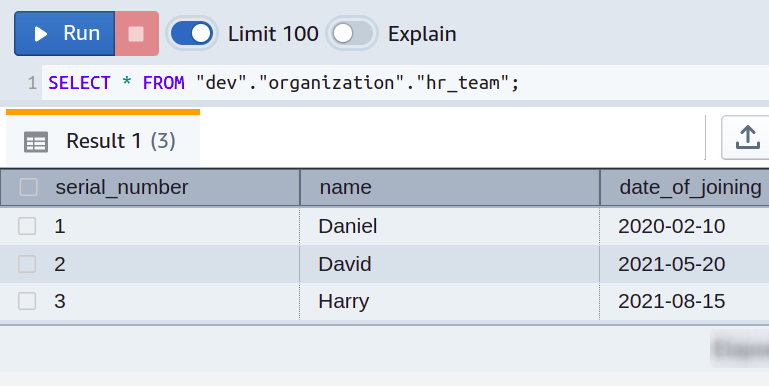
Suppose you run a small information technology firm with different departments and have developed separate database tables for each department. All the employee data for the HR team is stored in the table named hr_team, having three columns named serial_number, name, and date_of_joining. The table details can be seen in the following screenshot:
Everything is going fine. But over time, you just realized to further ease your life by adding the employees’ salaries in the database which you previously managed using simple spreadsheets. So you want to populate another column in each departmental table named salary.
The task can be simply performed using the following ALTER TABLE command:
add <column name> <data type>
Then, you require the following attributes to execute the previous query in the Redshift cluster:
- Table Name: Name of the table in which you want to add a new column
- Column Name: Name of the new column you are adding
- Data Type: Define the data type of the new column
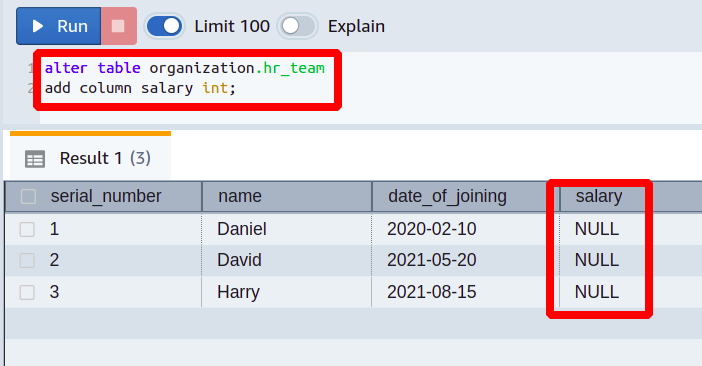
Now, we will add the column named salary with the data type int to our existing table of hr_team.
So, the previous query added a new column to the existing Redshift table. The data type for this column is an integer, and the default value is set to null. Now, you can add the actual desired data in this column.
Adding Column With specified String Length
Let’s take another case where you can also define the string length after the data type for the new column that we will add. The syntax will be the same, except there is just the addition of one attribute.
add <column name> <data type> <(Length)>
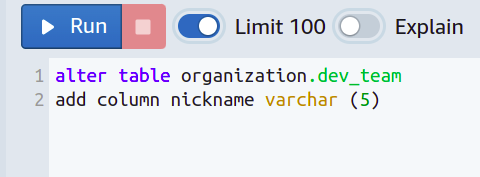
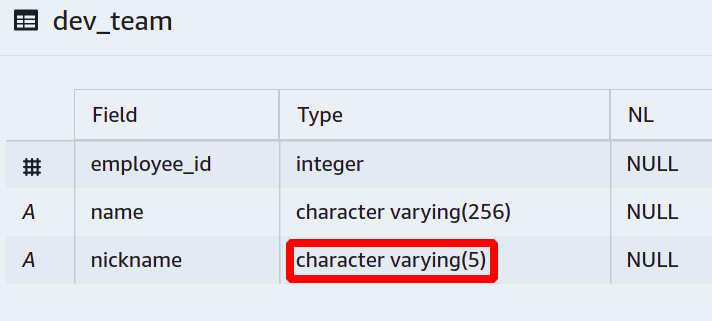
For example, you want to call each team member with a short nickname instead of their full name, and you want the nicknames to be composed of a maximum of five characters.
For this, you will have to restrict the people from going beyond a certain length for the nicknames.
Then a new column is added, and we have set a limit on varchar so it cannot take more than five characters.
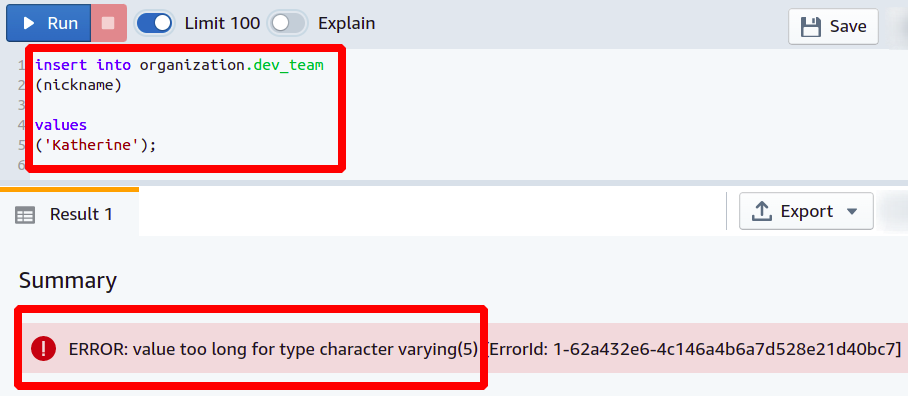
Now, if someone tries to add his nickname longer than we expect, the database will not allow that operation and will report an error.
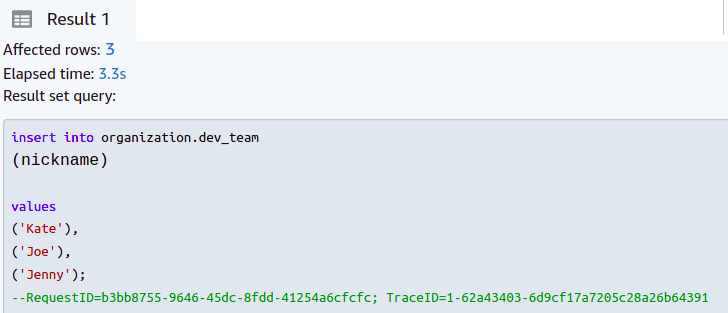
But, if we enter all nicknames with five or fewer characters, the operation will be successful.
By using the previous query, you can add a new column and put a limit on string length in the Redshift table.
Adding a Foreign Key Column
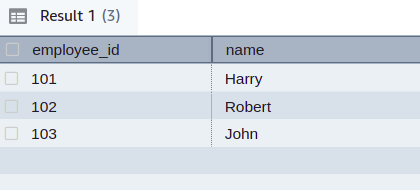
Foreign keys are used to reference data from one column to the other. Take a case where you have people in your organization working in more than one team, and you want to keep track of your organization’s hierarchy. Let’s have web_team and dev_team sharing the same people, and we want to reference them using foreign keys. The dev_team simply has two columns that are employee_id and name.
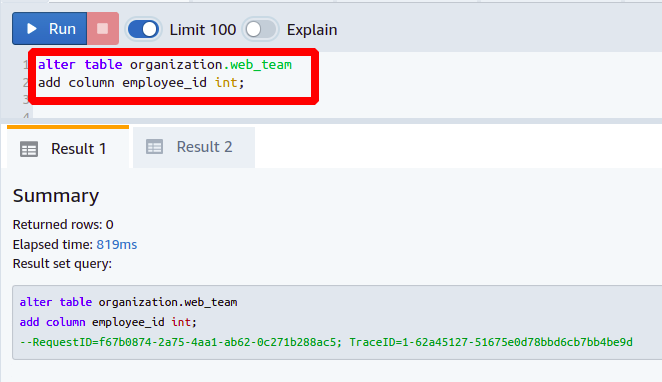
Now, we want to create a column named employee_id in the web_team table. Adding a new column is the same as discussed above.
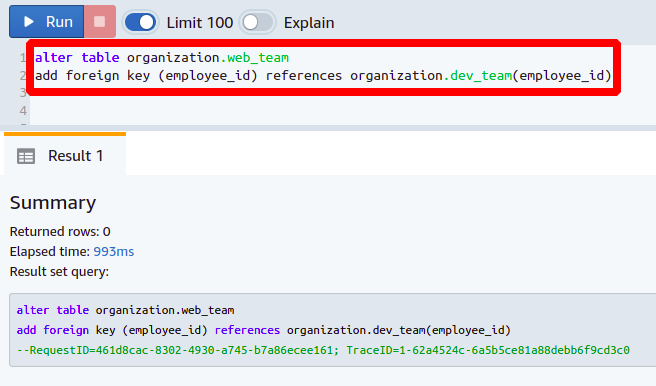
Next, we will set the newly added column as a foreign key by referencing it to the column employee_id present in the dev_team table. You need the following command to set the foreign key:
add foreign key
(<column name>) references <referenced table>(<column name>);
This way, you can add a new column and set it as a foreign key in your database.
Conclusion
We have seen how to make changes in our database tables like adding a column, removing a column, and renaming a column. These actions on the Redshift table can be performed simply by using SQL commands. You can change your primary key or set another foreign key if you want.

