Although you can grant each individual user the permissions for the specific database and database operations, it is still very difficult to manage, especially when the project is large and many users are working on it. In order to solve this problem, databases such as MySQL or Postgres and Amazon Redshift support the concept of roles that can provide privileges to users and user groups easily.”
Amazon Redshift
In the world of data warehousing, Redshift is a very famous cloud-based database created by AWS that can solve all your big data handling problems and solve complex queries. You can also create the serverless Redshift cluster to reduce the server management on your end. This article describes how we can use the Redshift ALTER ROLE command, which is very helpful when you are trying to modify your roles in your Redshift cluster.
Create Role
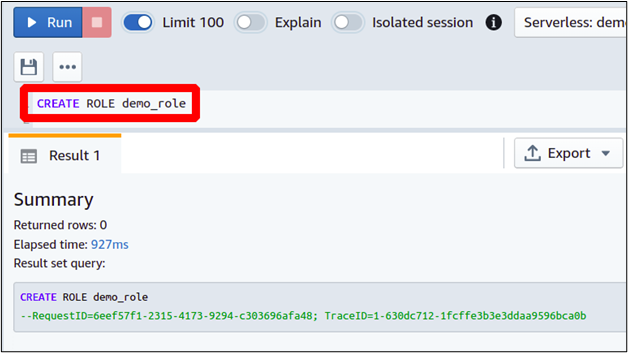
First of all, let’s first see how you can create a new role in Redshift. Although this is the prerequisite for this article, so just discussing it briefly here. The following Redshift query can be used to create a role in Redshift.
The above query will create a role named demo_role inside the Redshift cluster, and now in the coming sections, we will discuss how to change its parameters using the Redshift ALTER ROLE command.
Alter Role
Any Redshift user having superuser privileges or just having permission to use the alter role command will be able to change the role successfully. In the coming sections, we will explain some common scenarios to change the Role in Redshift.
Rename Redshift Role
Let us have an example where you are working in a large software technology firm with a large development and database team. You have multiple roles created and attached to different users for easy management of database privileges. Due to some recent changes in team infrastructure, the Redshift management team is facing issues due to conflict in the Redshift roles, and you are assigned the task of solving this issue by simply changing the names of roles in your Redshift cluster.
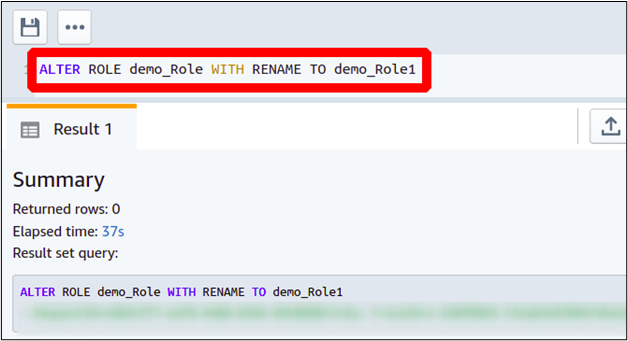
Now deleting the present roles and replacing them with new ones is a very hectic and difficult task and may take weeks to add all the users to them, but the command you are going to learn here will resolve this issue in minutes because it allows you to simply rename the present roles in Amazon Redshift. You just need to execute the following Redshift query to rename the existing role.
RENAME TO <New Role Name>
So this is how you will be able to rename your Redshift roles very easily within no time.
Modify Redshift Role Owner
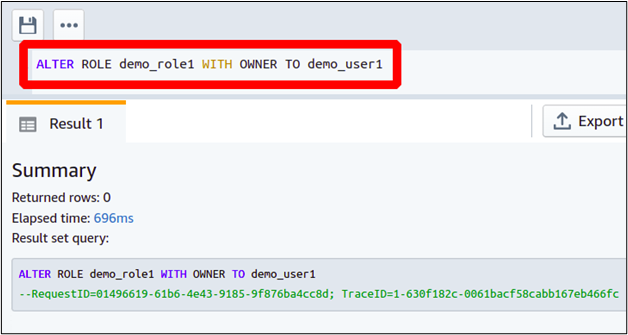
Suppose your company has hired a new database team lead, and now you want to grant him the ownership of a Redshift role. With the help of the ALTER ROLE command, you can change the owner of your role. The following query can be executed to rename the Role in the Redshift cluster.
WITH OWNER TO <New Owner User Name>
So we have successfully changed the owner of the Redshift role using this ALTER ROLE command.
Update Associated External ID
Amazon Redshift allows you to manage the Redshift cluster permissions and roles using the native identity provider federation, such as the azure active directory. For each identity provider, there is an external ID that is used to associate it with the Redshift role.
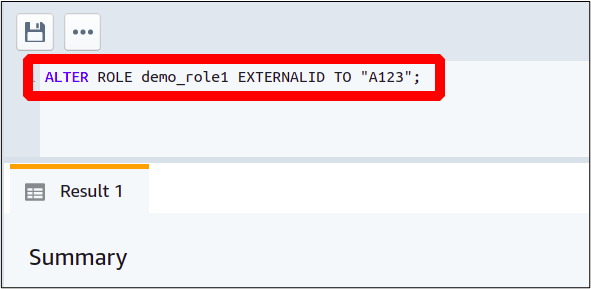
We can manage the identity provider attached to any specific role by executing the following query in the Redshift cluster.
EXTERNALID TO <“ID of Identity Provider”>
So this is how you can change the external ID associated with a Redshift role in an Amazon Redshift cluster.
Conclusion
Any role in Redshift can be updated or altered using the ALTER ROLE command, which is actually a built-in SQL command provided by Redshift. The ALTER ROLE command in Redshift can be used to change a role name, make any user the owner of that role, or update the external ID of an identity provider associated with that specific role. You will find this command very helpful if you are able to successfully learn and utilize it.


