In this article, we will briefly discuss recovering stashed uncommitted changes.
How to Recover Stashed Uncommitted Changes?
To recover stashed uncommitted changes, follow the below steps:
- Move to the Git particular repository.
- Make and track new text file.
- Commit added changes to the repository for saving purposes.
- Open and update the existing text file.
- Generate a stash to hold the changes temporarily.
- Use the “$ git stash pop” command for recovering stashed uncommitted changes.
Let’s check the implementation of the given scenario!
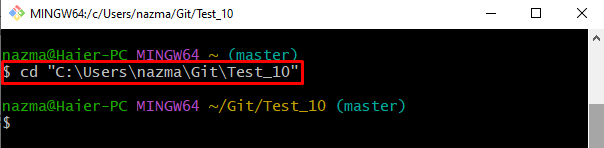
Step 1: Go to Git Repository
Run the “cd” command with the desired repository path and navigate to it:
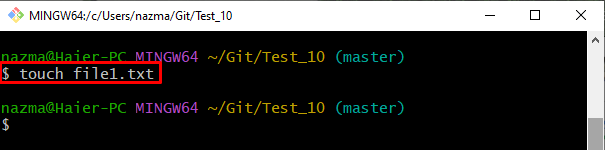
Step 2: Generate New File
To make a new text file, use the “touch” command and specify the new file name:
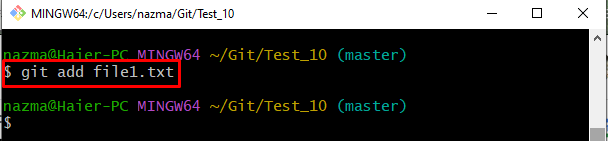
Step 3: Track Generated Files
Next, add the file to the staging index by executing the provided command:
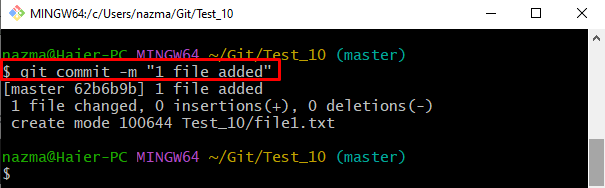
Step 4: Commit Changes
Next, save all added changes into the repository through the “git commit” command along with the commit message by using the “-m” option:
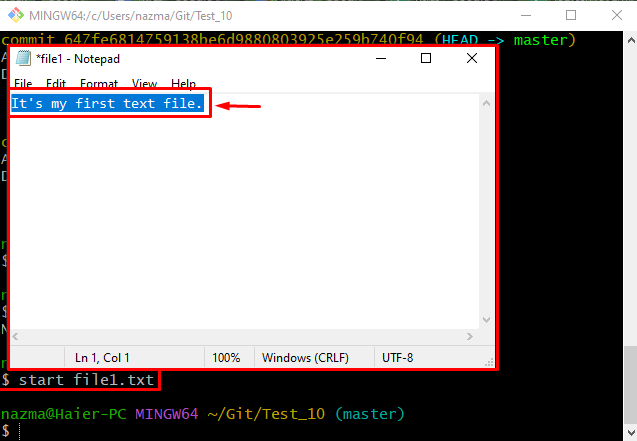
Step 5: Update Existing File
Now, run the ”start” command to update the existing file:
After executing the above-stated command, the file will be open with a default text editor, add changes, save, and close the file:
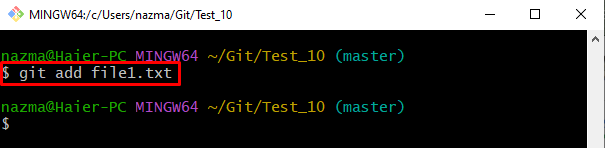
Step 6: Add Modification Into Staging Area
Then, add all the added changes into the staging area by utilizing the “git add” command:
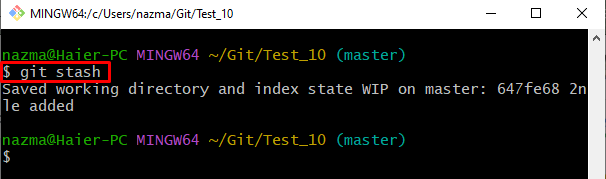
Step 7: Temporarily Save Changes
Next, save the working directory and index temporarily by running the “git stash” command:
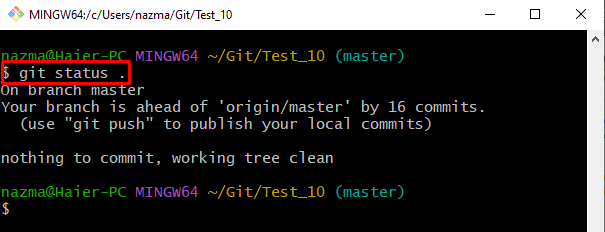
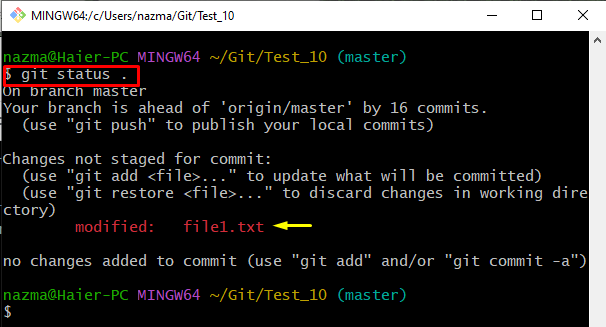
Step 8: View Repository Status
Now, execute the “git status .” command to check the current repository status:
Step 9: Recover Stashed Uncommitted Changes
Finally, to recover the stashed uncommitted changes, run the “git stash pop” command:
As you can see, the modified “file1.txt” file is recovered successfully:

Step 10: Verify Recovered Uncommitted Changes
Lastly, check the repository’s current status to ensure the recovered uncommitted changes:
We have provided the easiest way to recover stashed uncommitted changes.
Conclusion
To recover stashed uncommitted changes, go to Git particular repository. Generate and add a new text file. Then, commit to the repository for saving purposes. Next, update the existing file and add changes to the staging. Generate a stash to hold the changes temporarily. Finally, run the “$ git stash pop” command to recover stashed uncommitted changes. This article explained the procedure of recovering stashed uncommitted changes.