
Photorec
PhotoRec is a recovery tool that can recover deleted files such as video, documents, and archives from hard disks, CD-ROMs, and the memory of digital cameras. In fact, PhotoRec can be used in conjunction with hard disks, CD-ROMs, memory cards (CompactFlash, Memory Stick, Secure Digital/SD, SmartMedia, Microdrive, MMC, etc.), USB memory drives, DD raw image, EnCase E01 image, etc. PhotoRec will retrieve your lost files even if the file system has been damaged or even reformatted. However, you must be careful not to overwrite the deleted files, and for this, you must refrain from writing anything to the disk.
Photorec is a free and open-source tool that is available for DOS/Windows 9x, Windows 10/8.1/8/7/Vista/XP, Windows Server 2016/2012/2008/2003, Linux, FreeBSD, NetBSD, OpenBSD, Sun Solaris and Mac OS X.
PhotoRec can recover from the following: FAT, NTFS, exFAT, ext2/ext3/ext4 filesystem, and HFS+. Further, it can recover ZIP, Office, PDF, HTML, JPEG files and various other graphics file formats. In fact, it can recover over 480 file extensions.
Installing and using Testdisk/Photorec
Photorec is a part of Testdisk. You can download Testdisk from https://www.cgsecurity.org/wiki/TestDisk_Download and manually install it. However, you can also download it from the repository.
sudo photorec
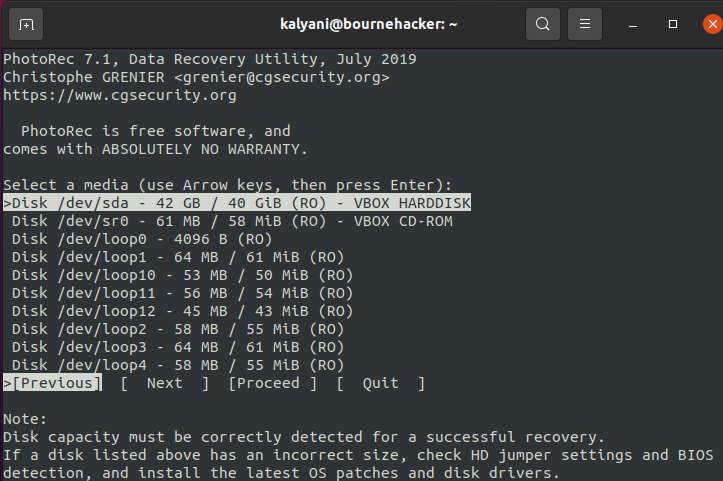
You do need root permission to run photorec. When you first type “sudo photorec”, you’ll be greeted with a page containing details about the available media. You can use the up/down arrow keys to navigate the page, and once you have made your selection, choose “Proceed”, and hit enter.
Once you’ve selected your media, you’ll get to choose the source partition.
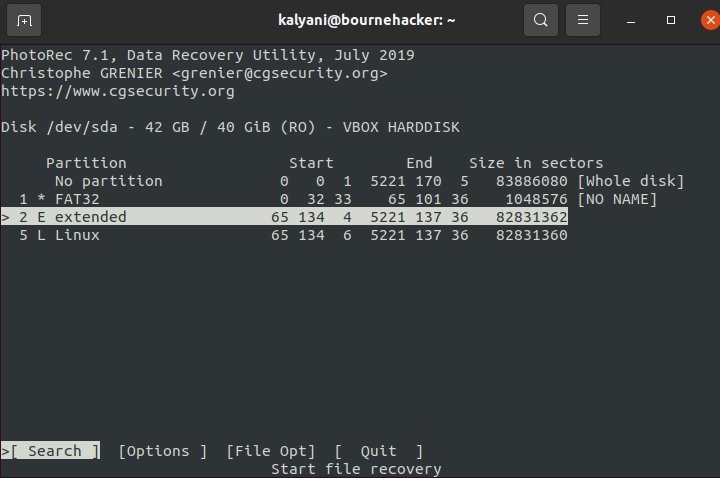
Here, you can select the partition on which the lost file is located in the source partition selection section. Further, you can choose “Options” to alter the search options and “File Opt” can be used to select the type of files that you want to recover. In fact, the “File Opt” option contains over 480 extensions. Once you have selected the partition you want, settle on “Search” and hit enter.
Once the partition selection has been made, you need to select the filesystem type. The author of the tool states that if it’s a ext2/ext3/ext4 filesystem, then choose that, else choose “other”.
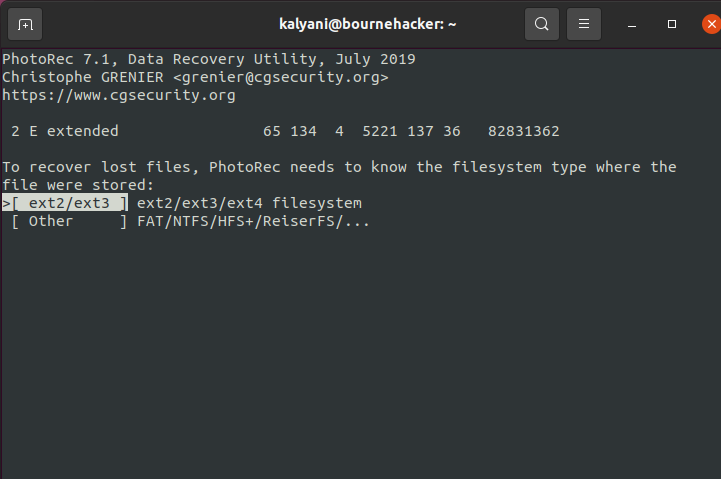
In my case, it’s a Linux filesystem, so I’ll choose the [ext2/ext3] filesystem.
Next, you can select where you want the recovered files to be saved. If you’re saving to an external disk, it may be available via the /media, /mnt or /run/media directories. It is suggested to mount the drive if you want to. The author of the tool has put in two warnings (https://www.cgsecurity.org/testdisk.pdf):
— WARNING: The recovered files should not be stored on the source filesystem. The deleted files may be overwritten and, therefore, definitely lost if you do so.
— WARNING: Do not choose a FAT32 filesystem to save in as it cannot handle files above 4GB in size.

When you have selected the correct destination, press the “C” key.

It will then recover the files and save them to the specified destination.
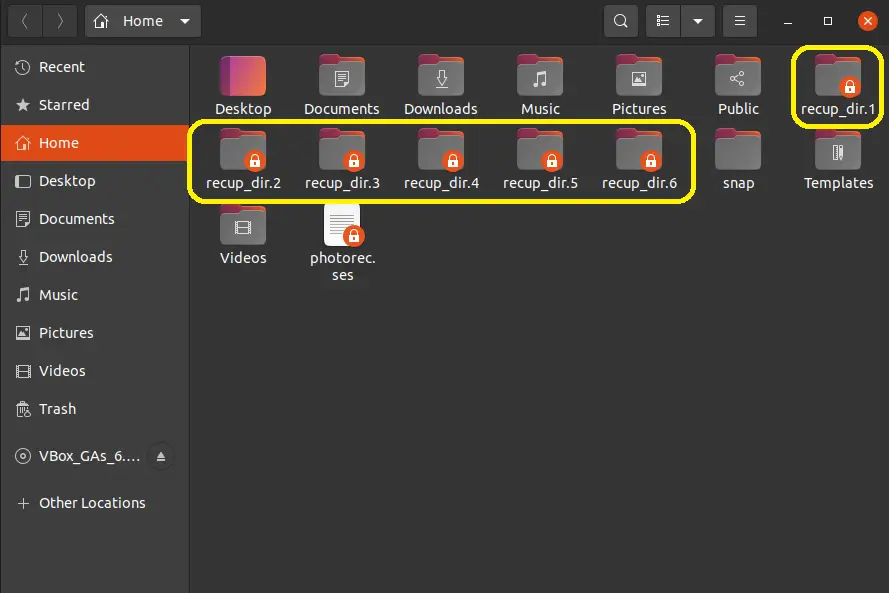
All the recovered files will be dumped in sub-directories labeled recup_dir* (recup_dir.1, recup_dir.2, etc.). Please note that if you happen to interrupt the recovery process, the next time you start up photorec, it will ask you if you wish to continue where you left off.
The file names within the sub-directories are such that they begin with a letter and are followed by 7 or more digits and finally ends with an extension. The files are labeled as follows:
b=broken
t=jpeg embedded thumnail
So a file could be labeled as f1234567.txt (for example). The seven-digit number is calculated by the computer (file location minus the partition offset divided by the sector size). Further, each folder contains 500 files at most (a new sub-directory is created when there is no more space in a single sub-directory).
Although there are many advantages to using PhotoRec, such as recovery from damaged file systems and reformatted systems, there is one disadvantage. Personally, I didn’t find it easy to sift through the files it found. It cannot specifically find a single isolated file. Rather it just recovers everything with the extensions that you specify and lists it out without name tags. This means that the original name of the file is not kept, and it retrieves a lot of files. So sifting through each one to find one particular file is gruesome! All files are renamed, and so in order to find the file you want, you must sift through all of them, and in my case, I think it found files in the 4 or 5 digits (ex: 5000 files), so sifting through them is not realistic manually anyways. Ok, granted that there will be thumbnails for jpegs and other graphics, I still think that the renaming of the files and the massive number of files found makes it hard to find that one file we deleted.
We’ve all gaffed at one point or another, whether using the rm command to remove an important file or emptying the trash can and permanently deleting the files contained within. We’ve then searched everywhere for file recovery tools, and for Linux, there are a whole bunch of them. Some of them are GUI, and others are not. Either way, the point is that there are plenty of tools for file recovery, and one of them is PhotoRec by Testdisk. PhotoRec can recover files from damaged and/or reformatted systems. Further, it can recover deleted files from various media, including digital cameras, CD-ROMSs and USB keys (amongst others). The process is rather simple if you can properly navigate through the displayed pages.
Happy Coding!