Asciinema is a free and open source command line utility that can be used to record terminal sessions in Linux distributions. It can capture commands and their output in high quality, and produces crisp and clear text, better than other screen recording and screencasting tools used to capture an entire desktop session.
Main Features of Asciinema
In addition to recording text output visible in a terminal emulator, Asciinema can append an ongoing recording session to a previously recorded output as well, allowing users to create a continuous stream from multiple casts.
Output captured by Asciinema can be played back anytime on your Linux installation. You can also upload the captured output on Asciinema website and share it with others. If you have a website or web app, you can embed the captured output and play it in a web browser or web app container.
Do note that captured output is not rendered in video formats like mp4 and webm. It is rendered in a custom format called “asciicast” and can be played by Asciinema only. A Javascript based player to playback captured asciicast output in web browsers is available on Asciinema website.
Installing Asciinema in Linux
You can install Asciinema in latest version of Ubuntu by running the command below:
You can also install it using the pip package manager in Ubuntu and other Linux distributions. To do so, run the following two commands in Ubuntu:
$ pip3 install asciinema
More packages and further distribution specific installation instructions are available here.
Using Asciinema in Linux
To start recording terminal output, run Asciinema command in the following format:
Asciinema will start recording shell output as soon as you run the command. It will show you a message in terminal, as shown in the screenshot below:
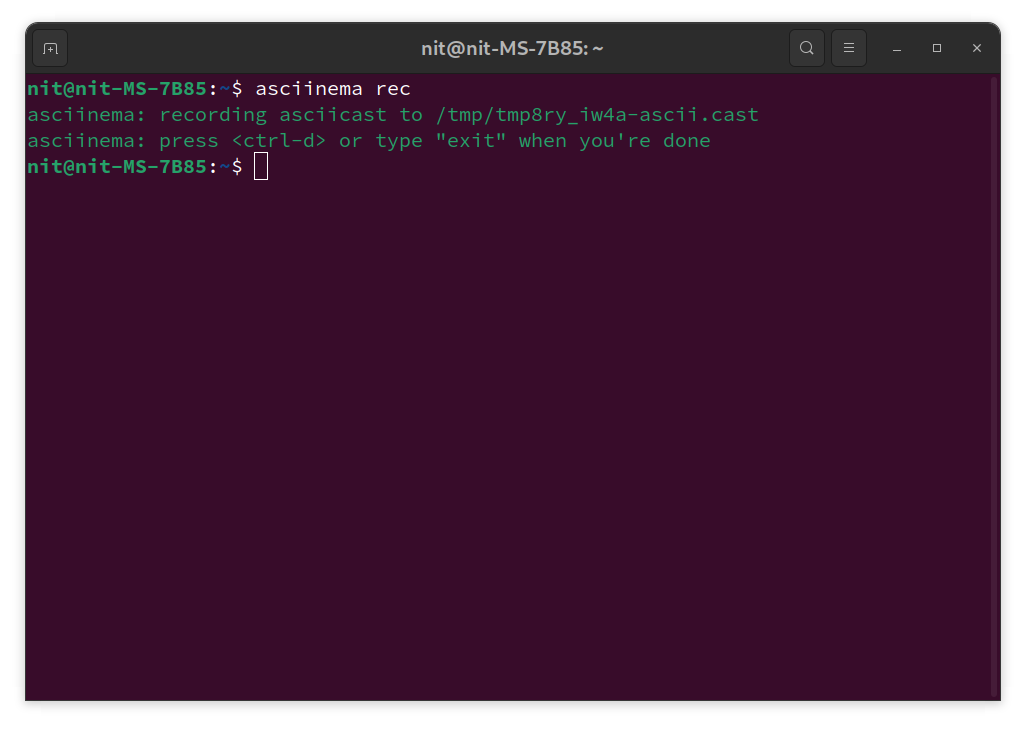
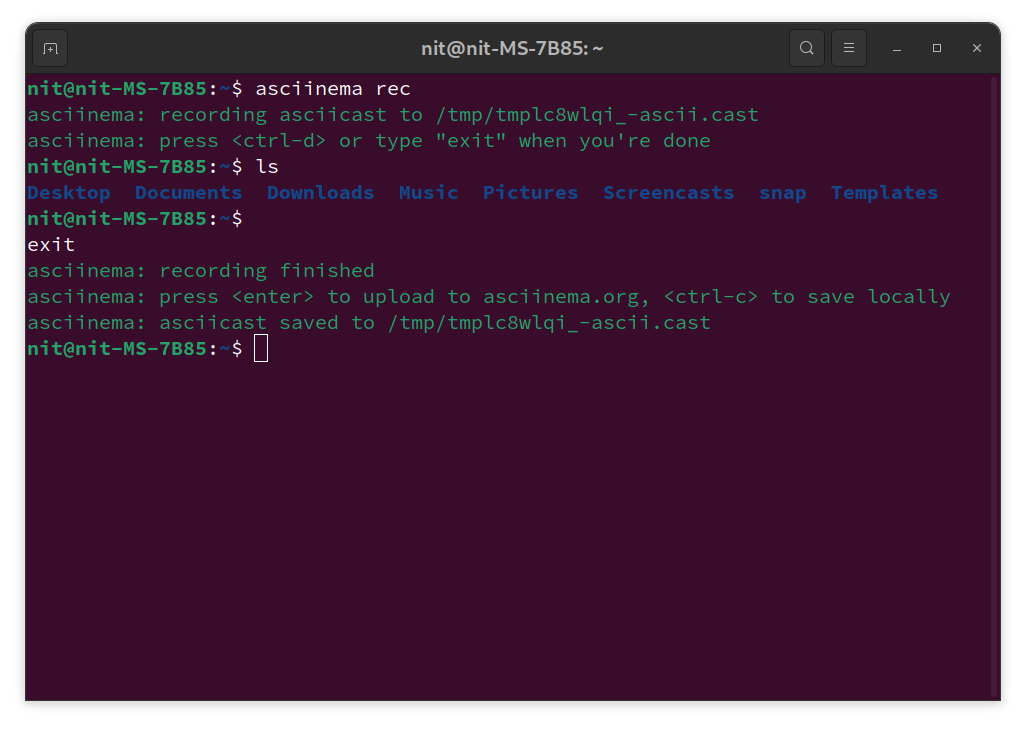
As you can see in the output above, Asciinema has started recording an asciicast which will be stored in the “/tmp” folder once recording is finished. Anything you type or run in the terminal once the recording has started, will be captured and saved into a “.cast” file. The recording can be stopped by pressing the <Ctrl+D> key or by typing “exit” command.
After you have stopped the ongoing recording, you will be prompted to save it on your local hard drive or upload it on the official Asciinema website. You can hit <Enter> key to upload captured asciicast online or you can press <Ctrl+C> keyboard shortcut to save it on local disk (as shown in the screenshot below):
By default Asciinema saves captured output to the “tmp” folder. To save an asciicast to a custom location on a local storage disk without uploading it online, supply a file path to the “rec” command. Here is an example command:

To manually upload a captured asciicast on Asciinema website, run a command in the following format (replace file path as needed):
To add a new recording to an existing asciicast, use “append” command in following the format (a new recording session will start and output will be appended to supplied “.cast” file):
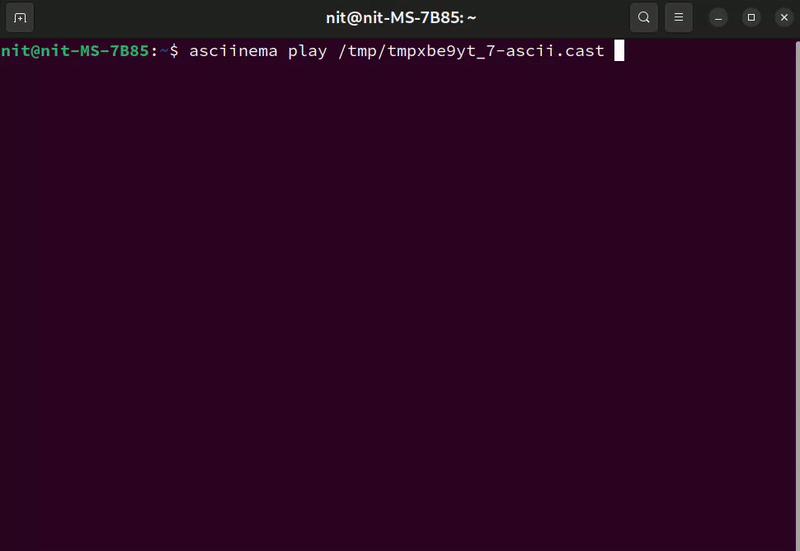
Once you have a “.cast” file captured, you can play it back using the following command (replace file path as needed):
Here is a small demo showing Asciinema asciicast in action:
Note that this a downscaled GIF animation, it doesn’t show captured output in its full quality in high definition. You have to play the “.cast” file yourself on your Linux distribution to watch it in full quality or you have to embed the captured output in a website and then play it back using Asciinema Javascript library. You can also view an asciicast in high quality after uploading it on Asciinema website.
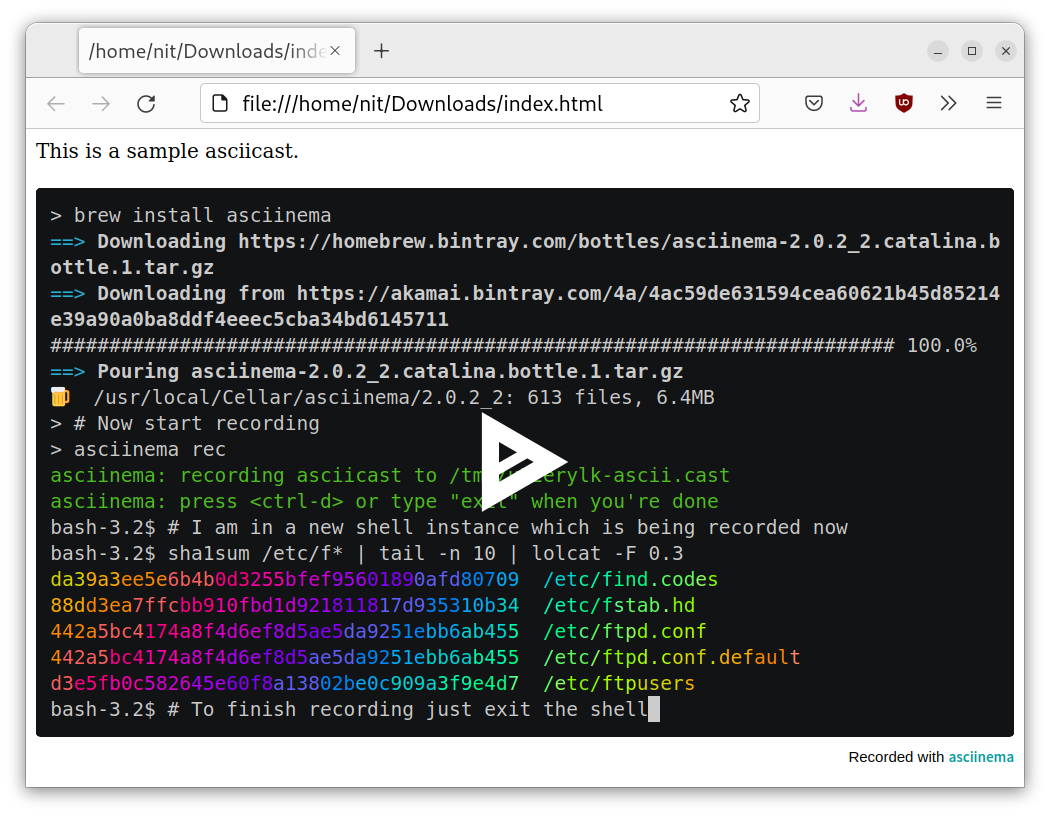
Here is a high definition asciicast sample that you can watch in a web browser by visiting the official Asciinema website.
For more information on Asciinema command line utility, run the following two commands:
$ asciinema –help
You can also browse official documentation online from here.
Embedding Asciicast on Your Own Website or Web Application
If you just want to share a captured session online and don’t have your own website or web application, the best method is to upload it online on official Asciinema website using the commands explained above and then share the URL link with others.
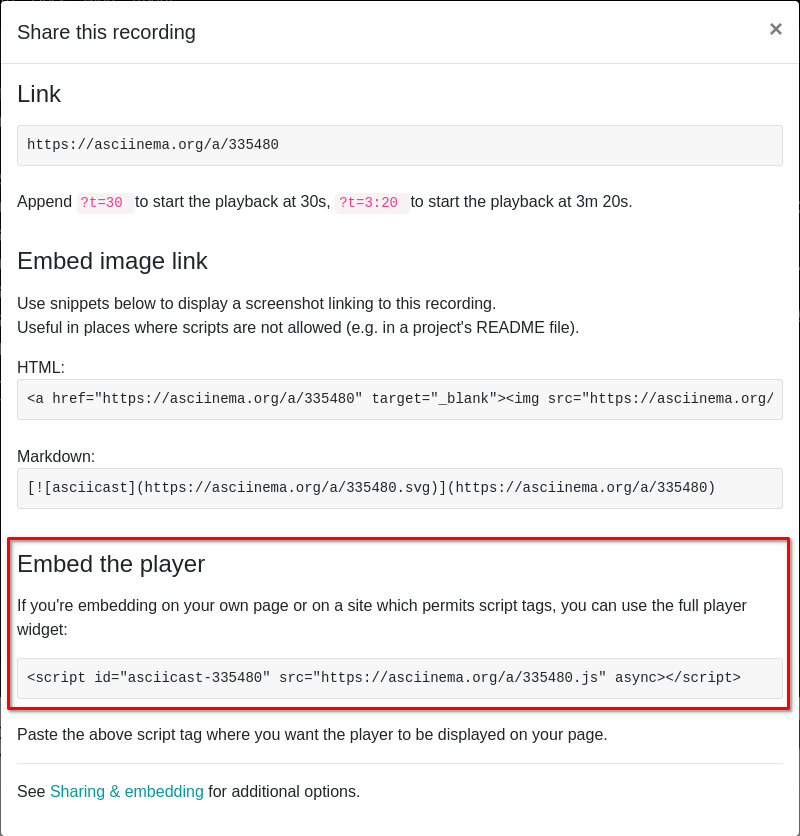
To embed an asciicast in your own website or web application, you will need to add the Asciinema player script to your html file by visiting the page where your asciicast has been uploaded online. For instance, to embed the Asciinema sample linked above, click on the “Share” button on the asciicast webpage to get the embed code. Here is an screenshot showing this:
If a very simple html file contains the following code:
You will see embedded player in your web page like this:
Conclusion
Asciinema provides a method to capture text based output in high quality. Unlike other video recording and capture methods, Aciinema saves raw data from a captured session into a text file and plays it back bit by bit. This produces crisp and clear text as if you have been running the commands and getting the text output on your own hardware in real time.