
In the present era, the lives of the people have undergone a huge change from what it used to be a couple of years back. In the educational sector, books have fallen down the pecking order, and people now prefer watching videos explaining the concepts of their syllabus. A great example of this is YouTube, where videos on things like programming languages, economics, political science, and even geography are getting many viewers. The business sector has also gone through some innovation as now people can easily keep a record of important voice calls and conferences that might be needed for looking at the main highlights of the meeting. Even recording presentations and then sharing them with your clients or bosses have become the norm as this allows information to be passed from one to another in a much more efficient manner. All of these are just a few examples of why screen recorders are one of the most useful tools out there. Screen recorders can even be used for recording content that many people may find enjoyable, such as recording a game that might be on the rise in popularity or put up videos to explain any issues or problems that you might come across in your life, like checking to see how one can remove and adjust tires from a car. Hence, our discussion topic in this article is to look at how one can record their screens in Ubuntu using its default built-in screen recorder.
Tool to Use in Recording your Screen?
Linux has always been known for having a large set of tools available with similar functionalities, and the same is the case with the screen recording. There are several excellent applications that allow users to record their screens and play with them as much as they want. Kazam, OBS Studio, SimpleScreenRecorder, etc., are just a few examples of screen recorders that offer dozens of excellent features and are good choices to consider. However, rather than switching to installing applications, Ubuntu has a very excellent built-in screen recorder that comes preinstalled with it. It requires no application, no command-line option for running it, and has no long hassle of activating it. This easy to use and simplistic nature makes it a great alternative to have for screen recording and is worth looking at.
Packages to Install (Optional)
Before we move onto the process of using Ubuntu’s default screen recorder, there is one step that you can follow, which is completely optional but will help you later on if you are dissatisfied with the initial settings of the default screen recorder of Ubuntu.
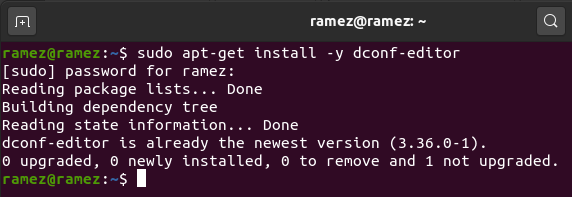
To change the settings of Ubuntu, Dconf Editor is a graphical editor that allows you to tweak the parameters of your Ubuntu system. It is an extremely powerful editor that provides several functions to users that allow them to change the configuration settings of your system and provide a back-end to the applications settings API called Gsettings. Dconf Editor does not come preinstalled with the latest versions of Ubuntu, so to install it, run the following command into the terminal:
Recording your Screen

The process of recording your screen in Ubuntu using the default screen recorder is extremely easy. There is neither a shortcut for running the application nor any hidden application available. Rather, you can simply run the recorder by pressing the keyboard keys Ctrl + Alt + Shift + R. You will be able to see if the recording has started from the orange dot that will appear on the top of your screen in the tray area.
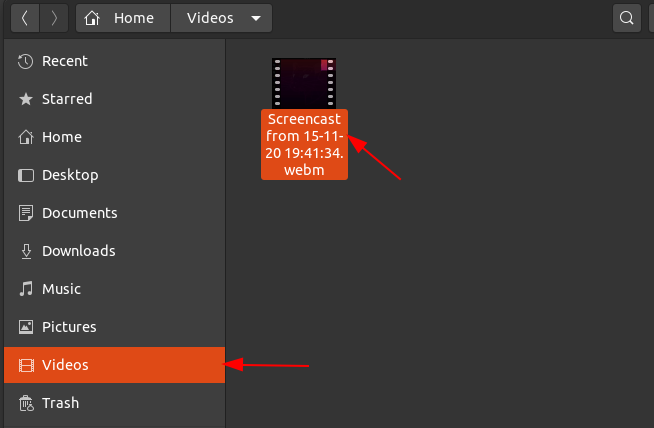
The duration of the recording, however, will only be active for thirty seconds (the 30s), and after that, it will automatically end. You can also manually stop the recording by once again pressing the keys Ctrl + Alt + Shift + R. The recordings from the screen recorder will automatically appear inside the Videos folder inside your Home folder once it ends. The recording will be saved in the webm file format, and that is the only format it supports. Default media player that comes preinstalled with Ubuntu does indeed support the webm file format.
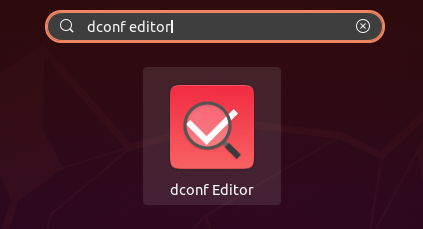
The duration limit, however, is extremely small and not useful for making presentations or tutorials. To change this, open your Dash, where all your applications are installed, and write dconf editor in the search bar. When it appears, simply click on it to open it.
The editor will start by opening the following window:
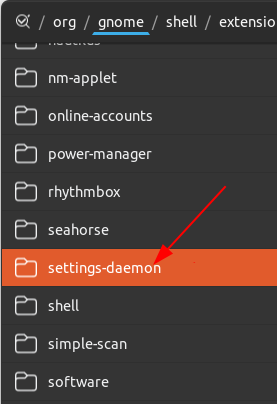
Click on the gnome button at the top and then move the cursor down to the settings-daemon option and click on it.

Gnome Button:
Settings-daemon:
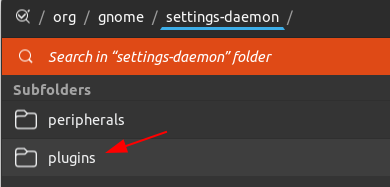
Next, click on plugins.
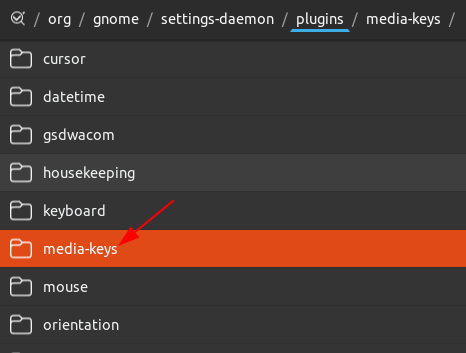
Now, inside the plugins menu, look for the media-keys option and click on it.
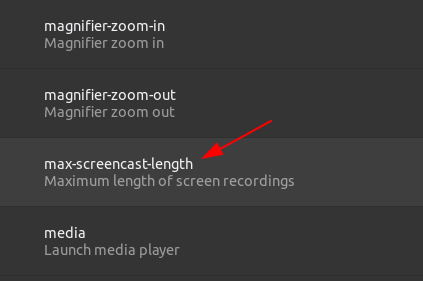
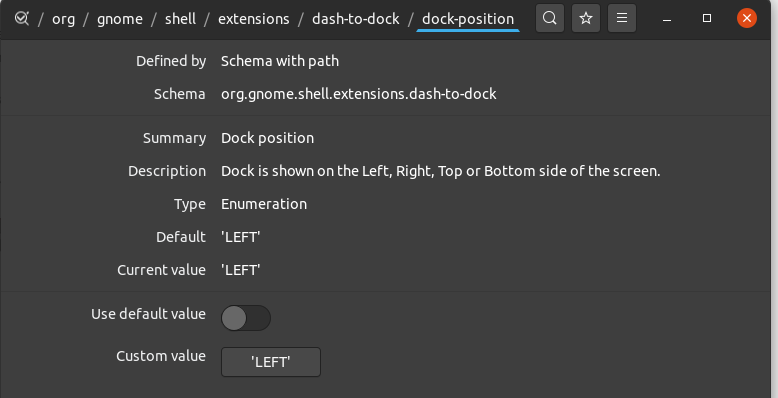
Scroll downwards till you find the max-screencast-length and click on it.
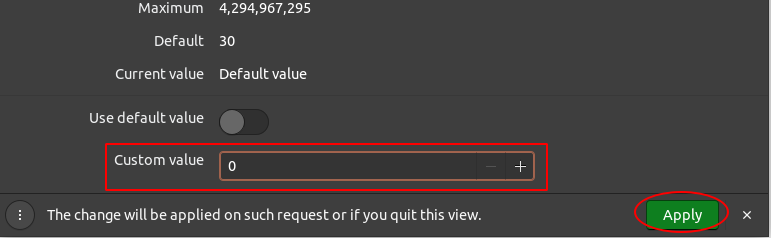
To change the duration size of your screen recorder, uncheck the default value button and then enter the value of the duration you want the recording to go to inside the text field next to the Customs value label. For having a recording with no time limit, simply enter 0. Click on the Apply button to make this change permanent, as seen in the circled area below.
For users more comfortable with the command line, you can also change the screen recording duration limit by entering the following command into the terminal:
max-screencast-length Length
Length here refers to the duration limit of the recorder you want to set.

So, Why Record your Screen?
Recently, it has become popular among people to record their screens for their presentations, educational videos, and even gaming walkthroughs. For people that prefer simple to use screen recorder and do not want to get into the hassle of installing a new one, Ubuntu’s default screen recorder is an excellent alternative to have.