Does that mean we can’t store ordinary data on RAM? Well, we actually can. If you don’t care about your data being lost, then you can use RAM as disk. Which is called RAMDISK. This solution is very effective if your computer has backup power supply that can keep your computer running for a long time even when the power goes off.
There is actually a way to use RAMDISK to store files permanently. Let’s say you have a 4 GB RAMDISK setup. You can store and access files here very fast. Of course, this is temporary storage. To fix that problem, we can use a hard drive and sync all the files and directories of our RAMDISK automatically with specific backup softwares. Even though hard drive is slow, and it may take a while to sync a hard drive with a RAMDISK, at least the data will be stored permanently. So when you shutdown your computer, RAMDISK will be erased. When you start your computer again, all the data will be copied from your hard drive to your RAMDISK. This process will be slow. But after the data is copied, you can again access the data very fast. So basically RAMDISK is used as a cache here.
In this article, I will show you how to create and use RAMDISK on Ubuntu 18.04 LTS. To watch a video of this process see video below:
Creating a RAMDISK:
Creating a RAMDISK on Ubuntu 18.04 LTS is really easy. All the tools required is already pre-installed on Ubuntu 18.04 LTS.
First create a mount point where you will be mounting the RAMDISK with the following command:
Now you can mount the RAMDISK to the /mnt/ramdisk mount point with the following command:
NOTE: Here, size=2G means, the RAMDISK will be 2 GB in size. To create RAMDISK of several MB, use M. For example, to create 256 MB RAMDISK, put size=256M
Now to verify whether the RAMDISK is created, run the following command:
As you can see, the RAMDISK is created and mounted on /mnt/ramdisk as expected.
You can use the RAMDISK as you use ordinary hard drive partitions. As you can see from the screenshot below, I copied several files and directories into the RAMDISK. I can even edit text files directly from RAMDISK.
To unmount the RAMDISK, run the following command:
WARNING: All the files in your RAMDISK will be lost.
Mounting RAMDISK Automatically on System Boot:
You can use the /etc/fstab file to automatically mount the RAMDISK on system boot.
First, make a backup of /etc/fstab file with the following command:
A copy of the file /etc/fstab is saved to /etc/fstab.backup. Now If anything goes wrong on the way, you can just restore the /etc/fstab file.
Now open /etc/fstab file with the following command:
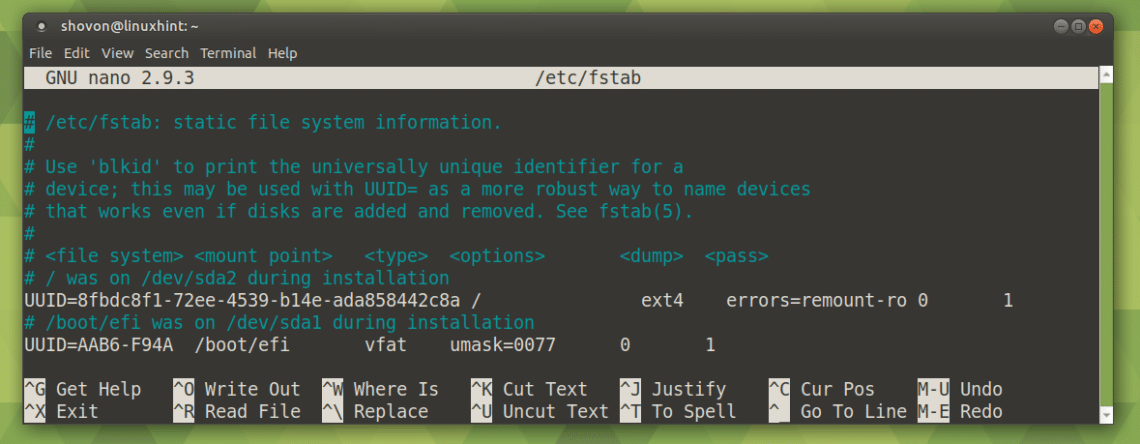
/etc/fstab file should be opened.
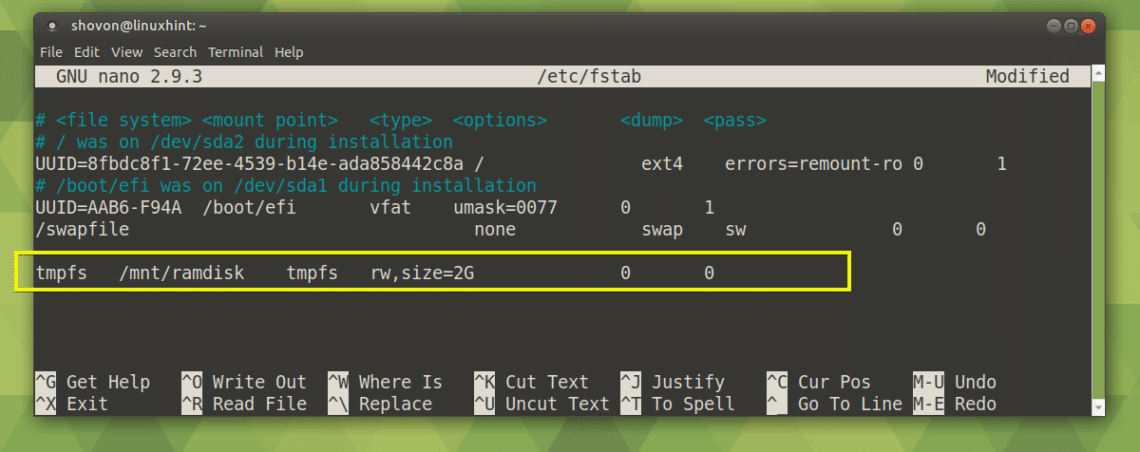
Now go to the end of the file and add the following line:
NOTE: Here size=2G means, the size of the RAMDISK will be 2 GB. To specify the size in MB, use M instead of G.
Now press <Ctrl> + x and then press y and then press <Enter> to save the file.
Now reboot your computer with the following command:
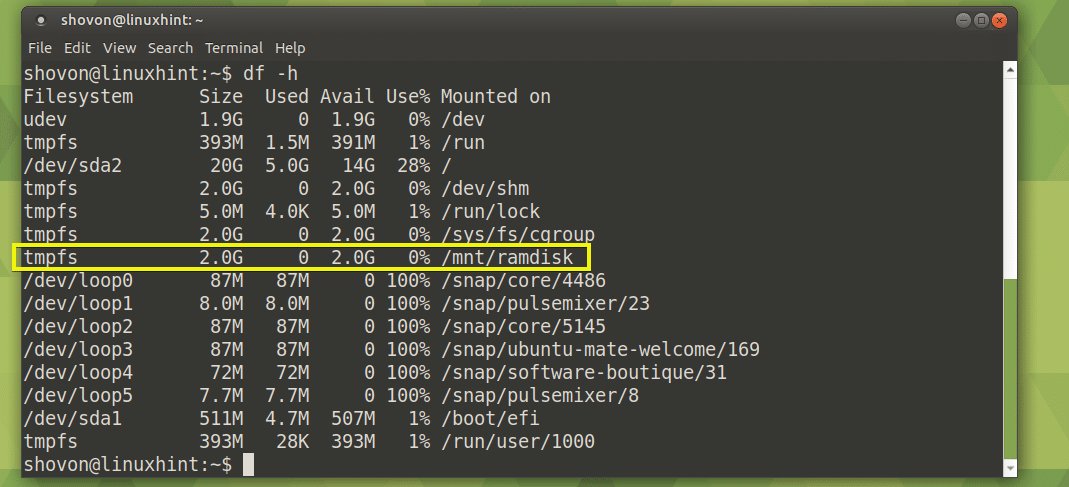
The RAMDISK should be mounted as you can see from the marked section of the screenshot below.
Persisting RAMDISK Data:
In this section, I will show you how to save RAMDISK data to hard drive on system shutdown and load data from hard drive to RAMDISK on system boot.
For this to work, the directory where the RAMDISK will be mounted and where the backup data will be saved must have the same file permission set. I will show you an easy trick. Stay tuned.
First create a directory where RAMDISK data will be saved on system shutdown with the following command:
If you’ve followed this article from the start, then the RAMDISK should be mounted on /mnt/ramdisk
Now create a system service file with the following command:
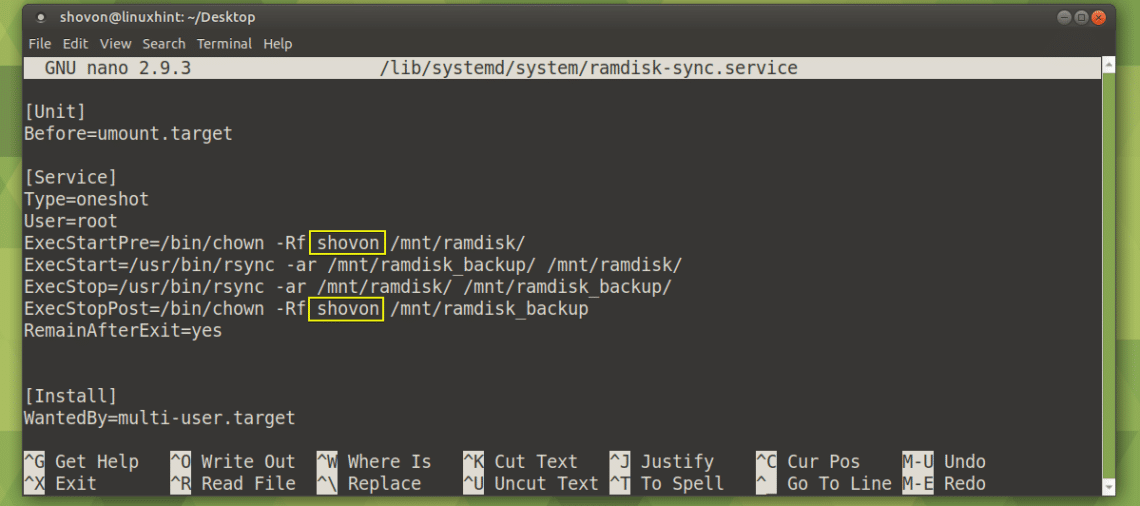
Now type in the following lines and replace shovon as marked in the screenshot below with your login username. Don’t forget this step as it won’t work otherwise. Now save the file.
Now enable the ramdisk-sync service with the following command:
The ramdisk-sync service is enabled. Now it will start automatically on system boot.
Now reboot your computer with the following command:
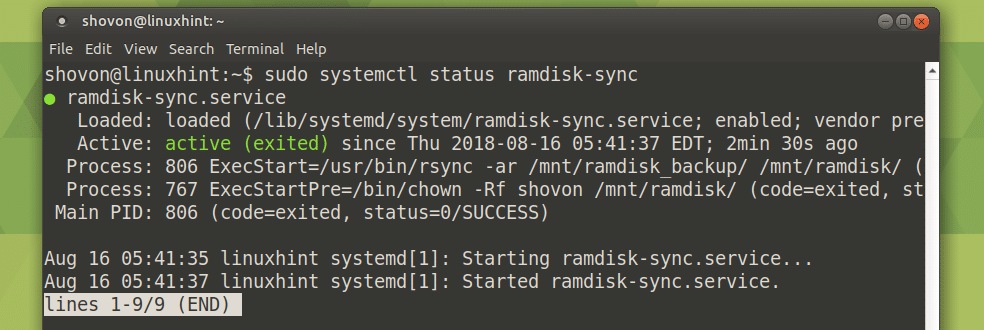
Once your computer starts, check whether the ramdisk-sync service is running with the following command:
As you can see, the service is running correctly.
As you can see, both the /mnt/ramdisk and /mnt/ramdisk_backup directories are empty.
Now I am going to copy some files to /mnt/ramdisk RAMDISK.
Now reboot your computer.
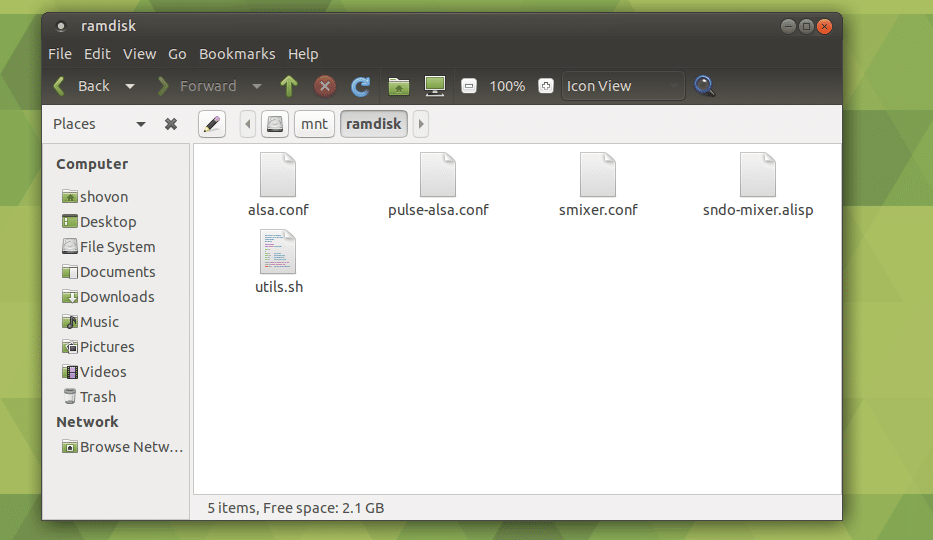
As you can see, once my computer boots, the files are available in my RAMDISK /mnt/ramdisk
Also the /mnt/ramdisk and /mnt/ramdisk_backup contains the same files.
That’s how you create and use RAMDISK on Ubuntu 18.04 LTS. Thanks for reading this article.


