Example: Quickly Set up GitHub SSH
To quickly set up GitHub SSH, at first, we will create a new repository on GitHub, then launch the Git Bash terminal and generate the SSH key using the “$ SSH key-gen” command. Next, execute the “$ ssh-add ~/.ssh/id_rsa” command to launch the SSH agent, then add it to the agent, and copy it. Then, move to the “GitHub” account settings and add to it. Lastly, test the SSH-built connection to GitHub by using the “$ ssh -T [email protected]” command.
Let’s try out the above procedure on your system by following the provided steps!
Step 1: Create Repository
Go to the GitHub hosting service, hit the “+” icon to open up the drop-down menu, and click on the “New repository” option:

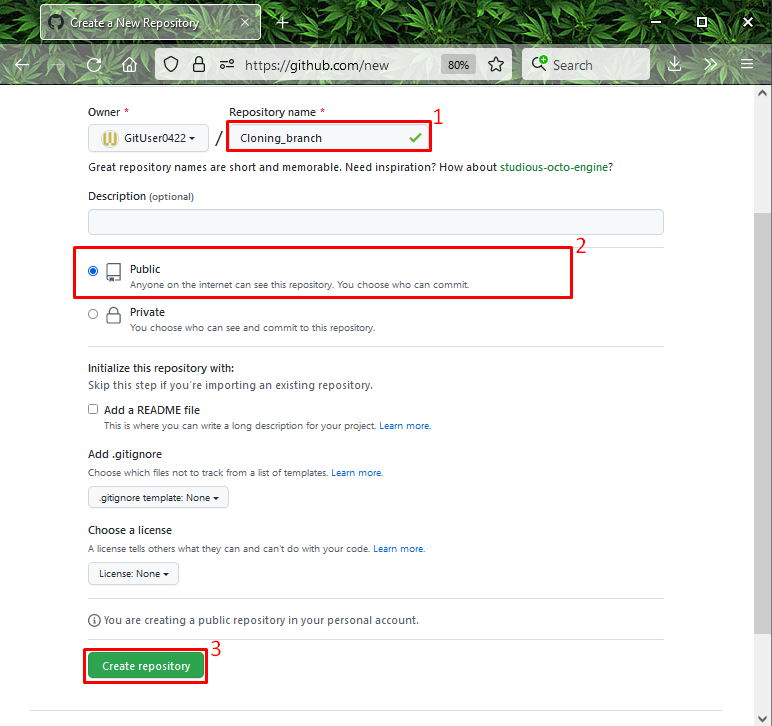
Enter a descriptive repository name, mark the “Public” option to permit everyone to see it, and click on the “Create repository” button:
Step 2: Open Git Bash
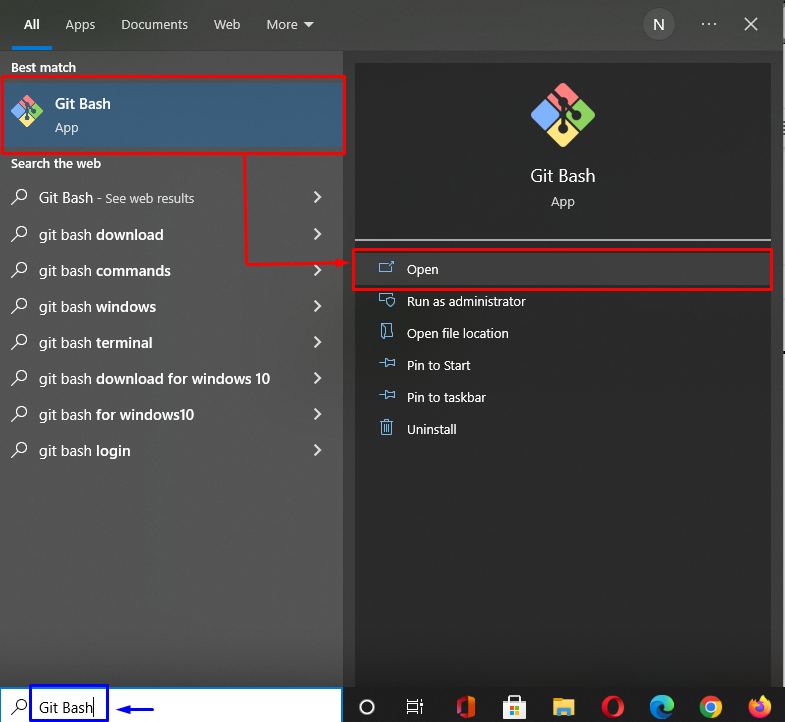
Next, search and open the “Git Bash” terminal with the help of the “Startup” menu:
Step 3: Generate SSH key
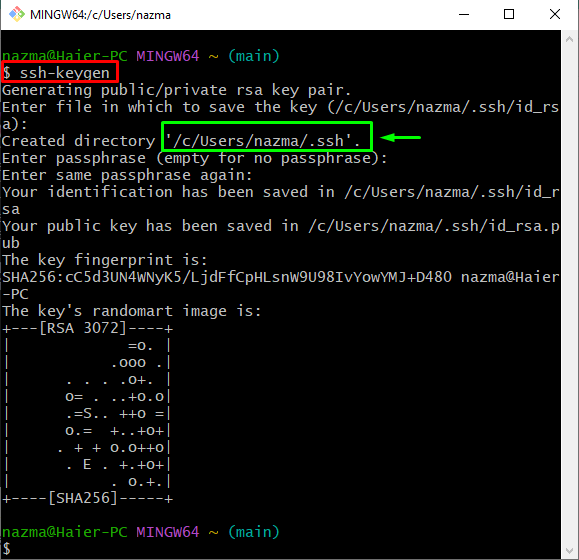
Now, to generate the SSH key pair (public-private), run the below-given command:
As a result of the above-provided command, you will be asked to enter the file in which you like to save the key pair(public-private). For instance, we will go with the default directory option:
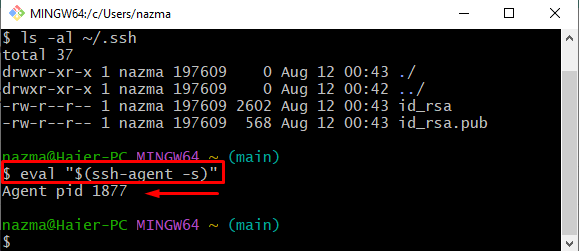
Step 4: Verify SSH keys
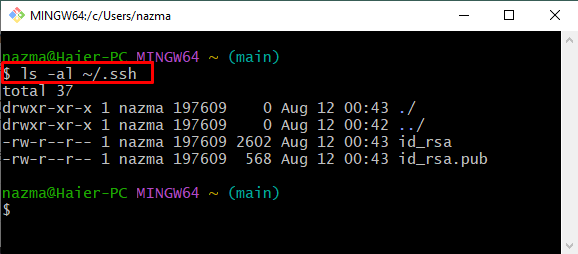
Then, verify if the SSH keys are generated and saved into specified files:
Here, “id_rsa” will keep the private key, and “id_rsa.pub” stores the generated public key:
Step 5: Launch SSH Agent
Run the below-mentioned command to launch the SSH agent:
The below-given output shows that the agent is activated as a background process with “1887” process id or (pid):
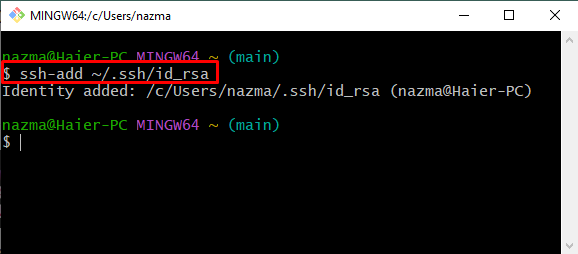
Step 6: Add SSH key to SSH Agent
Now, add the SSH key to the SSH agent by utilizing the following command:
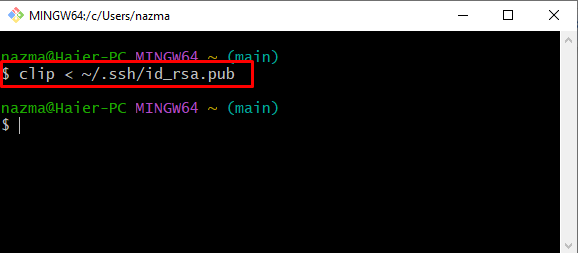
Step 7: Copy Public Key
Execute the below command to copy the above generated public key to the clipboard for later use:
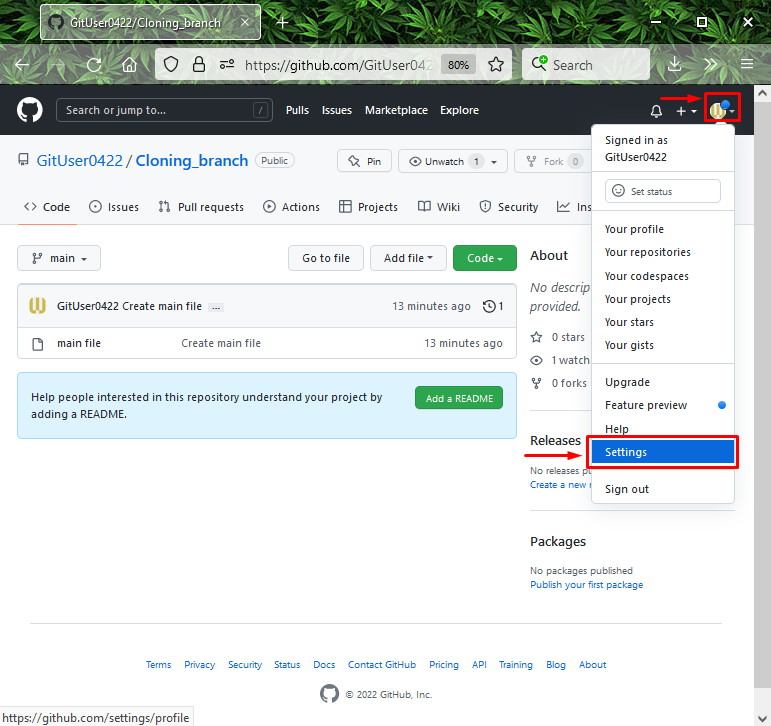
Step 8: Open Remote Repo Settings
Switch to GitHub, press the “Profile” icon, and select the “Settings” option from the appeared menu:
Step 9: Add SSH key
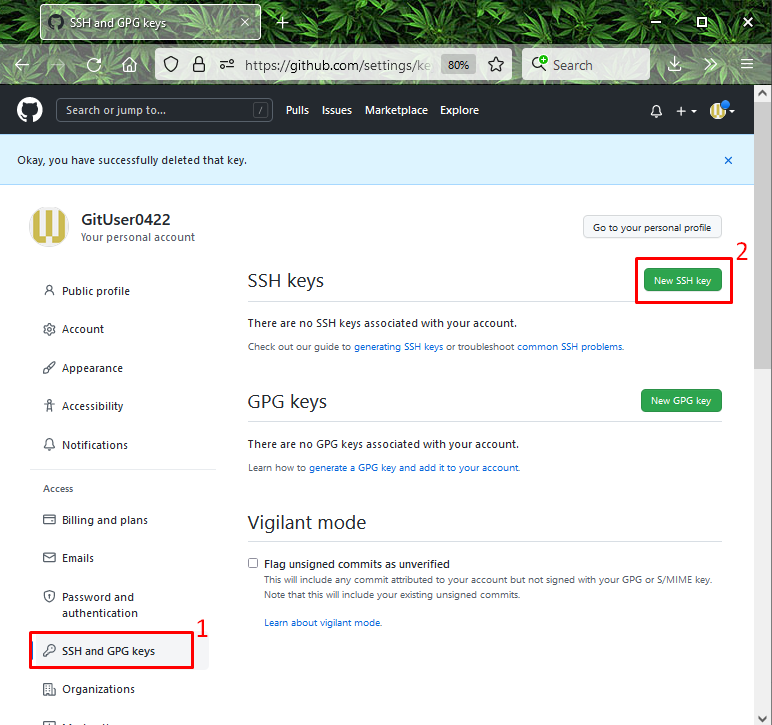
Next, hit the below highlighted option from the left side menu and click on the “New SSH key” button:
Step 10: Add SSH key
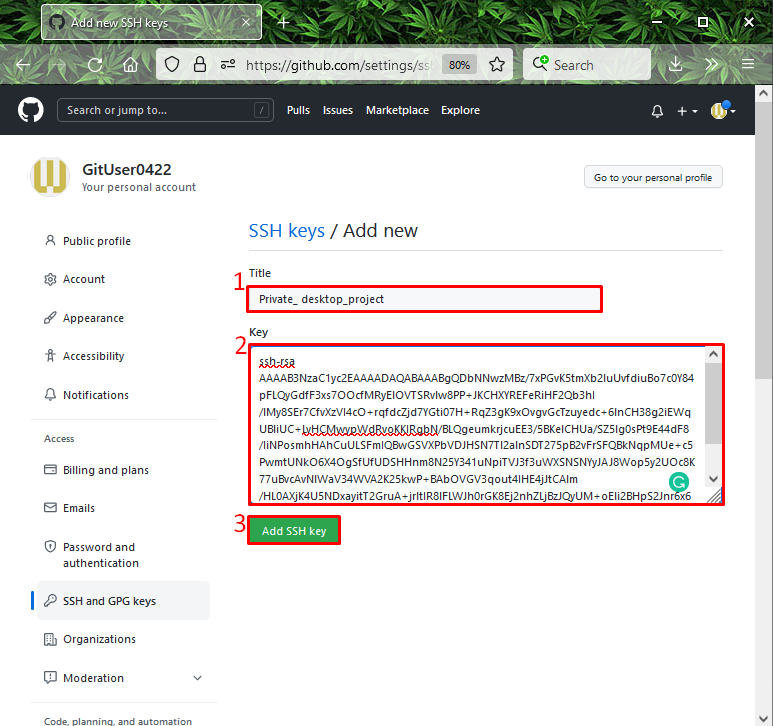
Add the title for the key in the required field, paste the Public copied key in the “key” field, and click on the “Add SSH key” button:
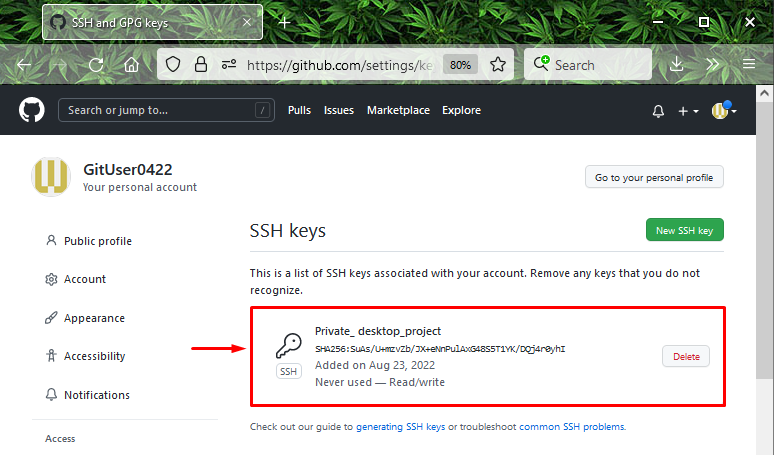
In the below images, our Public SSH key is added successfully:
Step 11: Test SSH Connection to GitHub
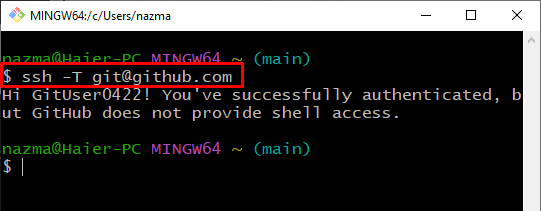
Lastly, execute the provided command to verify if the SSH connection is established with GitHub:
It can be seen that we have successfully authenticated:
This study led you to how to set up GitHub SSH quickly.
Conclusion
To quickly set up GitHub SSH, first, make a new repo on GitHub, launch the Git terminal, and run the “$ SSH key-gen” command to generate the key pair. Next, open up the SSH agent, execute the “$ ssh-add ~/.ssh/id_rsa”, add it into the agent, and copy it. After that, open up the GitHub account settings, and add the SSH key. Lastly, execute the “$ ssh -T [email protected]” command to test the SSH-built connection to GitHub. This manual has elaborated on how to set up GitHub SSH quickly.