
Install the Default OpenJDK
The first thing before installing Java is to update your Ubuntu environment via the “apt” instruction with the “update” option. We utilize the “Apt” package of Ubuntu within the install instruction followed by the “default-jdk” keyword. This command should be executed with the sudo rights, and the password of the currently logged-in user should be added upon prompt.

After a while, you will be asked to confirm the installation of the default JDK on Ubuntu as it will acquire 117 MB of your Ubuntu system space.

Wait for the completion of the default JDK installation for some time.

After a successful default JDK installation, ensure that the changes are reflected in your system. For this, we utilize the “apt” instruction with the “update” option.

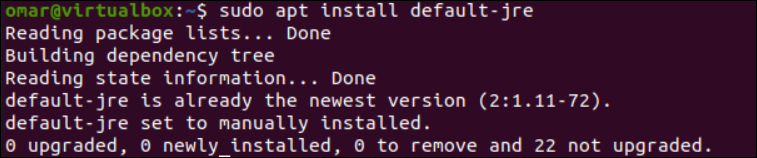
Install the Default JRE
The standard JRE package is also installed when the OpenJDK package is installed. Mount the JRE package by adhering to the following instructions if the package fails to install or its configuration files are damaged. This “apt” command includes the “default-jre” keyword for the installation of the Java Runtime Environment on our system using the “install” option.
Install Oracle JDK from a Third Party
The default Oracle JDK is accessible via the manual setup or third-party sources. The benefit of deploying from a third-party source is that the system updates seamlessly reload the packages, eliminating the requirement for manual package updates. Before installing Oracle JDK, make sure to install the dependencies using the “apt” installation command as follows:

Make sure to add the third-party required packages of Java within the “Apt” sources of our system using the “add-apt-repository”

Use the “update” instruction again to let the Ubuntu system reflect the changes.

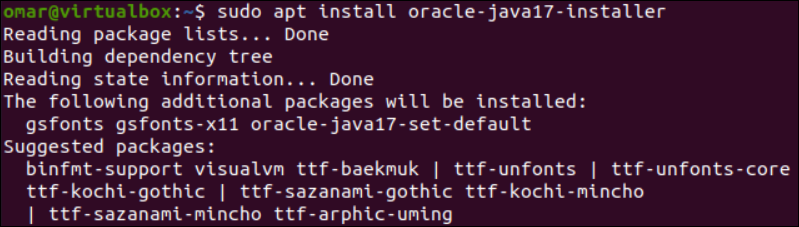
Now that we added the required Java packages from a third party, our system can install the latest version of Oracle Java, i.e. Java 17. The following “install” instruction of the “Apt” repository is utilized to install the Oracle Java 17 installer:
Prior to its configuration, the Oracle Java 17 installer needs confirmation. Tap on “y” to proceed with the installation process of Oracle Java 17.

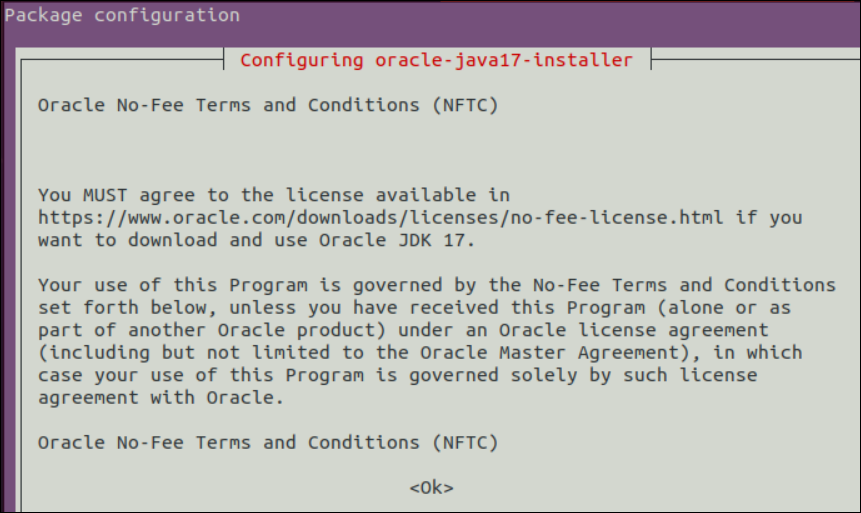
While the processing is continued, the Oracle Java 17 installer setup wizard will pop up. Since we are installing the Oracle Java 17 from a third-party source, it requires us to accept the license agreements that it holds. Tap the <Ok> button at the end to accept the agreement clauses and proceed with the installation.
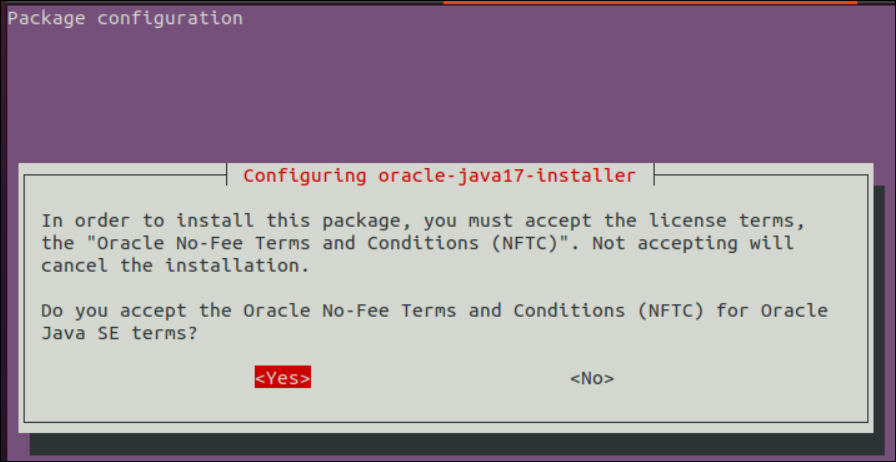
Another window will open to affirm your action of agreeing to the terms and conditions of the package to be installed. Select <Yes> and continue to the next window.
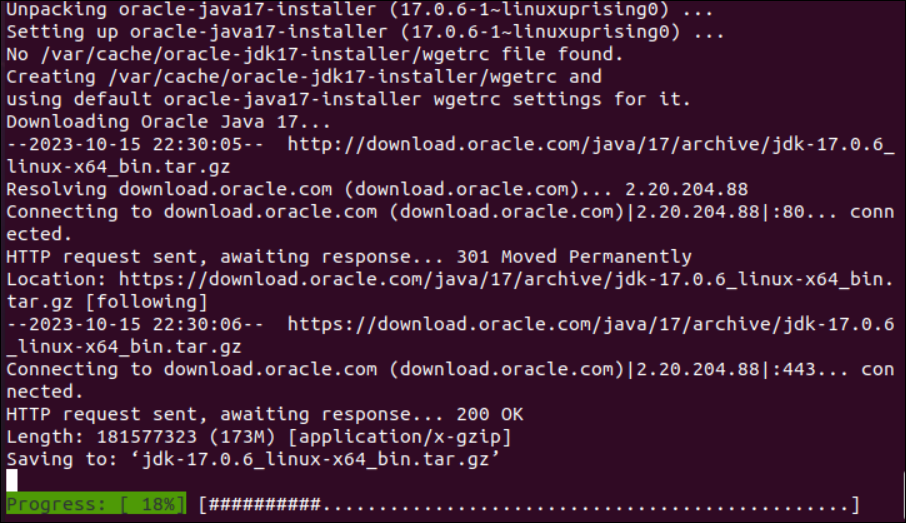
After accepting the license agreements of the Oracle Java 17 configuration wizard, the normal installation process continues on the command shell of the Ubuntu system as shown in the following image. The Oracle JDK version 17 is installed via this process.
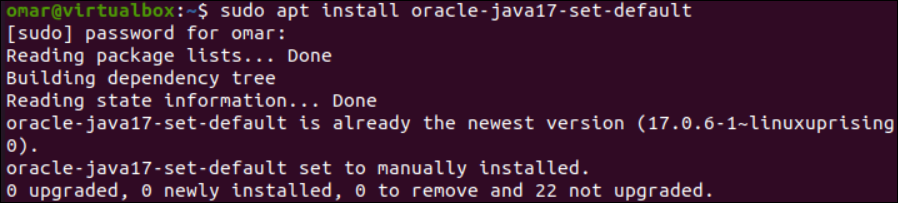
After the successful installation of Oracle Java 17, we can make it as our default JDK for the Ubuntu system. As mentioned previously, Java 11 is the default for the Ubuntu system. We need to use the “install” instruction via the “Apt” package and the “oracle-java17-set-default” keyword to set the default Java version. To continue with the setup, this needs the password for the user account that is now logged in.
Install Oracle Java Using the Deb Package
Besides installing Java’s latest version through a third party, you can use the “Deb” package that is available at the official Oracle site. Before the installation through the “Deb” package, we require some dependencies to be installed in the Ubuntu system like libc6-i386, libc6-x32, libxi6, and libxsts6. These dependencies can be installed via the following install “Apt” command:

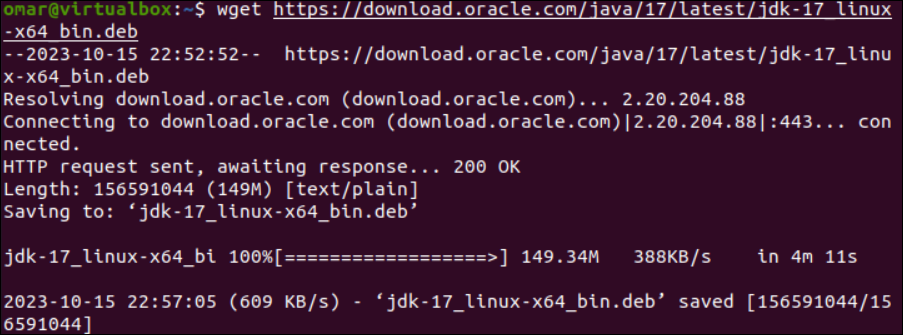
After installing the required dependencies, we now move towards downloading the “deb” package from the official Oracle site using the “wget” utility on the command shell. After some time, the “deb” file of Java 17 will be downloaded entirely in our system within the current working directory, i.e. jdk-17_linux-x64_bin.deb.
It’s time to unpack and install the “Deb” package of Java 17 that we just downloaded. For this, Ubuntu’s “dpkg” utility instruction can be utilized with the “-I” option followed by the name of a “Deb” file like jdk-17_linux-x64_bin.deb.

After a while, Java version 17 will be successfully installed on your Ubuntu system. You can verify the installed version via the following command:

Install a Specific Version of Java
Within the previous two methods, we have seen how Java can be installed via a third party and by downloading the “deb” package from the official Oracle website. You can also install the specific version of Java in your Ubuntu system using the simple “install” instruction, specifying the OpenJDK version, i.e. JDK 11 or 17 etc, as depicted in the following:

Set the Java Default Version
To set the default version of Java when the system has many Java versions installed, use the following instruction and enter the selection number at the end, i.e. 0, 1, 2, or 3:

Your Java version will be set successfully as shown upon adding a number of your choice.

Set the Environment Variable for Java
Open the environment file using the following query:
![]()
Now, set the JAVA_HOME variable by adding the path to your default JDK.

Conclusion
This guide is all about the quick Java installation on the Ubuntu system. Starting from the installation of Open JDK and JRE, we have gone through the installations of different Java versions using different methods like third-party sources and the “Deb” package of the official Oracle site.