What is Version Control Systems?
Before we head into the details, let’s understand what a version control system is. VCS belong to a category of software tools that help programmers manage changes to the software over time. These changes are always kept on track, denoted by letters or numbers in the version control system. This allows software teams to compare source codes, identify differences, and create revisions before writing any new software. Besides, you can also keep a note of which version of the application is currently in development or needs one.
Git and GitHub
Git and GitHub are two terminologies that most software developers confuse nowadays. Git is a version control software but comes in the form of a tool that lets you manage the history of your source code whereas GitHub is a hosting service for projects that use Git.
You don’t need a GitHub account to use Git. You can use it independently along with IDEs. Whereas for GitHub, you will need a git repository to control and track tasks, its bugs, and feature requests. It allows sharing your repositories; accessing others’ and storing remote copies of your repositories as a backup on the GitHub servers.
Integrating Git in PyCharm
The tutorial below will guide on how to integrate PyCharm’s Git features. Instead of performing Git related task independently in a command terminal, PyCharm lets you perform them in the IDE and later link it to your GitHub account.
1. How to install and configure Git?
To be able to use Git for PyCharm, do the following:
-
- Download the tool from here. The supported version for Windows is 2.4 and for Linux and MacOS is 1.8.0.0.
- Next, from the Settings/Preferences dialog on the main toolbar of your IDE, select Version Control and then click on Git from the left pane.
- Specify the path to the file where Git executable is.
- Set a password for your remote Git repository. This is because every time you use a remote git repository, it asks for authentication.
- From the Settings tab, select Appearance and Behaviour.
- Now, click System Settings and then choose Passwords on the left.
- PyCharm processes passwords for remote Git repositories in several ways:
- I. Native Keychain: This option uses Native Keychain to store your passwords. It is only available for Mac and Linux OS.
- II. KeePass: This option lets you store passwords in a file that are only accessible through a master password. To do that, enter a password in the Master Password Field that will be used to access the c.kdbx file.
- III. Do not save: This option is available when you want PyCharm to reset your passwords every time you close it.
2. How to Create a Local Git Repository
To create a local Git Repository, follow the procedures below:
- First, to link your GitHub account with PyCharm. Go to File -> Settings -> Version Control -> GitHub
- Enter your GitHub username and password to log in.
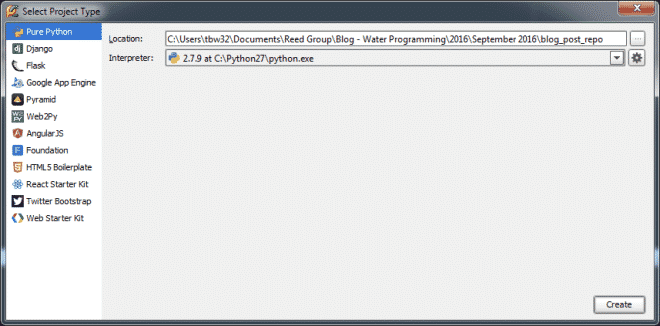
- Now, create a new PyCharm project. Click File -> New Project

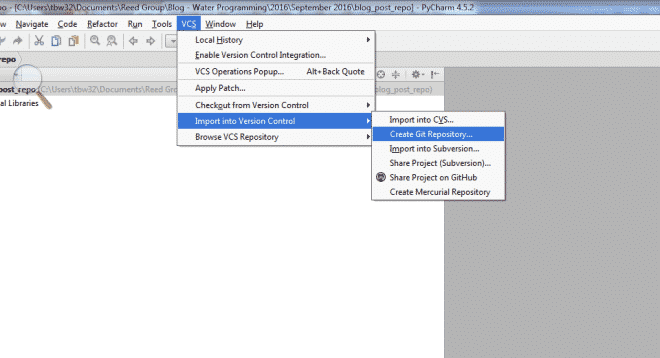
- Now, for the local repository, go to VCS -> Import into Version Control -> Create Git Repository.

- Once created, you will see a directory named ‘.git’ in the project directory. To test your repository, go to File -> Settings -> Version Control -> Git -> Test
3. How to Add and Commit Files to the Git Repository
- To create a python file, right click on the project that you just created from the Project Menu and select New -> Python
- Next, PyCharm will ask you if you want this file to be added into your repository. If you click on ‘Yes’, you will be able to commit and track all the changes you will make to this file.

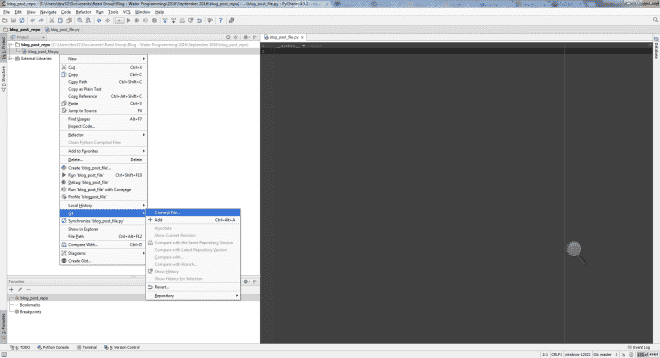
- To commit this file to the repository. Right click on the python file, select Git -> Commit File.Note: The file name in your project menu will appear green unless you don’t commit the file. Once you’re done adding the file, you can make changes and commit them. Soon after the changes, the file name in the menu will change colors to blue.
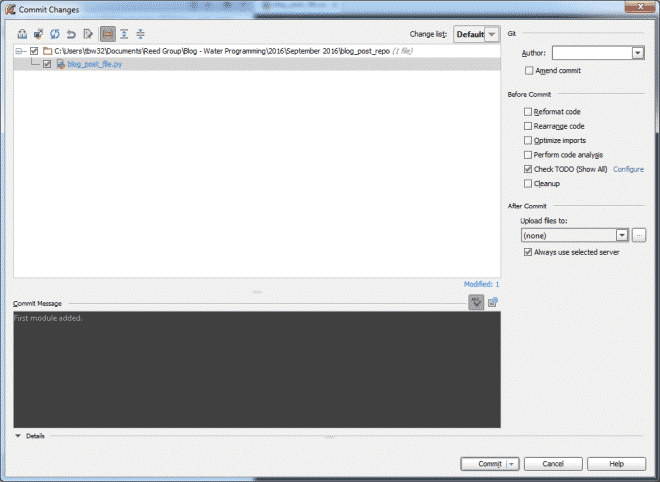
- After that, you will be prompted with a Commit Changes window on your IDE.

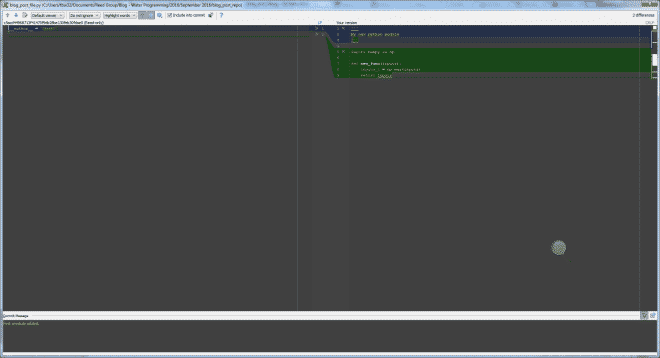
- To keep track of what changes you have made in the past, double click the filename, and you will see the code in green.
- Lastly, you can now to go to the Version Control menu right at the bottom of the window to see a variety of other features. This includes a Log that stores all the changes you will make in the particular local repository.
- After that, you will be prompted with a Commit Changes window on your IDE.
 Note: The file name in your project menu will appear green unless you don’t commit the file. Once you’re done adding the file, you can make changes and commit them. Soon after the changes, the file name in the menu will change colors to blue.

4. How to Add a Remote Repository?
In addition to working on a local repository, you can also create remote repositories to collaborate with developers from all around the world. These will help to fetch and push data whenever you need to share your work.
To define a remote repository:
- Create an empty repository on GitHub
- When you are ready to push your commits, choose the Push option by selecting VCS -> Git -> Push
- If you haven’t created any remote repositories yet, the Define Remote option will appear instead of a remote name. If you have added already, it won’t.
- Now, upon seeing the dialog, specify the remote repository’s name and the link to the URL where it will be hosted.
- You can also edit and Remove Repositories through the Git Remotes