Git is a widely used version control system that lets users keep multiple lines of development for a team project. These development lines are known as branches. This platform enables its users to fetch a recent branch version from the Git remote repository, or they can retrieve the most recent version of all remote branches at once. This can be done by utilizing the “$ git pull –all” command.
In this study, we will talk about how to pull all branches in Git.
How to Pull All Branches in Git?
Let’s say you have to work on team projects, and it is required to add some data, but not in the main working branch. For this purpose, you must create a new branch and add data.
Branches can be stored remotely or locally. A branch will be called a local branch if you work on a Git local repository. You can fetch all metadata of remote branches and also pull all remote branches using Git available commands.
Now, follow the below instructions to understand the procedure of pulling all branches in Git.
Step 1: Move to Git Directory
At first, navigate to the Git directory using the “cd” command:
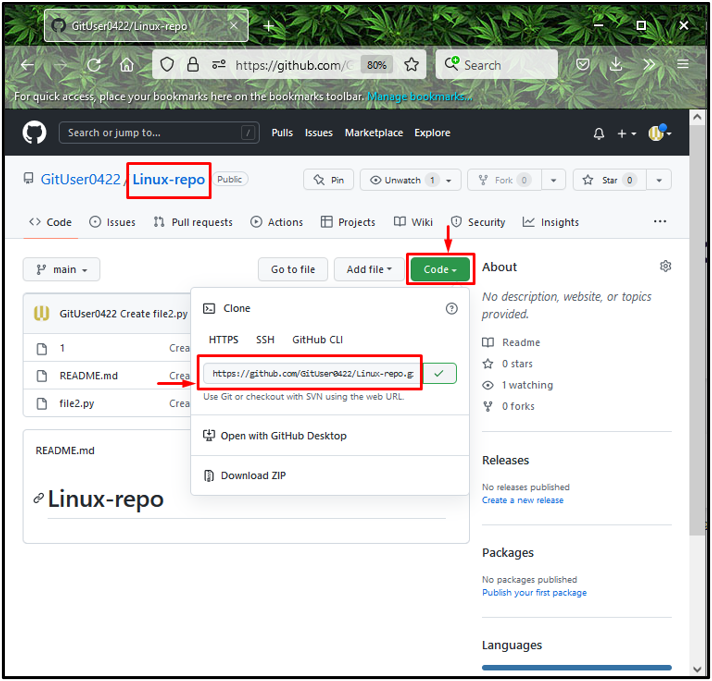
Step 2: Copy Remote Git Repo URL
Open up the remote repository, click on the “Code” button, and copy its HTTP URL to clipboard:
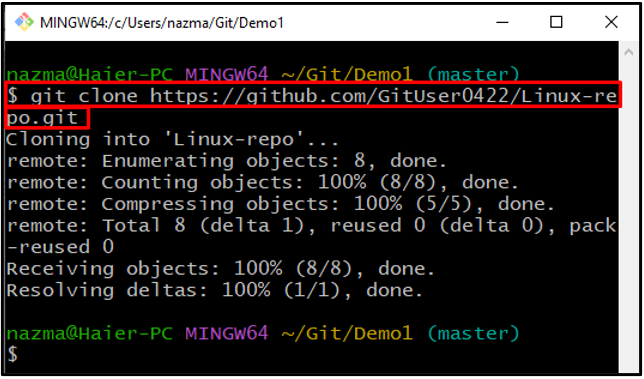
Step 3: Clone Remote Git Repo
Next, execute the “git clone” command and specify the copied URL to clone the selected Git repository:
Below output indicates that we have successfully cloned the “Linux-repo” remote repository and our local Git repository is connected with it:
Step 4: Fetch All Remote Branches Data
Now, we will fetch all of the metadata of the remote branches for tracking them:
Here, we have used the “–all” flag which will fetch all metadata of branches:
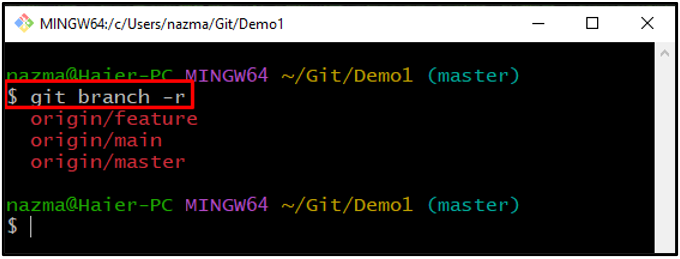
Step 5: List Remote Branches
To display all remote branches, execute the “git branch” command:
In the above-mentioned command, the “-r” indicates the remote branches. As you can see, currently, we have three branches in the remote repository:
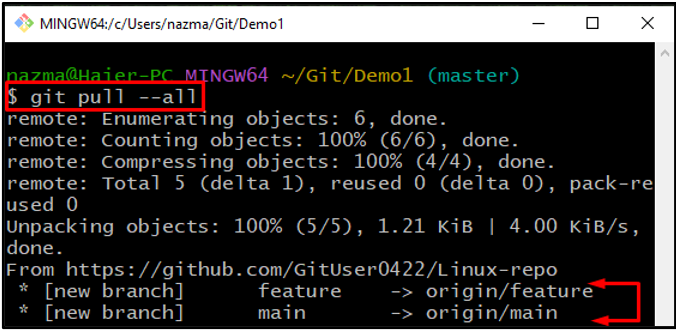
Step 6: Pull All Branches
Lastly, pull all branches of the Git remote repository by utilizing the “git pull” command with the “–all” option:
Below output shows that all remote branches are successfully pulled:
That’s it! We have offered the easiest method of pulling all branches in Git.
Conclusion
To pull all branches in Git, first, navigate to the directory, open the remote repository, and copy its HTTP URL to the clipboard. Then, clone the remote repository to the Git local repository. Next, execute the “$ git fetch” command with the “–all” flag to fetch all of the metadata of branches. Lastly, pull all branches using the “$ git pull –all” command. This study demonstrated the procedure of pulling all branches in Git.


