This write-up will discuss various demonstrations of the “Set-Content” command.
How to Write/Output to a Text File in PowerShell Using the “Set-Content” Command?
As mentioned earlier, the “Set-Content” command is used to write into a new text file. However, it overwrites existing text in a file.
Example 1: Use the “Set-Content” Command to Write to a Single File
This example will demonstrate about writing content into a single file:
In this above-stated command:
- First, add the “Set-Content” command and add the output file path.
- After that, specify the “-Value” parameter and write the text within inverted commas:
Let’s execute the “Get-Content” command alongside the path of the output file path to get the exported content of a file inside the PowerShell console:
Example 2: Use the “Set-Content” Command to Write to Multiple Files
You can also utilize the “Set-Content” command to write text to all the “.txt” files in the specific folder:
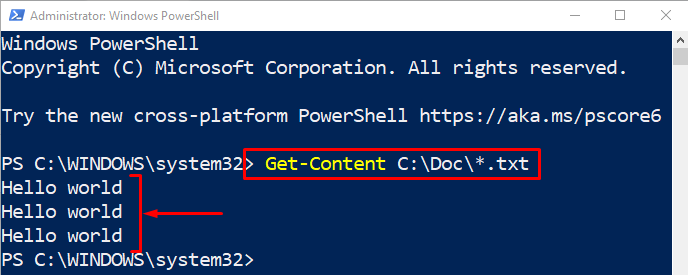
Here, we have added the wild character “*” along with the “.txt” extension at the folder path to select all the text files to write inside it:
For the verification, execute the following command:
That was all about writing to a file in PowerShell.
Conclusion
To write to a text file in PowerShell using the “Set-Content”, first, write the “Set-Content” command followed by the file path. After that, add the “-value” parameter and add the text within the inverted commas you want to write into a text file. This write-up has discussed in detail the use of the “Set-Content” command to write to a text file in PowerShell.


