In this particular tutorial, we will observe the PowerShell “SecretManagement” module in detail.
How to Install and Manage the PowerShell SecretManagement Module?
Here is the list to explore more about the “SecretManagement” module:
- How to Install PowerShell Secret Management Module?
- How to Manage PowerShell Secret Management Module?
How to Install the SecretManagement Module?
To enjoy the full functionality of the “SecretManagement” module, you need to install it first along with the “SecretStore” module. To do so, check out the provided procedure.
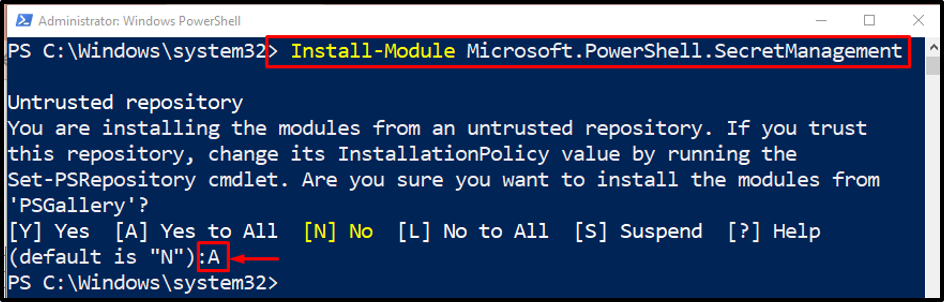
Step 1: Install the SecretManagement Module
In order to install the “SecretManagement” module, execute the following command:
After executing the above-described command, it will ask you to press the particular key according to your choice. For instance, we have pressed the “[A]” for yes to all:
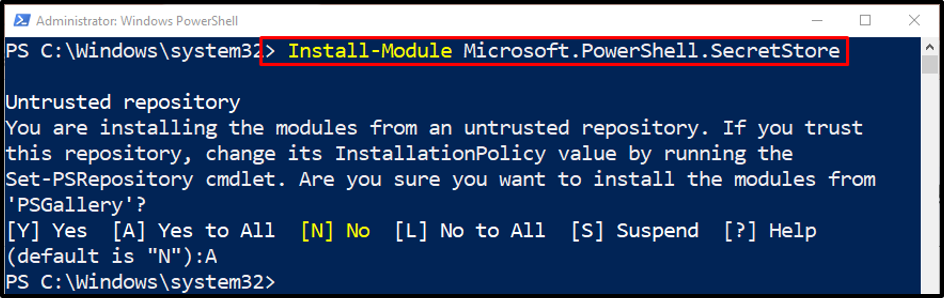
Step 2: Install Secret Store in PowerShell
Then, run the below-stated command to install the secret store in PowerShell:
How to Manage PowerShell SecretManagement Module?
As we have learned that the PowerShell “SecretManagement” module is responsible for managing and storing the secrets. Now, check out the practical demonstration of the above-stated theory.
Step 1: Create a SecretVault in PowerShell
To create a “SecretVault”, simply run the given code:
In the above-described code:
- First, specify the “Registry-SecretVault” cmdlet.
- Next, type the “-Name” parameter having the stated value assigned to it.
- Moving on, write down another parameter “-ModuleName” and assign the mentioned value.
- Lastly, specify the parameter “-DefaultVault”:
 Step 2: Set a Password on the SecretVault
After creating the “SecretVault”, the next step is to set the password. To do so, use the below-specified command:
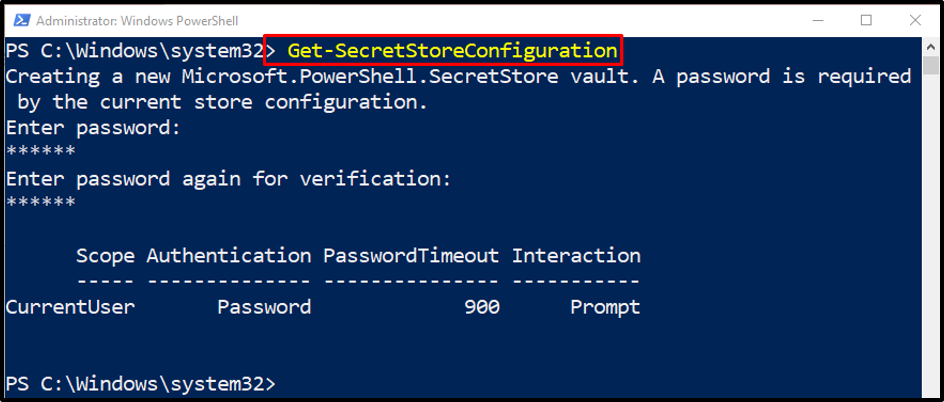
Note: Whenever the command gets executed, it will ask to enter the password two times to set it.
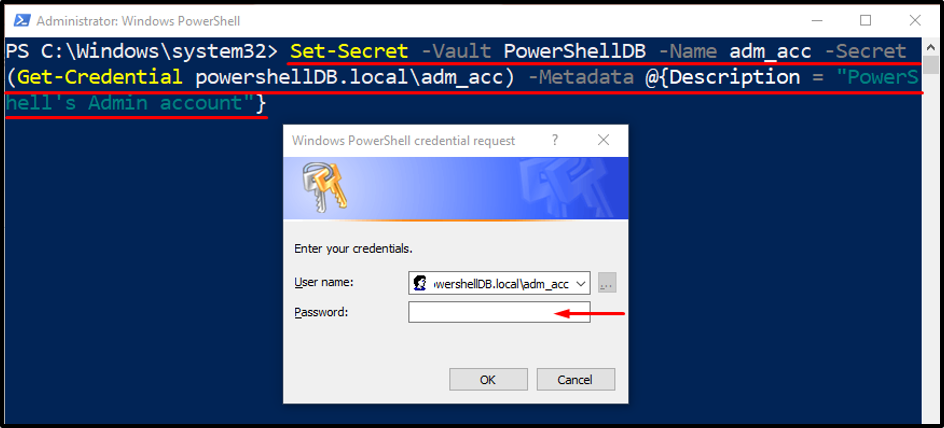
Step 3: Add Credentials to the SecretVault
Execute the below-given command for adding credentials to the “SecretVault”:
According to the above code:
- Firstly, place the “Set-Secret” cmdlet and the “-Vault” parameter having assigned the stated value.
- Moving further, specify the “-Name”, “-Secret”, and the “-Metadata” parameter with stated values assigned to them:
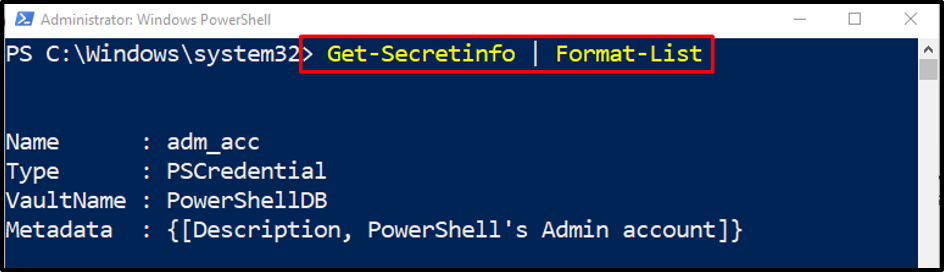
Step 4: Verify the SecretVault
After creating the SecretVault, use the provided command and enter the password for verification:
Here:
- Start with the “Get-Secretinfo” cmdlet along with the “|” pipeline.
- Then, specify the “Format-List” to get the information in the table format.
Conclusion
The PowerShell “SecretManagement” module is utilized to manage and store the secrets. It can be installed by executing the “Install-Module Microsoft.PowerShell.SecretManagement” cmdlet. In this particular tutorial, the “SecretManagement” module has been explained quite clearly.