PowerShell lets you export file names and extensions into a text file or any format you need. If this task is performed using the UI, then you will have to write the file name and extension in a text file one by one, which is quite difficult and time-consuming. PowerShell can perform the same task within a minute using a specific command.
This tutorial will observe a comprehensive guide to extract or export file names and extensions.
How to Extract File Name and Extension in PowerShell?
The file name and extension can be extracted with the combination of the “Get-ChildItem” and the “Out-File” cmdlet. The “Get-ChildItem” cmdlet is used to get the items from more than one specified location, while the “Out-File” cmdlet is used to send or export output to a file.
Let’s consider overviewing the below example to extract file names and extensions using PowerShell.
Example
This example will demonstrate to extract file name and extension into a file:
In the stated command:
- At first, add the “Get-ChildItem” alongside the file path from where you want to extract file name and extension, followed by the “-Name” parameter to get the name and extension of the file.
- After that, add the “Pipeline |” to transfer the output of the “Get-ChildItem” cmdlet as an input to the “Out-File” cmdlet.
- Lastly, add the “Out-File” cmdlet followed by a file path, where the file names and extensions will be stored:
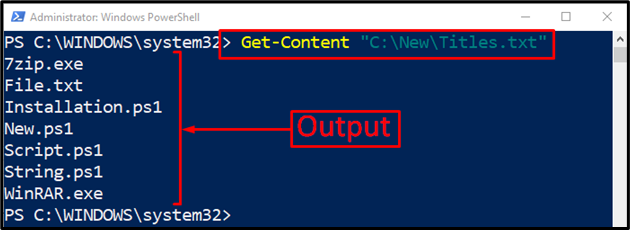
Execute the given command to check whether the file names and extensions were extracted or not:
The output confirms that the file names with their extensions have been extracted successfully.
Conclusion
The file name and extension can be extracted or exported using the “Get-ChildItem” cmdlet with the combination of the “Out-File” cmdlet. The “Get-ChildItem” cmdlet first gets the files to be extracted, and then “Out-File” is used to output the file names and extensions to a new text file. This post has elaborated a detailed guide to extract file names and extensions in PowerShell.


