HKEY_CURRENT_USER: The keys and values related to the user are stored in this hive. It loads when a user logs in.
HKEY_LOCAL_MACHINE: This hive contains the general OS related information, like the services, drivers, programs that are loaded on startup.
The CURRENT_USER instance can be edited by the respective user and the changes are limited to that specific user only. On the other hand, the LOCAL_MACHINE registry keys and values can be modified by any user and the changes are applicable to each user that logs into the system. This article provides a demonstration to create PowerShell registry keys.
Prerequisites
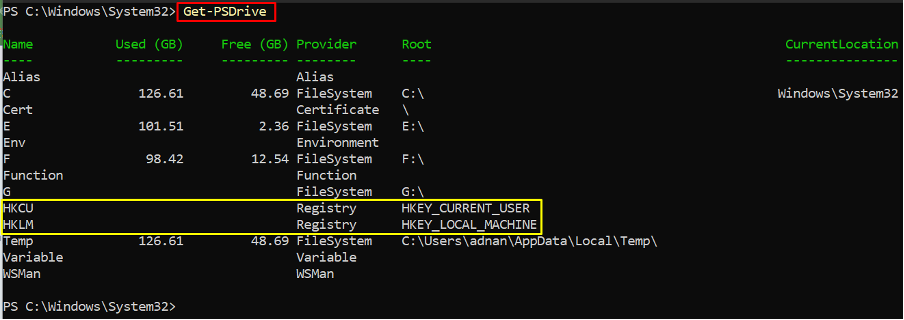
The first and foremost step is to get the location of the registry key hives on your PC. This step would get you to the location of the machine’s and user’s hive path and you can use that path to perform any changes in it. To get the Registry providers, the following command is executed that will list down the local drives and you can get registry key hives here.
How to create a registry key using PowerShell
Registry keys refer to directories, therefore, they can be created with the New-Item cmdlet of PowerShell, just like folders are created. The syntax of this cmdlet is provided below:
The values of the registry keys can be assigned using the New-ItemProperty cmdlet. The syntax of the New-ItemProperty cmdlet is described below:
The above two syntaxes are the core part to create registry keys and their values.
Example 1: Create a registry key in HKEY_CURRENT_USER
To create and assign property values to a registry key, the following steps must be performed carefully.
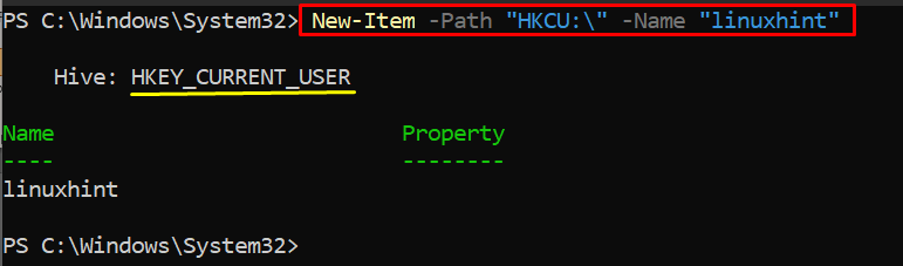
Step 1: Create a Registry key using “New-Item”
Using this example, we demonstrate how to create a registry key within the current user’s hive. The following command creates a new item named “linuxhint” at a location “HKCU:\ “. It is observed from the output that the property value is empty:
Step 2: Assign a property value to the registry key
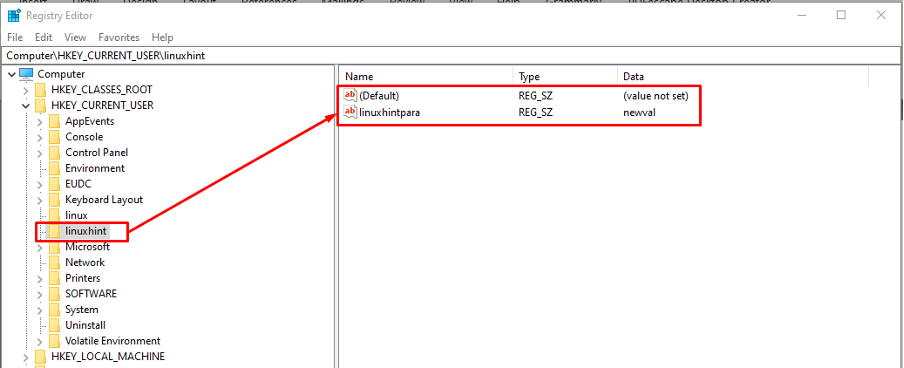
Once the registry key is created, you must assign it a property value. As we have practiced the following command to assign a parameter named “linuxhintpara” and value “newval” to the registry key linuxhint.

The newly created registry key and its associated values can be obtained via GUI as well.
How to remove a registry key
The registry key handling is quite sensitive as the information about the programs/drivers of your operating systems resides there. So, if you have created a registry key just for a trial then it is recommended to remove that key to avoid any inconvenience. We have practiced the following command to remove the registry key named “linuxhint“:

Note: To remove a property of a registry key only, then you can execute the command stated below.
Conclusion
The Registry key is referred to as the internal database of a machine or the user where the basic configuration information is stored. As PowerShell provides task handling from its console, one can handle the registry keys operations from PowerShell as well. In this post, we have presented the way to create a registry key using PowerShell. Apart from its creation, you have also learned to assign property value to a registry key. Furthermore, two commands are provided at the end that will assist in removing the reg key and its property.