
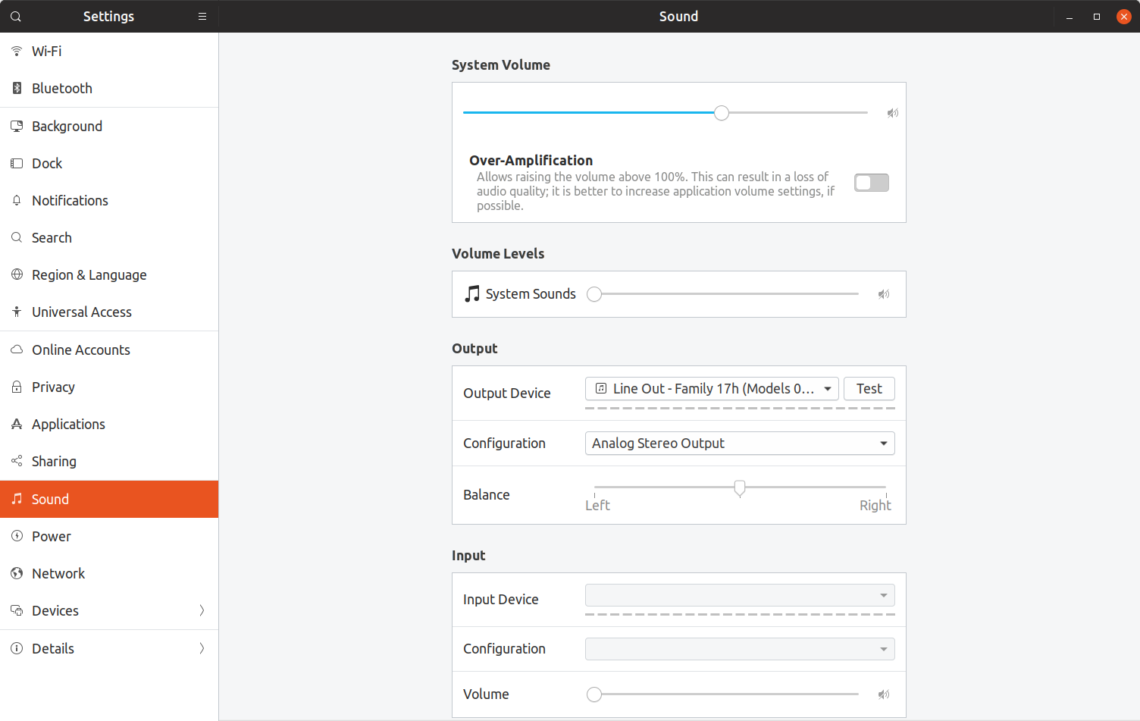
Default system settings configuration utility in Ubuntu offers a plethora of options to configure PulseAudio sound settings. Usually when applications are not playing any sound, only a couple of control sliders are present:
Once you launch an app that starts playing sound, for example Firefox playing a YouTube video, a new bar appears that allows you to configure per app volume:
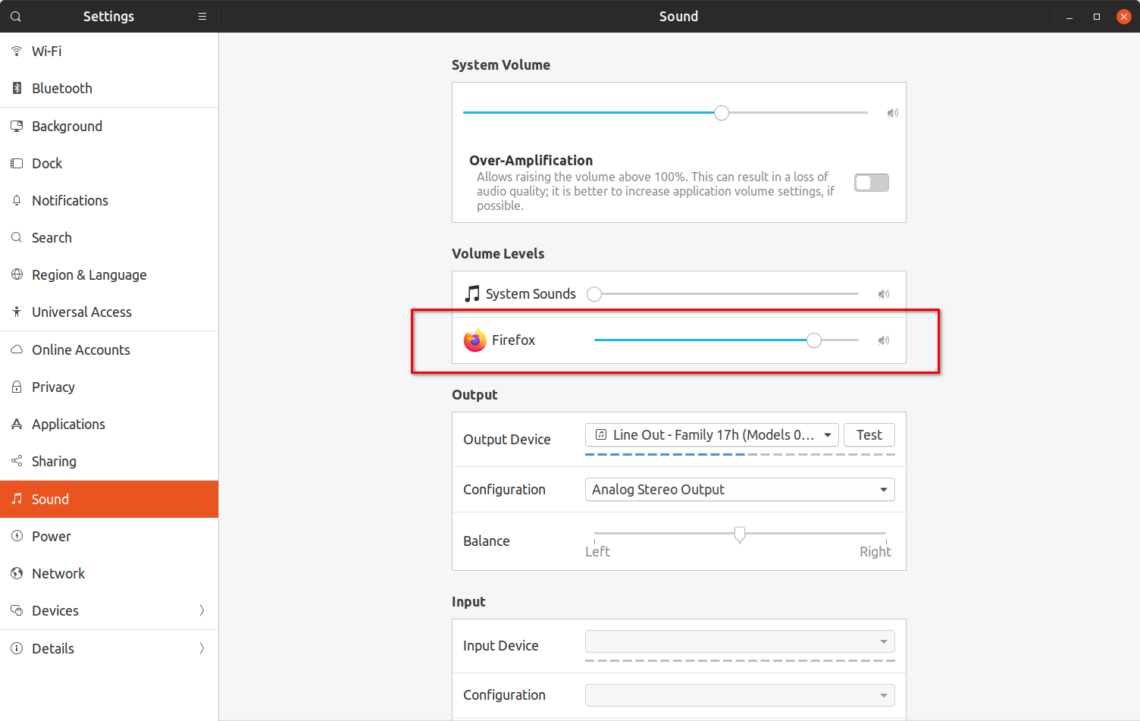
Ideally the new volume slider visible in the screenshot above should allow you to control volume of Firefox without affecting master volume or sound level of other running apps. This doesn’t work as expected however. Notice below how main system volume also increases when you move Firefox slider to the right:

This particular issue of master volume syncing with volume levels of individual applications can be narrowed down to “flat-volumes” behavior enabled in Ubuntu by default. So what is this “flat-volumes” option in PulseAudio?
Flat-volumes increases overall system volume with the volume of the loudest application. In our case, raising Firefox volume has raised master volume as well, with added side effect of indirectly increasing volume of VLC player. When you switch to VLC and resume playback, sound will be now played at new raised master volume level instead of earlier lower level. This can be a huge issue and it has the potential to ruin your eardrums, especially when using headphones.
As annoying as this behavior may be, flat-volumes can be completely disabled in Ubuntu. Once done, each application will have true separate volume level that doesn’t mess with master volume at all. Configured per app volume level will be remembered in existing or new instance of the application and it will persist through reboots as well.
To disable flat-volumes in Ubuntu, you will need to add a line to PulseAudio daemon.conf file. Run command below to create the required directory:
Use the command below to create a new or open existing daemon.conf file. You can replace nano with command of your favorite text editor:
Paste the following line in the opened file and then save by pressing CTRL+O in nano:

Once you have saved the file, restart PulseAudio server by running command:
You will need to close and relaunch running apps for this to take full effect. Flat-volumes setting is now disabled, lets see how per application volume works now:

Notice that per application volume levels are now fully decoupled from master volume.
Upstream PulseAudio keeps flat-volumes enabled by default. Following suit, Debian, Ubuntu and its derivatives also ship this feature by default. The good news however is that a new commit has been merged recently in Debian that finally disables flat-volumes and there is a good chance it will trickle down to Ubuntu as well (most probably in 20.04 LTS version). Arch Linux has always made a sensible choice of disabling flat-volumes by default.
Why I am making a big deal of this flat-volumes thing? Because it protects you from sudden sound spikes throughout the system and makes volume levels above 100% less annoying and easier to manage. VLC player includes an option for raising volume above 100% which is quite useful when audio quality is less than optimal.
Do note that raising volume above allowed threshold or over-amplification can result in hearing loss, crackling audio or damage to speakers. The next part of this tutorial explains how to increase volume above 100% but you should use it at your own discretion and must absolutely have flat-volumes disabled.
To increase master volume above allowed levels, you can just use over-amplification toggle in system sound settings. For individual apps, you will need to install Pavucontrol app from package manager (some distributions ship this utility by default). To install, run command:
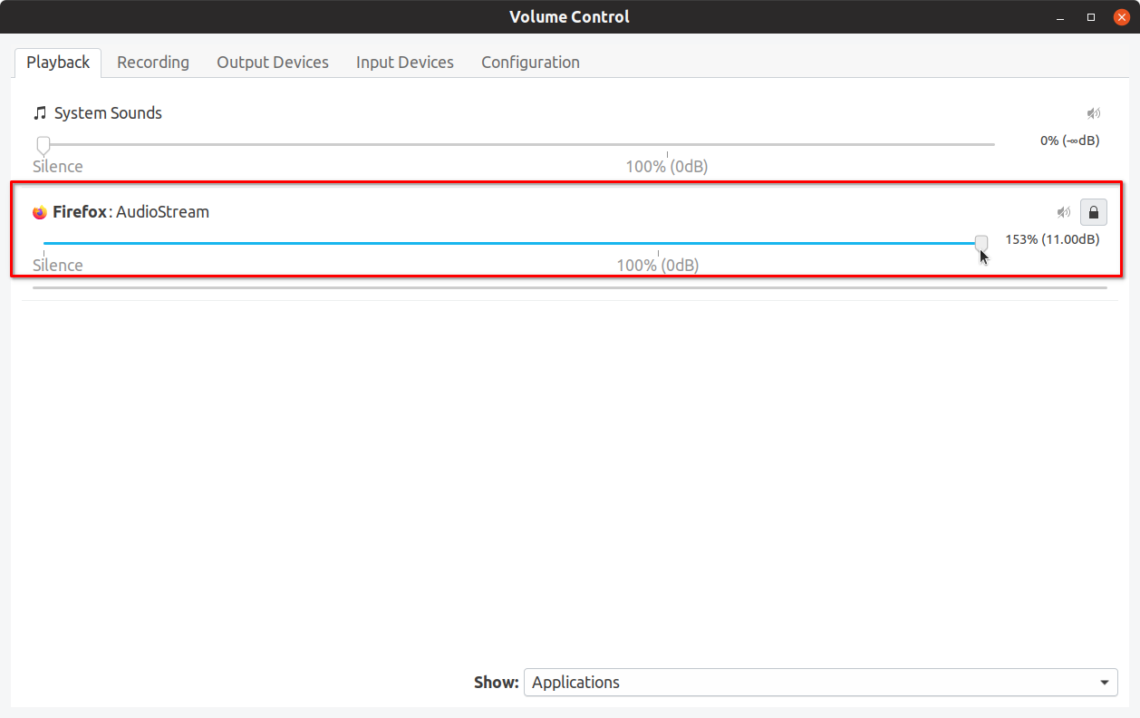
Launch “PulseAudio Volume Control” from application launcher and go to playback tab to configure volume for running apps (up to 153% ~ 11.00dB):
To further increase volume levels above 153% (read warning above in bold words), you will need to execute certain commands in terminal.
With an app running with audio playback, run the following command in the terminal (use ALT+TAB if using any full-screen application or game):
You will see some detailed output about currently playing sound channels. Note down sink input id of the app that you want to raise the volume level for, as shown in the screenshot below:

Then run command below by replacing “sink_input_id” with the input id you found above. You can replace 200% with your own choice.
For the example shown in the screenshot above, final command would be:
Run command “pactl list sink-inputs” again to see volume level raised to 200%. Note that you have to run these commands only once. Next time when you launch Firefox, it will be already at 200%.

This concludes the tutorial. Any changes made on your system after following this guide can be reverted by deleting hidden “.pulse” folder in your home directory (visible after pressing CTRL+H).
Lastly a bonus, here is a link to an excellent guide by Sytem76 about troubleshooting sound issues on your system.