When it comes to developers, we might come across instances where we need to programmatically generate the PDF documents based on input data. For example, you can have a web app that generates the PDF invoices based on purchase information from the database.
Luckily, the Go ecosystem is massive and there are tools and features to perform the PDF generation with ease without building from scratch.
In this tutorial, we will learn how to use the “fpdf” package which provides with powerful features to generate the PDF documents based on input data.
Environment Setup
Before we proceed, ensure that you have the following tools installed:
- Ensure that you have the latest Go compiler installed on your system
- A code editor
Install Gofpdf
Once you have your project setup, use the “go get” command to install the “fpdf” package.
Once installed, we can proceed and cover the features provided by the package for PDF generation.
Create a Basic PDF Document
Consider the following example code that demonstrates how to use this package to create a basic PDF given a basic input text.
import (
"github.com/go-pdf/fpdf"
)
func main() {
pdf := fpdf.New("P", "mm", "A4", "")
pdf.AddPage()
pdf.SetFont("Arial", "B", 16)
pdf.Cell(40, 10, "Lorem ipsum dolor sit….")
pdf.OutputFileAndClose("lorem.pdf")
}
In the given example, we start by importing the packages that we need. In our case, we only need the “fpdf” package.
Next, we create a new PDF document using the fpdf.New() function and specify the PDF properties such as the page orientation, unit of measure, and size.
Next, we add a new page using the AddPage() function.
We then proceed to set the font and size for the document using the SetFont() function. We also add a rectangular area, also known as a cell, with the Cell() function to display the text.
Finally, we generate the PDF and save it with the OutputFileAndClose() method.
Add the Images
We can also add a support for images as shown in the following example code:
import (
"github.com/go-pdf/fpdf"
)
func main() {
pdf := fpdf.New("P", "mm", "A4", "")
pdf.AddPage()
pdf.ImageOptions("linux-tux.png", 10, 10, 40, 0, false, fpdf.ImageOptions{ImageType: "PNG", ReadDpi: true}, 0, "")
err := pdf.OutputFileAndClose("example.pdf")
if err != nil {
panic(err)
}
}
This should include the specified image to the document.
Multi-Page Document with Headers and Footers
The package also supports multiple pages including features such as headers and footers as shown in the following example:
import (
"strconv" // Import the strconv package
"github.com/go-pdf/fpdf"
)
func header(pdf *fpdf.Fpdf) {
pdf.SetFont("Arial", "B", 12)
pdf.Cell(0, 10, "Page Header")
pdf.Ln(20)
}
func footer(pdf *fpdf.Fpdf) {
pdf.SetY(-15)
pdf.SetFont("Arial", "I", 8)
pdf.Cell(0, 10, "Page "+strconv.Itoa(pdf.PageNo()))
}
func main() {
pdf := fpdf.New("P", "mm", "A4", "")
pdf.SetHeaderFunc(func() { header(pdf) })
pdf.SetFooterFunc(func() { footer(pdf) })
pdf.AddPage()
pdf.SetFont("Arial", "", 12)
for i := 0; i < 40; i++ {
pdf.Cell(0, 10, "Printing line number "+strconv.Itoa(i))
pdf.Ln(12)
}
pdf.OutputFileAndClose("multipage.pdf")
}
In this case, we define a header and footer functions to set the contents for these sections of the PDF.
We then use the SetHeaderFunc and SetFooterFunc to specify the functions as the header and footer for the document.
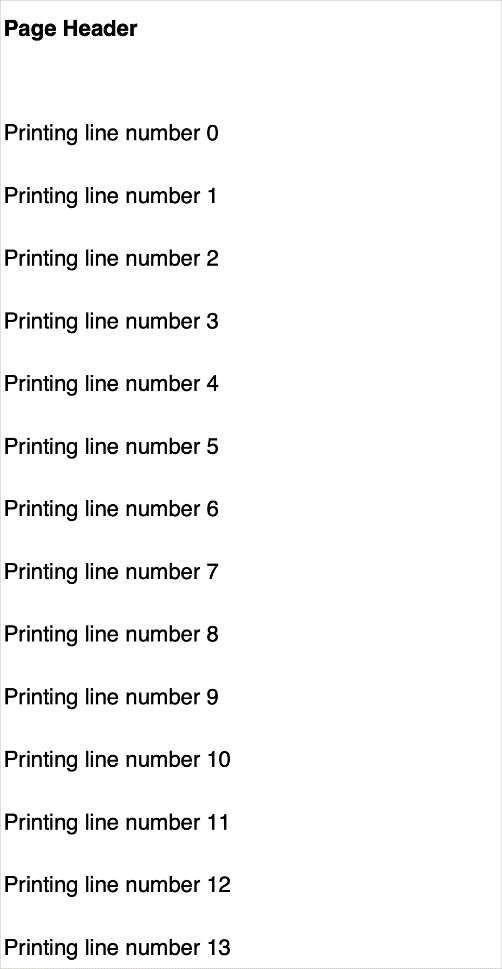
Finally, we use a loop to create multiple lines of text lines which results in multiple pages. The resulting PDF is as follows:
There you have it!
Conclusion
In this tutorial, we learned a lot about PDF generation in Go using the “fpdf” package. This package comes packed with lots of tools and features to generate PDFs. Check the docs to learn more.

