In this article, we will show you how to partition the disks using cfdisk from the command line on the most popular Linux distributions, i.e. Ubuntu/Debian, Linux Mint, Fedora, RHEL, Rocky Linux, CentOS.
Topic of Contents:
- Installing Cfdisk on Ubuntu/Debian/Linux Mint/Fedora/RHEL/Rocky Linux/CentOS
- Listing the Available Disks on Linux
- Opening a Disk with Cfdisk for Partitioning
- Navigating the User Interface of Cfdisk
- Creating a New Partition Table on the Disk Using Cfdisk
- Adding a New Partition to the Disk Using Cfdisk
- Changing the Partition Type Using Cfdisk
- Setting/Unsetting the Bootable Flag on Partitions Using Cfdisk
- Removing the Partitions from the Disk Using Cfdisk
- Resizing the Partitions Using Cfdisk
- Finding the Partition Information Using Cfdisk
- Writing the Partition Table to the Disk Using Cfdisk
- Getting Help on Cfdisk
- Conclusion
Installing Cfdisk on Ubuntu/Debian/Linux Mint/Fedora/RHEL/Rocky Linux/CentOS
Cfdisk is a part of fdisk. Since fdisk is installed on most popular Linux distributions by default, cfdisk should also be installed. So, you don’t need to install cfdisk manually.
Listing the Available Disks on Linux
To partition a disk using cfdisk, you need to know the full device path of the disk that you want to partition.
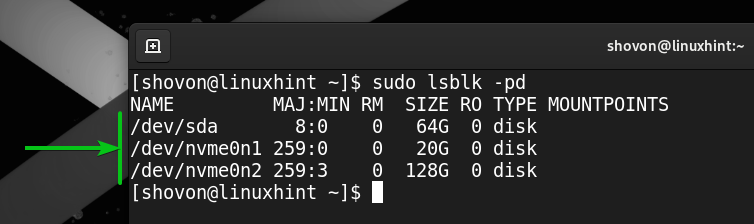
To list the full device path of all the available disks of your computer, run the following command:
As you can see, we have three disks (/dev/sda, /dev/nvme0n1, and /dev/nvme0n2) installed on our computer.
Opening a Disk with Cfdisk for Partitioning
To open a “/dev/nvme0n2” disk (let’s say), run the following command:
If the disk is new, it’s more likely that it won’t have any partition table on it. In that case, cfdisk will ask you to create a partition table on it.
If the disk already has a partition table, cfdisk will show you all the available partitions of the disk.
Navigating the User Interface of Cfdisk
To select a partitioning scheme/label for your disk or to select a partition, you can use the <Up> and <Down> arrow keys on your keyboard[1].
To select a menu item, you can use the <Left> and <Right> arrow keys on your keyboard[2].
To return to the main menu from a sub-menu or prompt, you can press the <Esc> key on your keyboard.
Creating a New Partition Table on the Disk Using Cfdisk
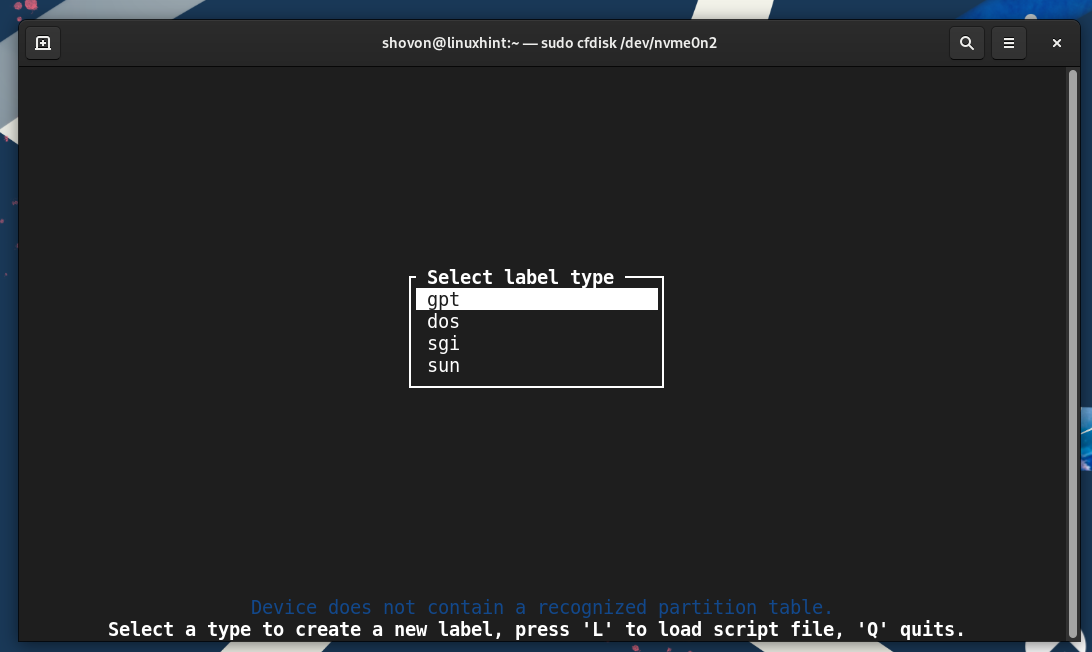
To create a new partition table on the disk using cfdisk, select one of the supported partition table types and press <Enter>.
gpt: GUID Partition Table is a part of the UEFI standard. It is a modern partitioning scheme for computer storage devices. GPT overcomes with many limitations of the MBR partitioning scheme. All modern computers support GPT and booting from GPT partitions on UEFI systems. So, on modern systems, using GPT is recommended.
dos: MBR or Master Boot Record is the partitioning scheme for the old BIOS-based systems. It’s being replaced by GPT in UEFI-based systems. Newer operating systems don’t support booting from dos/MBR partitions on UEFI systems anymore.
sgi: This partitioning scheme is used on IRIX/SGI system.
sun: This partitioning scheme is used on BSD/SUN systems.
NOTE: Gpt and dos are the most commonly used partitioning schemes. So, you will most likely want to use one of them. For more information on different partitioning schemes/labels, read the DISK LABELS section of the fdisk manpage.

A new partition table should be created on the disk. Now, you can create new partitions on the disk.
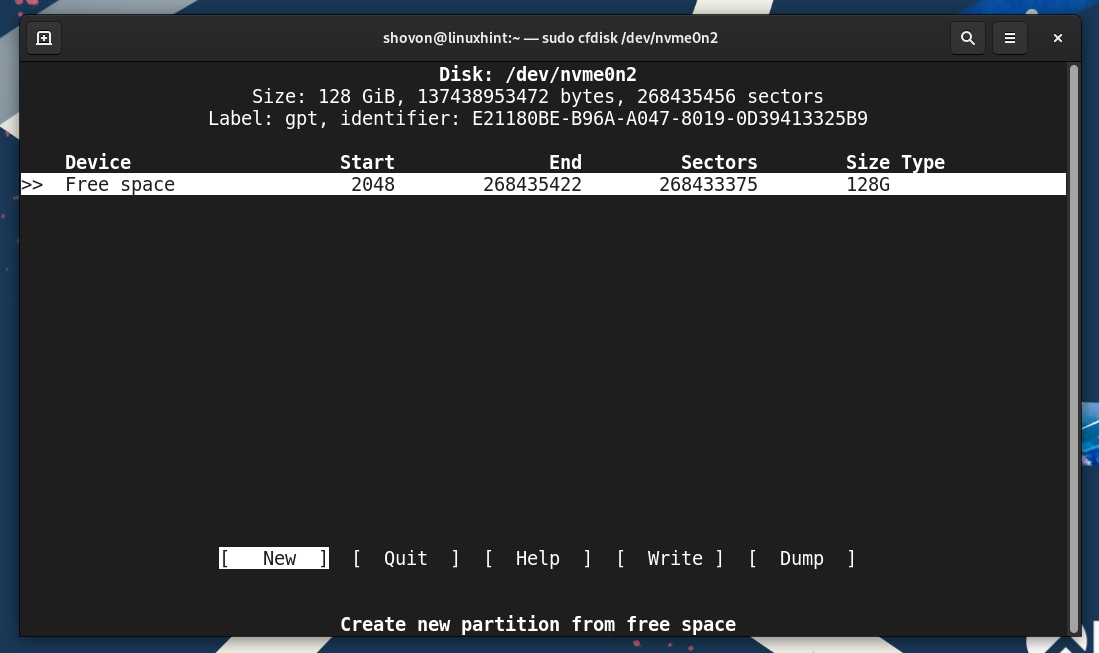
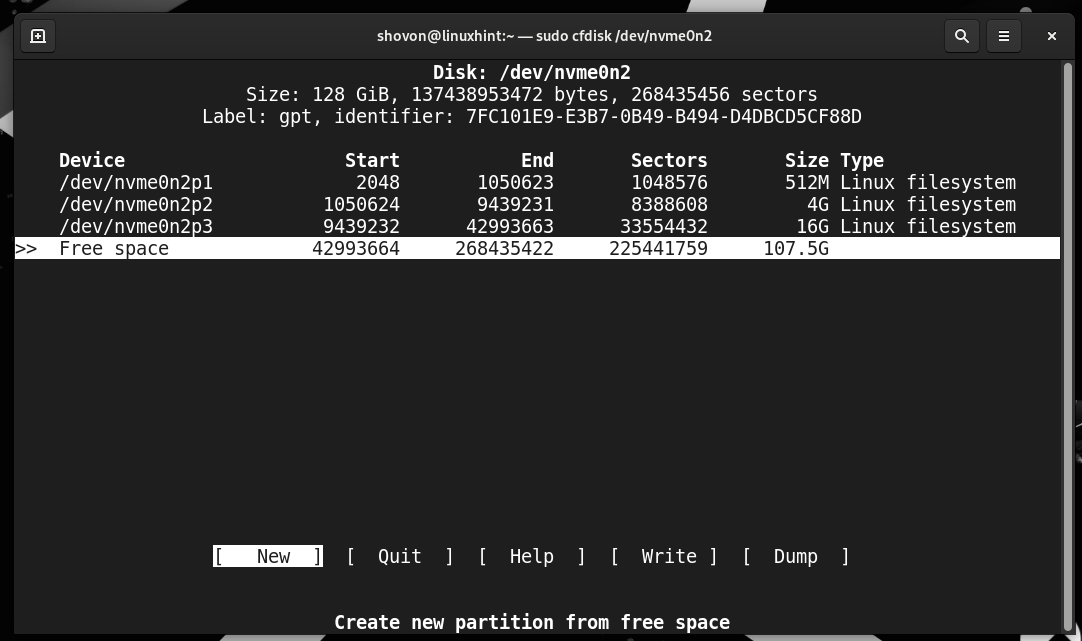
Adding a New Partition to the Disk Using Cfdisk
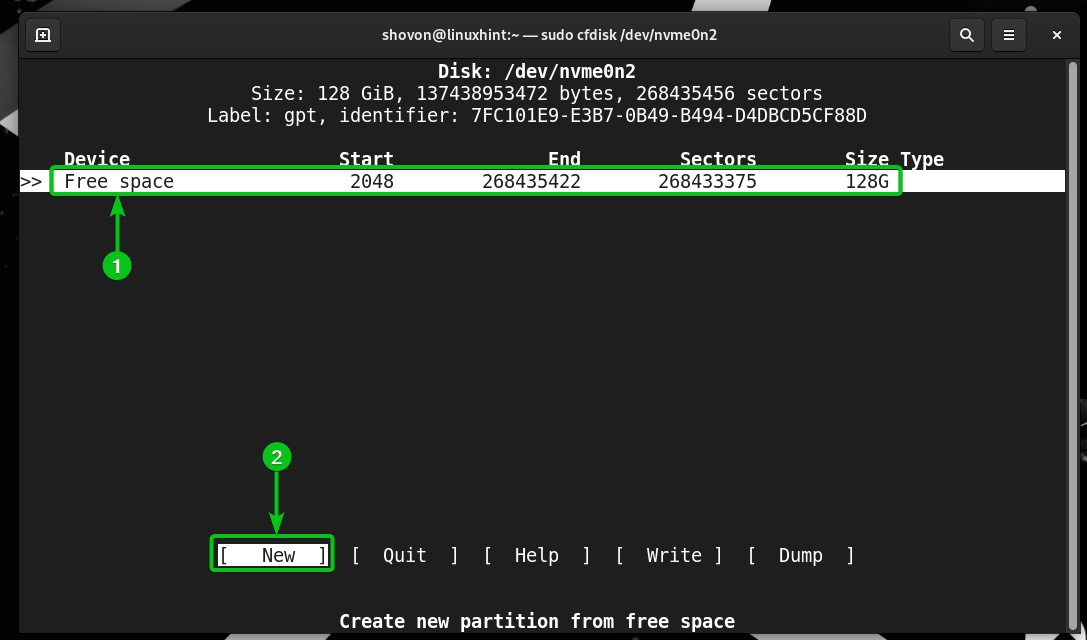
To create a new partition on the disk, select “Free space”[1], select [New][2], and press <Enter>.
You can also select the Free space and press “n” to create a new partition on the disk.
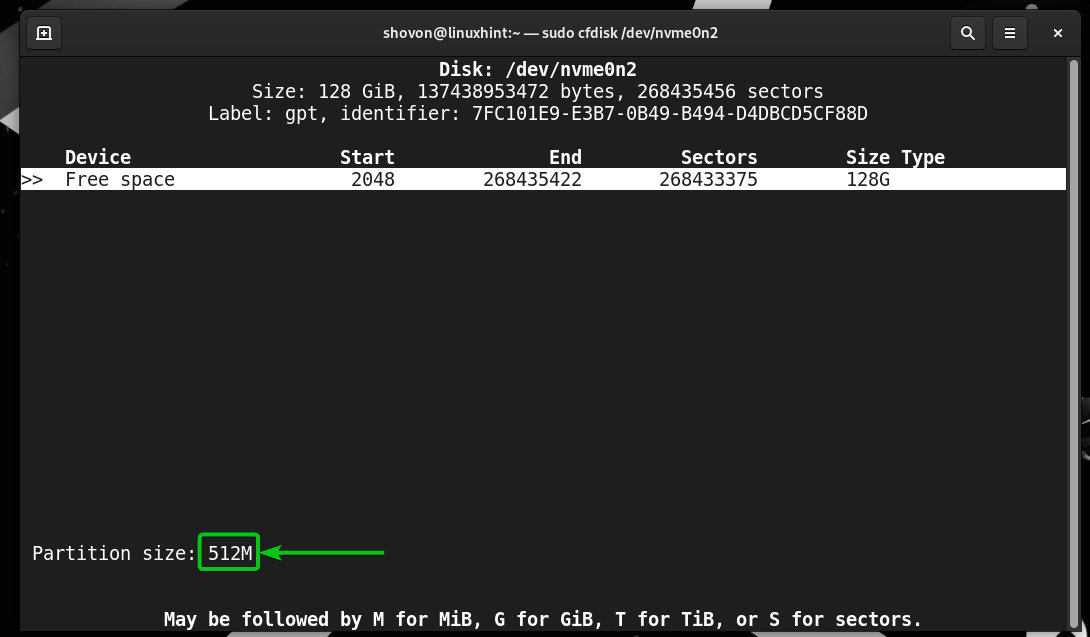
Type in a size for the new partition and press <Enter>.
Some examples of partition size are:
512M – To create a 512 MiB partition, append “M” after the partition size of 512.
0.5G – Use this to create a 512 MiB or 0.5 GiB partition. It’s the same as in the previous one; just a different format.
10G – To create a 10 GiB partition, append “G” after the partition size of 10.
1.5T – To create a 1.5 TiB partition (1 TiB + 512 GiB), append “T” after the partition size of 1.5.
100000S – To create a partition 100000 sectors large, append “S” after the partition size of 100000.
A new partition should be created on the disk.

To demonstrate the different features of cfdisk, we created some new partitions on the disk.
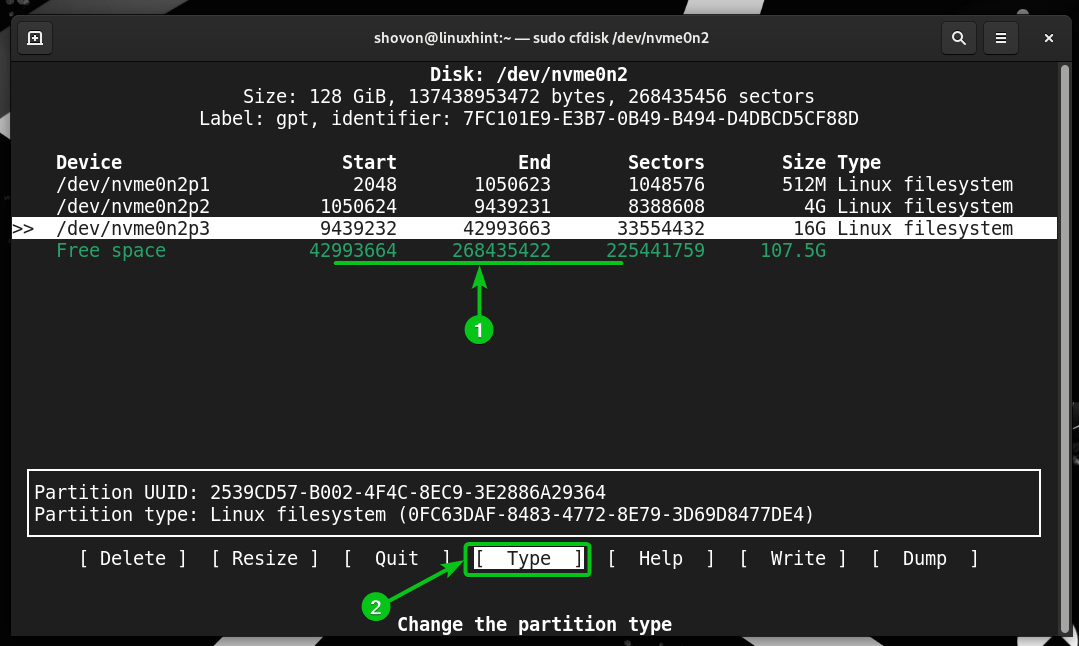
Changing Partition Type Using Cfdisk
To change the partition type of a partition, select the partition from the list[1], select [Type][2], and press <Enter>.
You can also select the partition and press “t” to change the type of the partition.
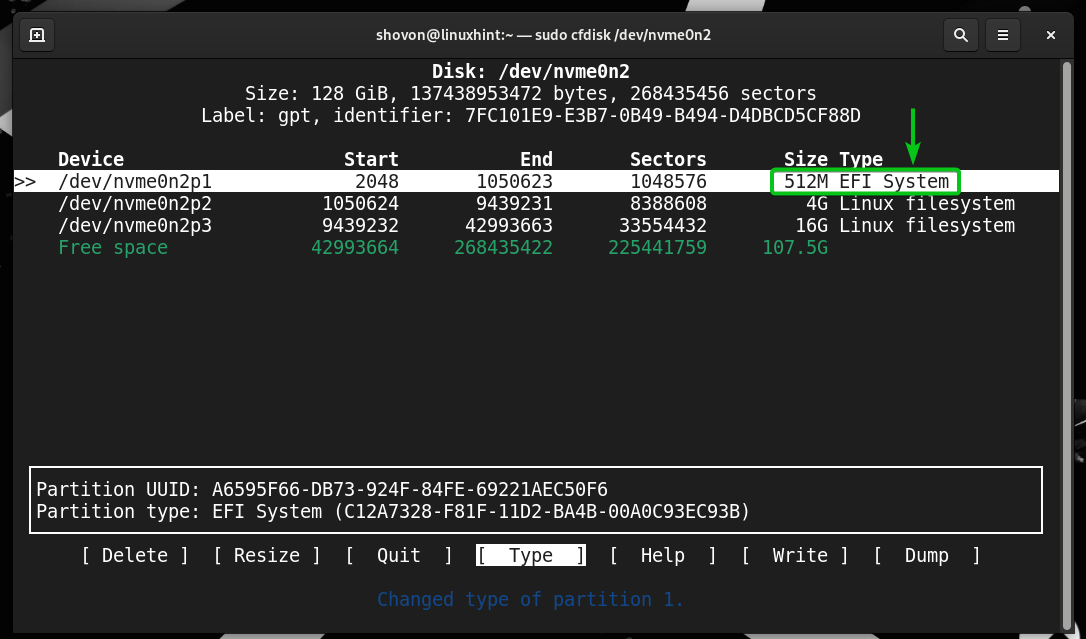
Select an appropriate partition type from the list and press <Enter>.
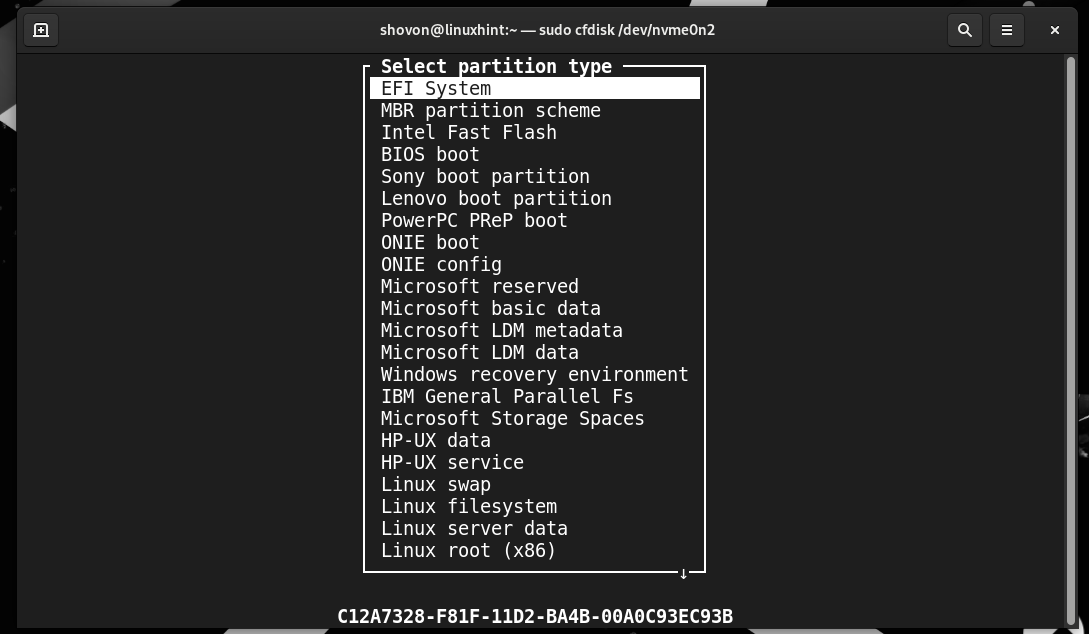
We created an EFI System partition as you can see in the following screenshot:
Setting/Unsetting a Bootable Flag on Partitions Using Cfdisk
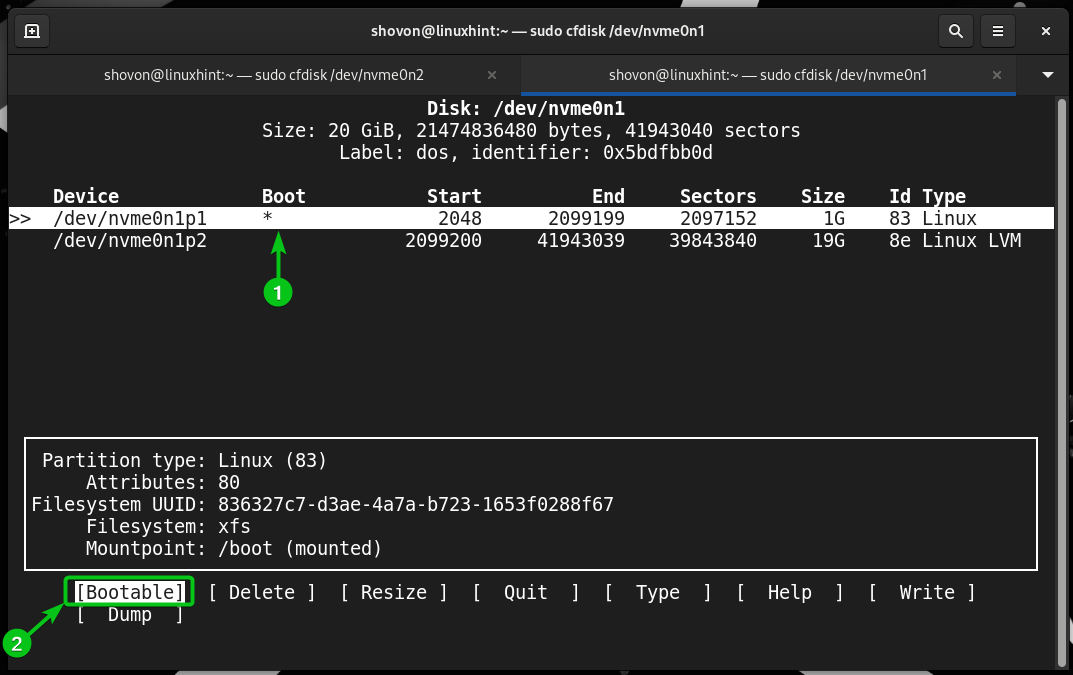
In dos/MBR partitioning scheme, you can set a bootable flag on the partitions.
To toggle on/off the bootable flag on a partition, select the partition[1], select [Bootable][2], and press <Enter>.
You can also select the partition and press “b” to toggle on/off the bootable flag.
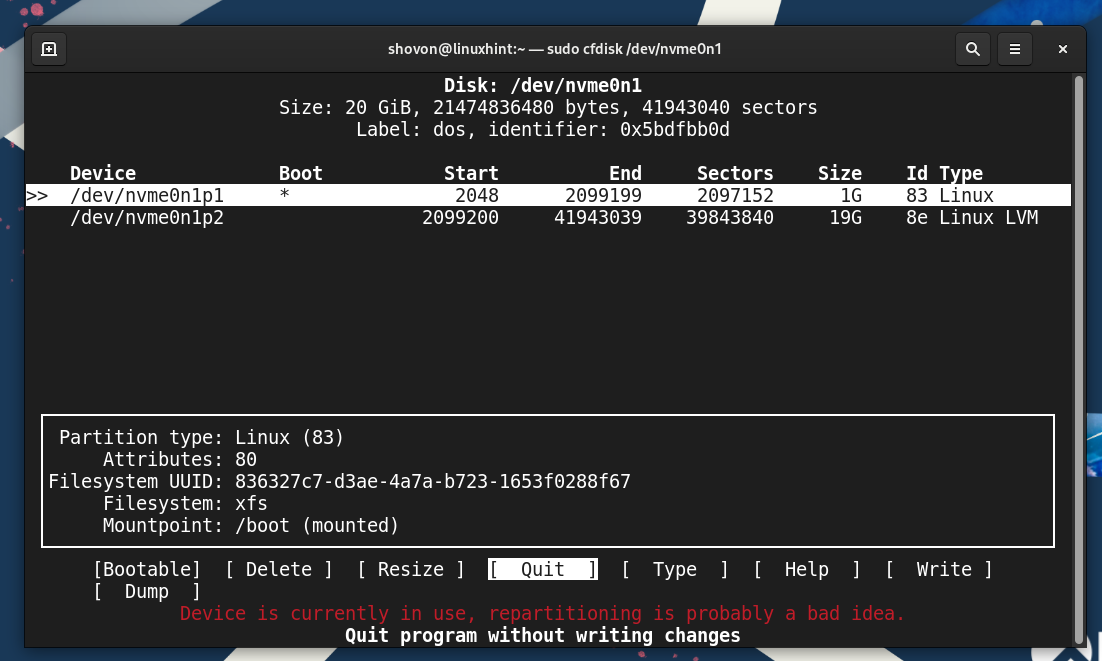
If the bootable flag is set on the partition, you will see a “*” in the “Boot” section[1].
Removing Partitions from the Disk Using Cfdisk
To remove/delete a partition from the disk, select the partition[1], select [Delete][2], and press <Enter>.
You can also select the partition and press “d” to delete the partition.
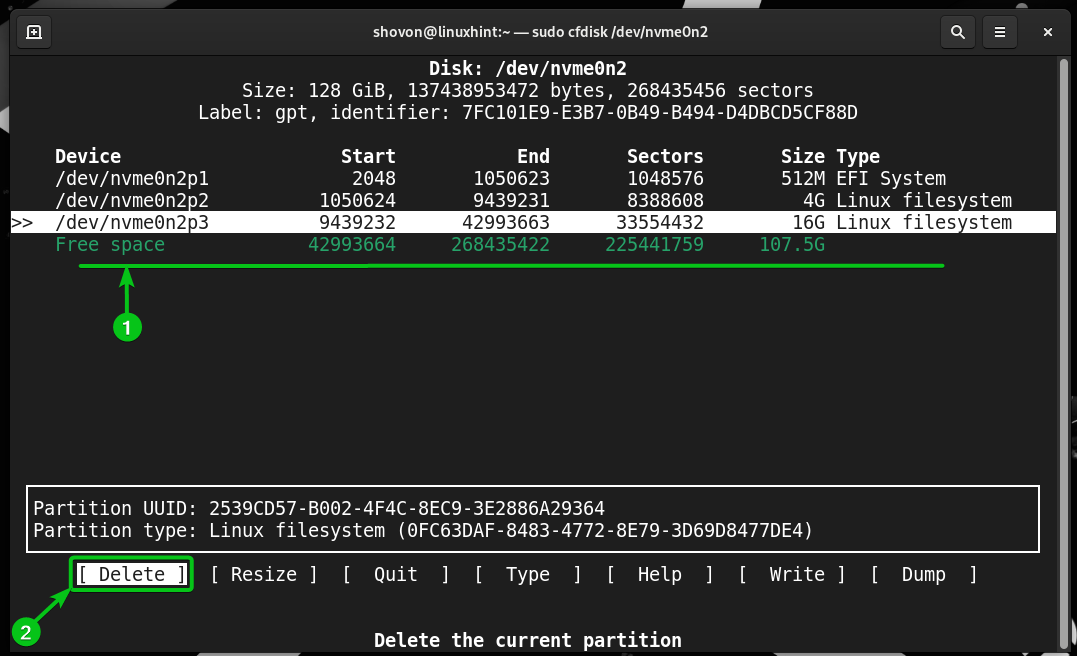
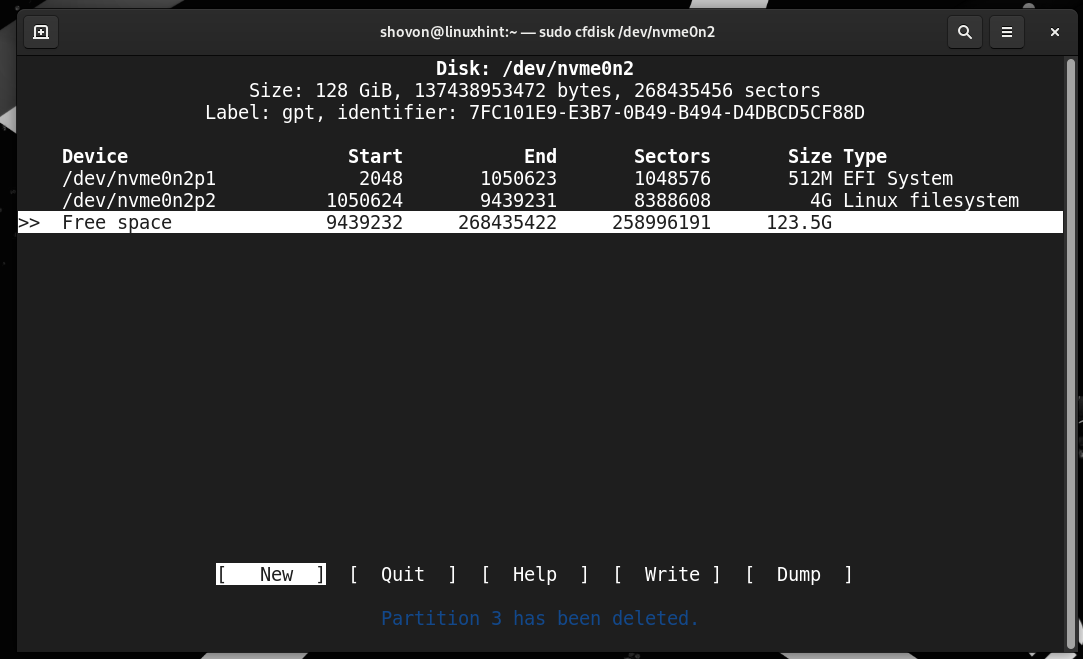
The partition should be removed/deleted from the disk.
Resizing Partitions Using Cfdisk
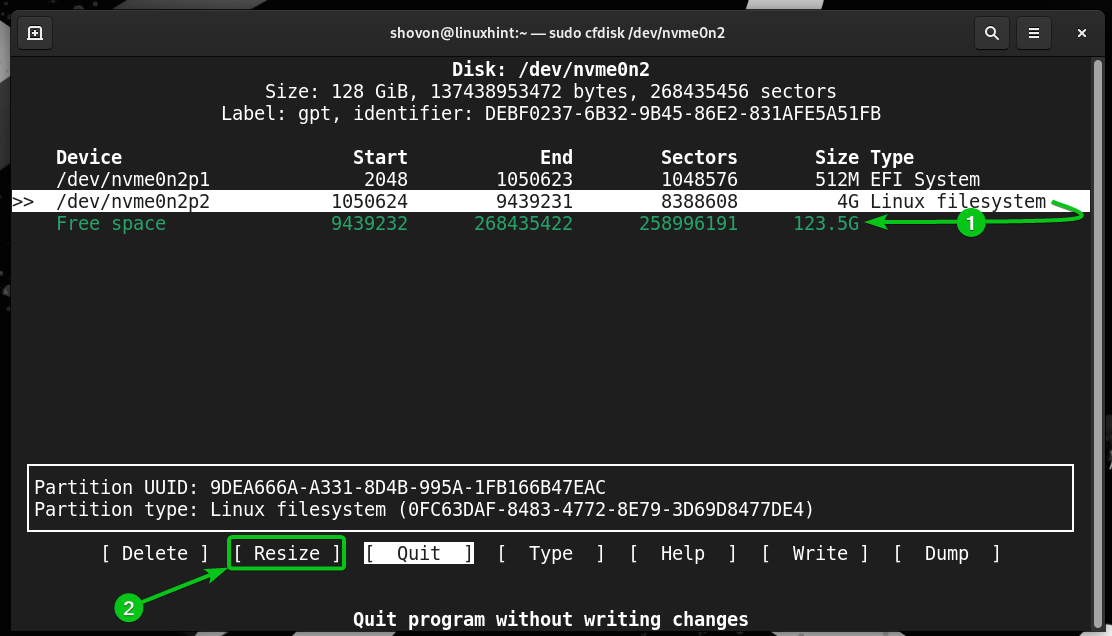
NOTE: To increase the size of the partition, you must have a free space just below the partition[1].
NOTE: Decreasing the partition size might result in data loss. So, be careful while decreasing the size of the partition when you have an important data on the partition. On the other hand, increasing the size of the partition is a risk-free operation.
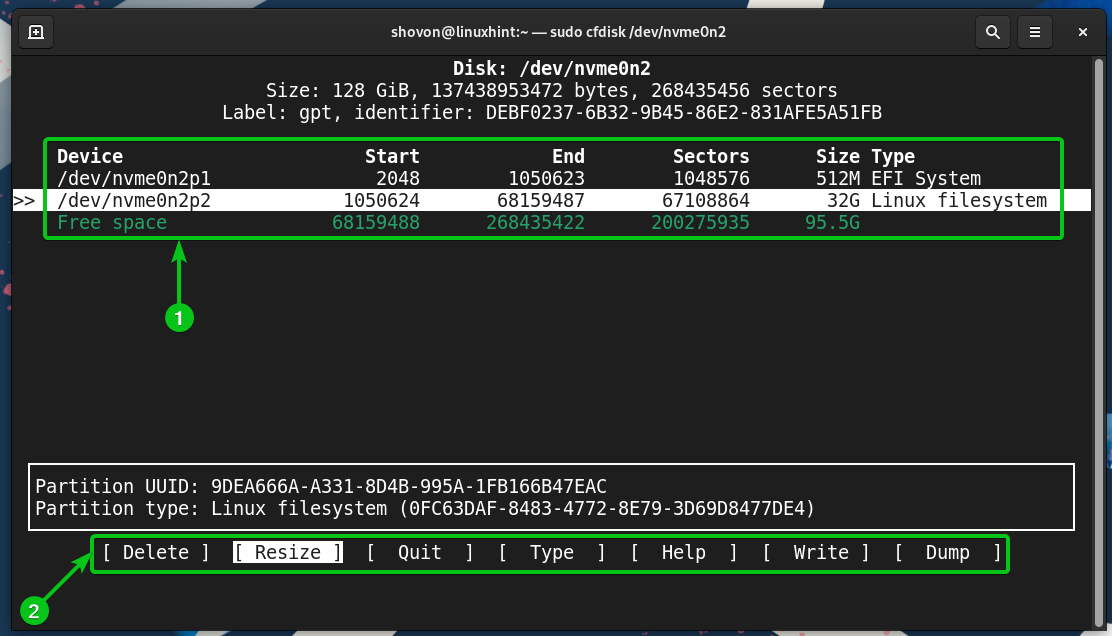
To resize a partition, select the partition[1], select [Resize][2], and press <Enter>.
You can also select the partition and press “r” to resize the partition.
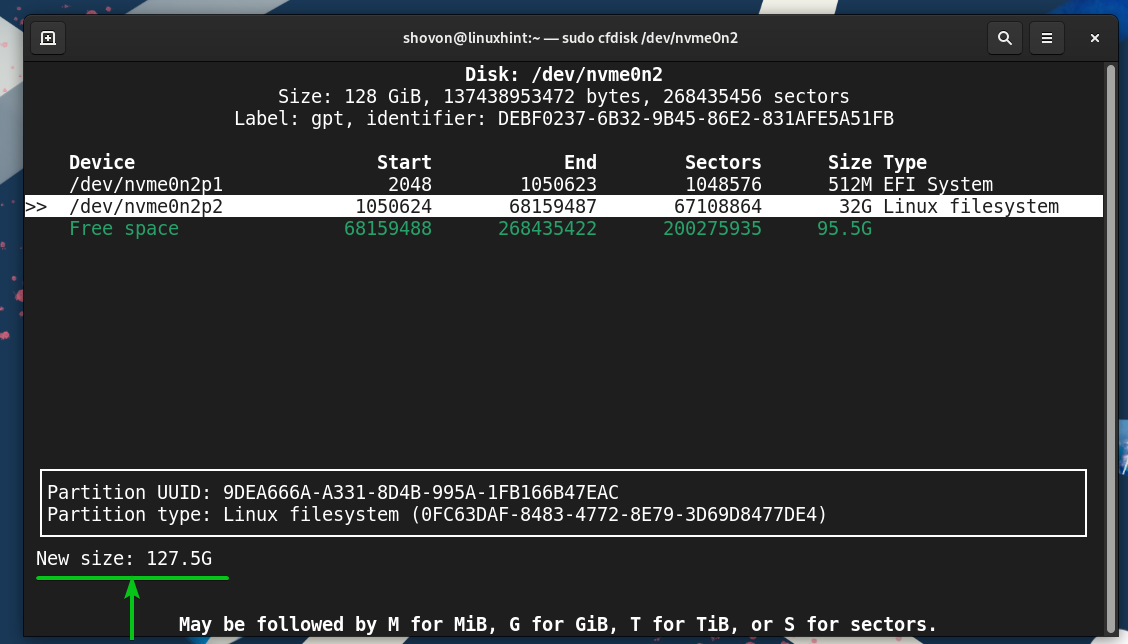
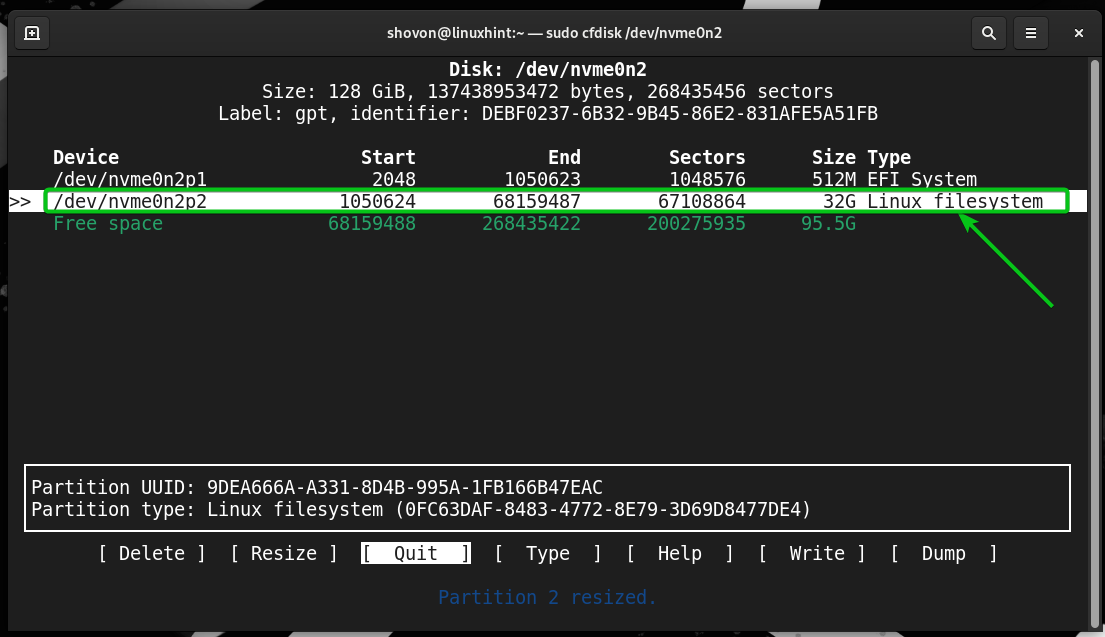
Type in a new size for the partition and press <Enter>.
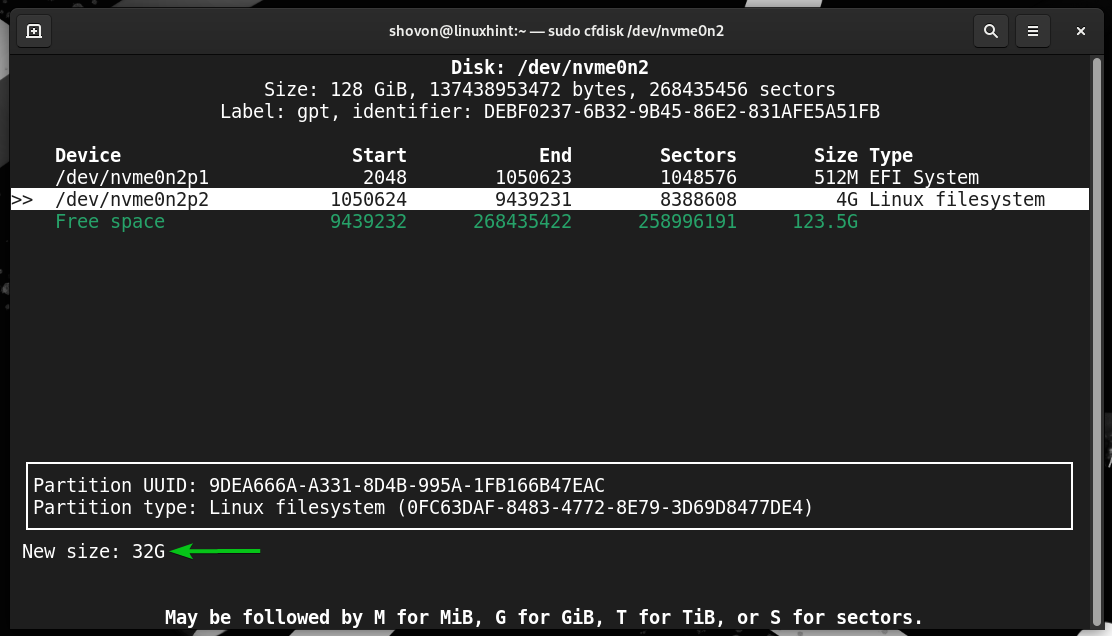
The partition should be resized.
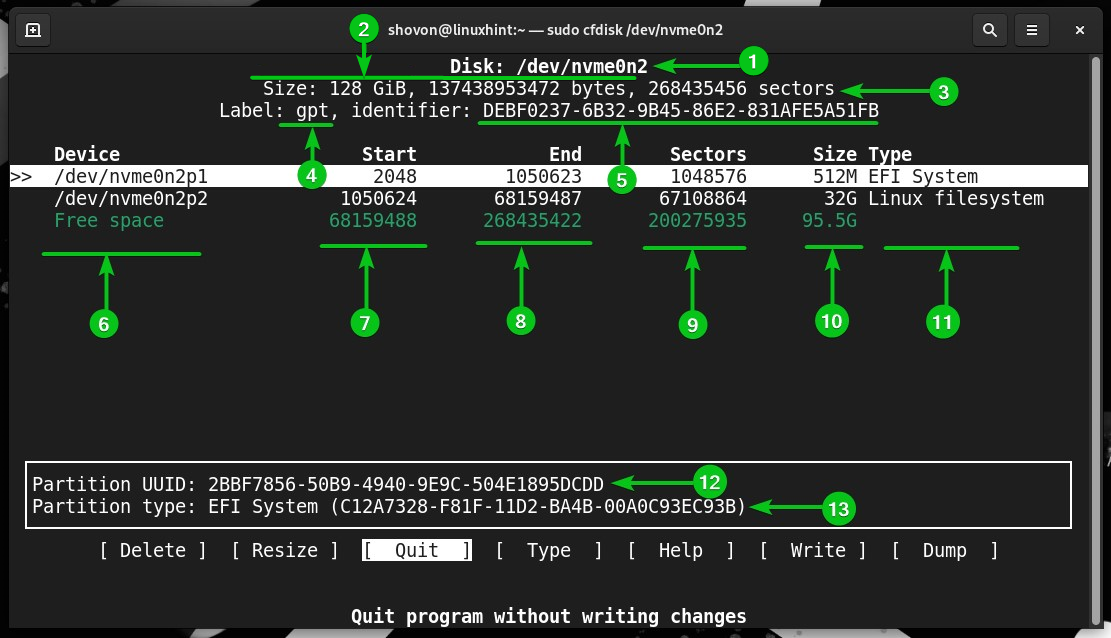
Finding the Partition Information Using Cfdisk
On the cfdisk user interface, you will find a lot of information about the partition table/layout and partitions of the disk.
In the top section, you will see the full device path (i.e. /dev/nvme0n2)[1], the size of the storage device (i.e. 128 GiB, 137438953472 bytes)[2], and the available sectors (i.e. 268435456)[3]. You will also see the partitioning scheme (i.e. gpt) and the UUID/identifier of the partition table (i.e. DEBF0237-6B32-9B45-86E2-831AFE5A51FB).
You will also see a list of available partitions on the disk and the following partition information:
- Full device path of the partitions[6]
- Start sector number of the partitions[7]
- End sector number of the partitions[8]
- Used sectors of the partitions[9]
- Size of the partitions in human-readable format[10]
- The partition type[11]
At the bottom section, you will see the UUID[12] and type[13] of the selected partition.
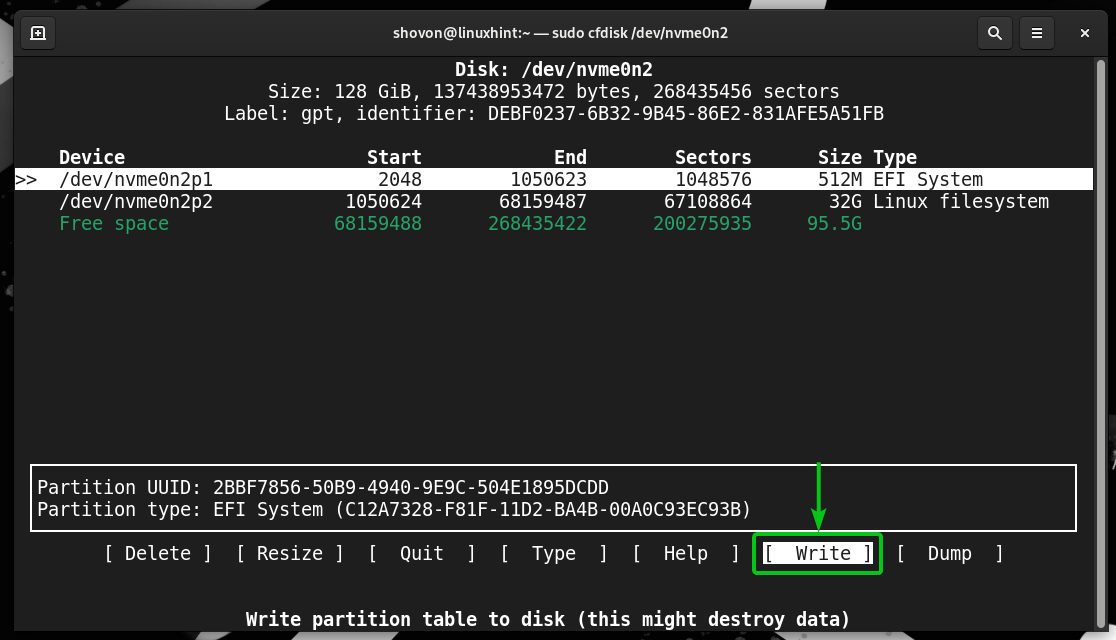
Writing the Partition Table to the Disk Using Cfdisk
Once you’re done partitioning the disk, you have to write the changes to the partition table of the disk.
To write the changes to the partition table of the disk, select [Write] and press <Enter>.
You can also press <Shift> + w to write the changes to the partition table of the disk.
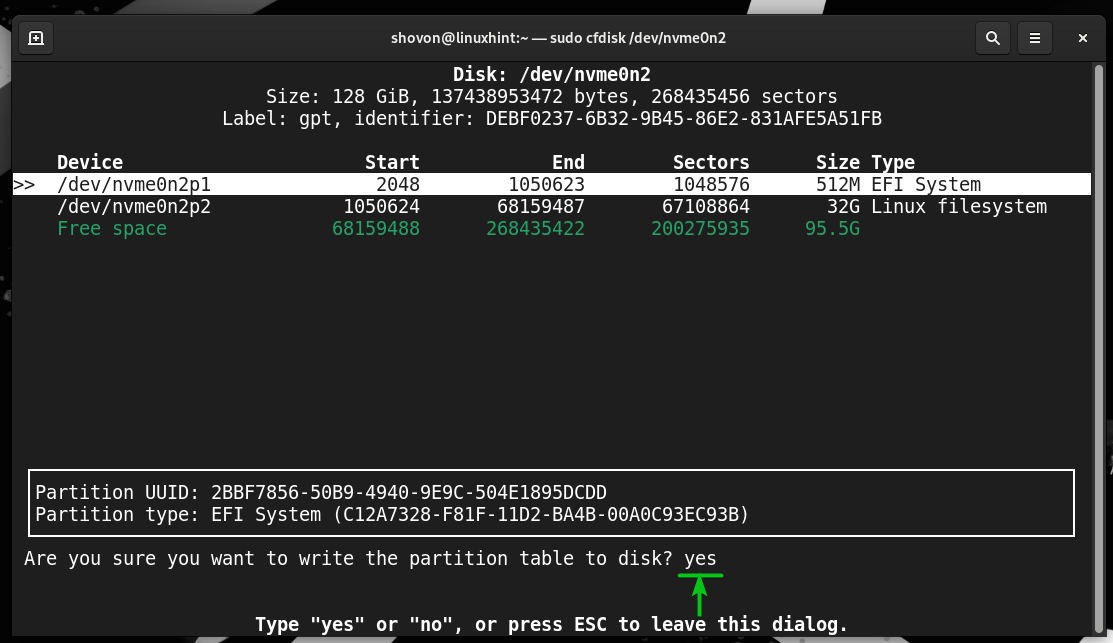
To confirm the write operation, type in “yes” and press <Enter>.
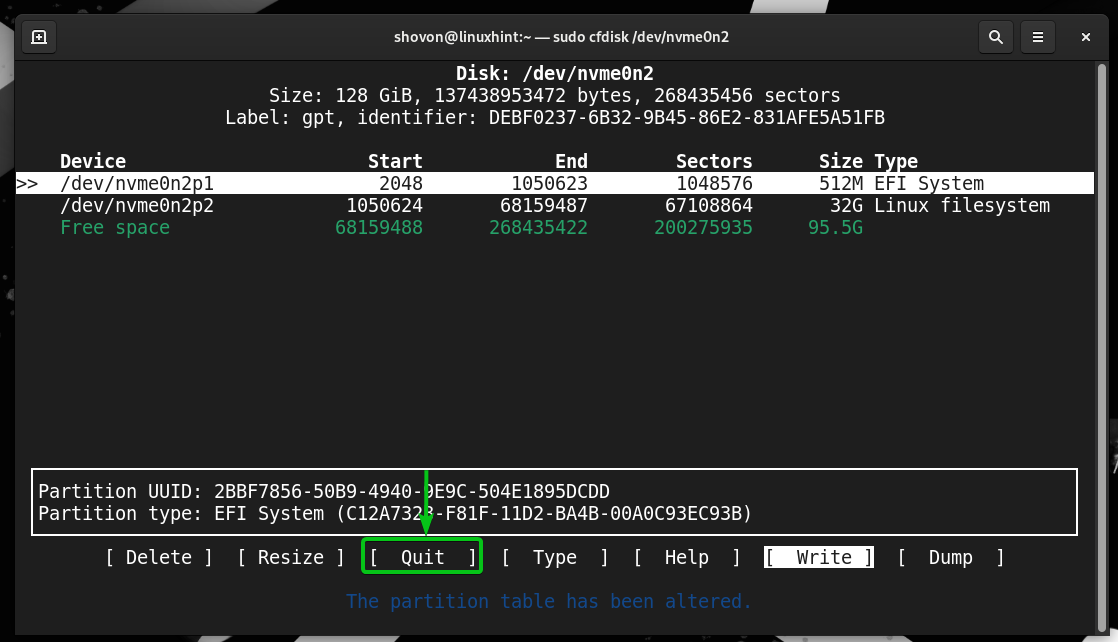
The partition table should be saved on the disk.
To close the cfdisk program, select [Quit] and press <Enter>.
You can also press “q” to close the cfdisk program.
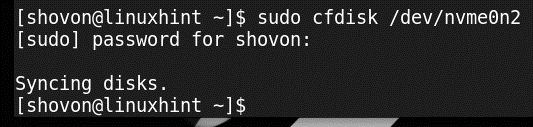
The cfdisk program should be closed.
Getting Help on Cfdisk
If you need any help with cfdisk, you can:
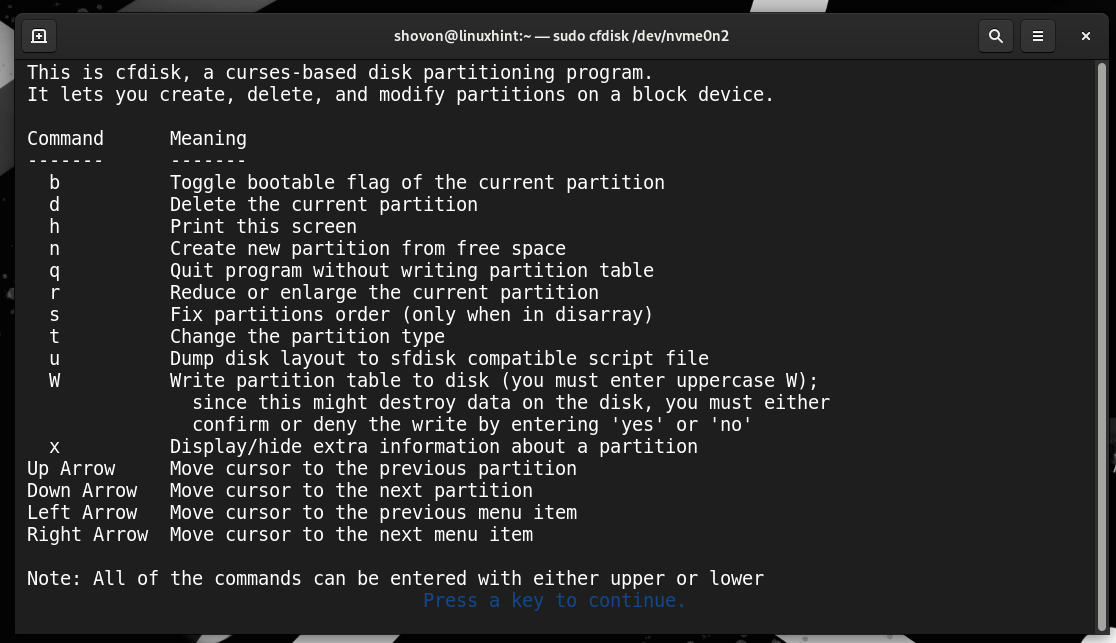
1. Read the help window of cfdisk.
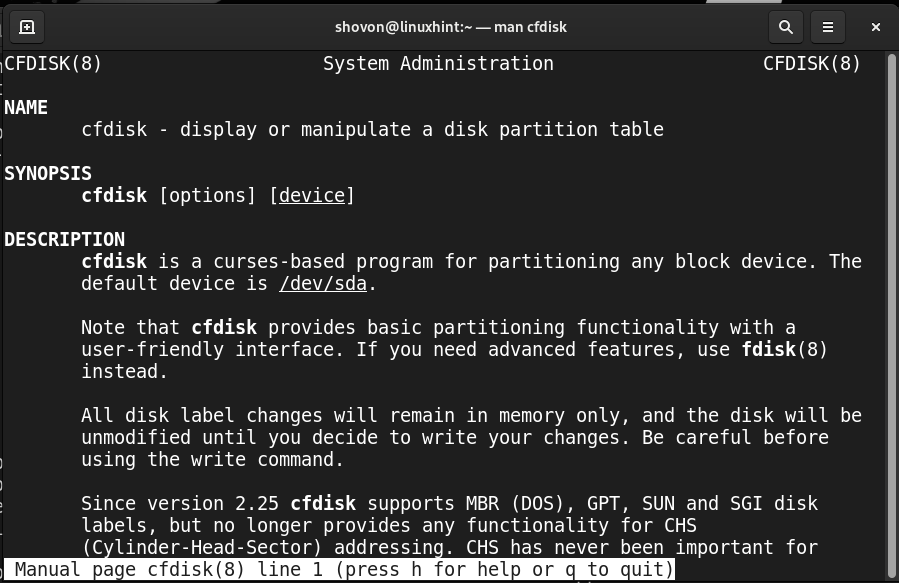
2. Read the manpage of cfdisk.
To display the help window of cfdisk, select [Help] and press <Enter> or just press “h”.
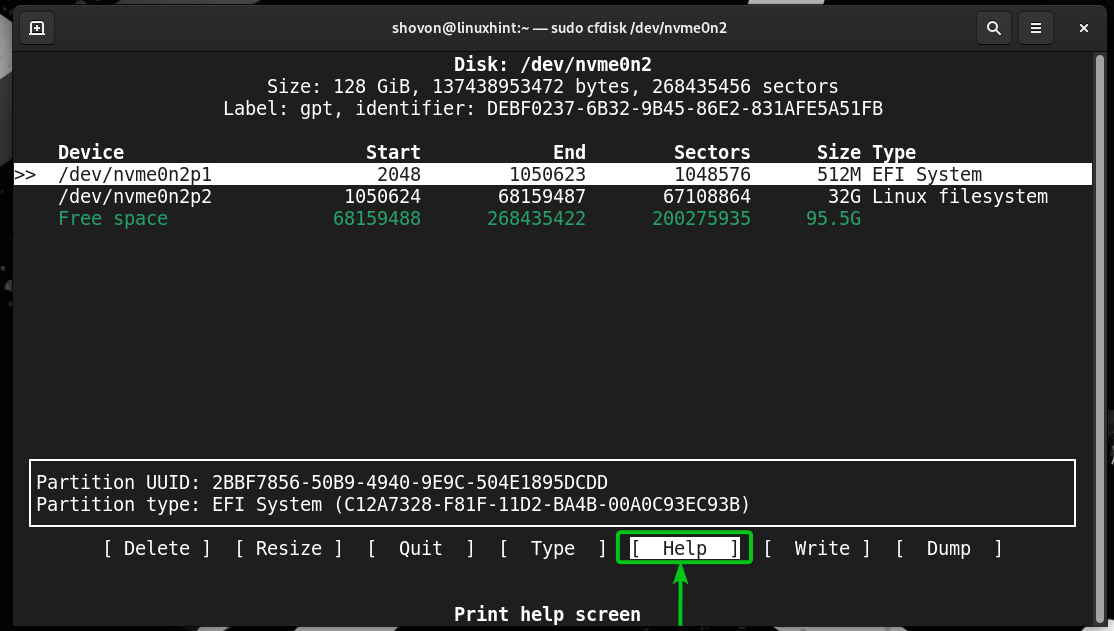
The help window of cfdisk should be displayed. You will find a lot of information on using cfdisk from here.
The manpage of cfdisk has a lot of useful information as well. To read the manpage of cfdisk, run the following command on a terminal app:
Conclusion
In this article, we showed you how to open a disk with cfdisk for partitioning and navigate the user interface of cfdisk. We also showed you how to create a partition table on new disks, add/remove/resize the disk partitions, change the partition types, and toggle on/off the bootable flag on dos/MBR partitions. Finally, we showed you how to save the partition table on the disk.