OpenSSL works with the SSL and TLS protocols. We will cover the different ways on how you can use the OpenSSL s_client to test and verify your SSL connections.
OpenSSL S_Client Usage Examples
The OpenSSL toolkit offers many options that you can specify to achieve different objectives.
1. Test the Connection
To test your HTTPS service connectivity and view the diagnostic information related to the SSL connection to a given server including information such as certificate chain, you need to use the –connect flag.
We are using port 443 as it is preferred for secure HTTP over TLS/SSL. The command’s output displays basic details about the connection you are establishing with the server.
For example, we will use kyle.com as the server.
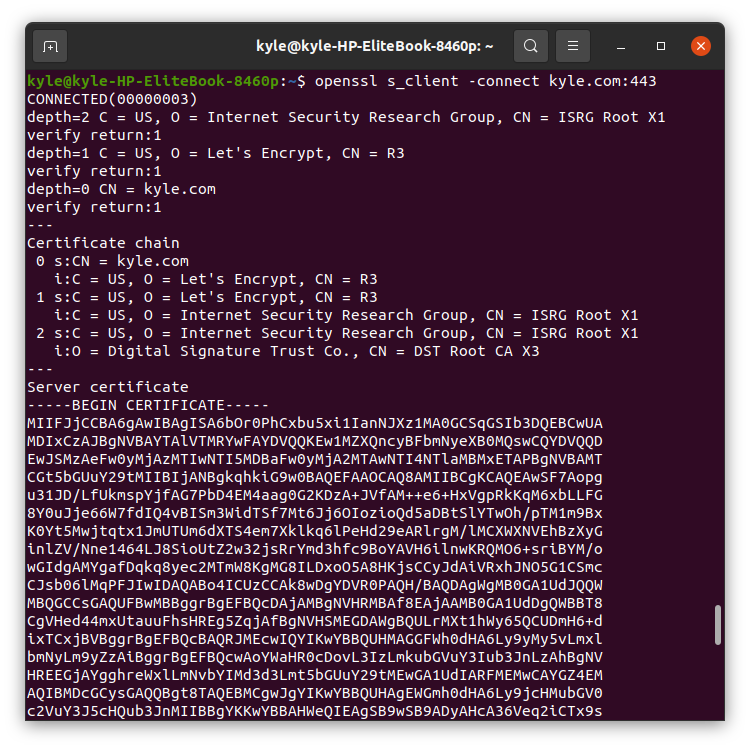
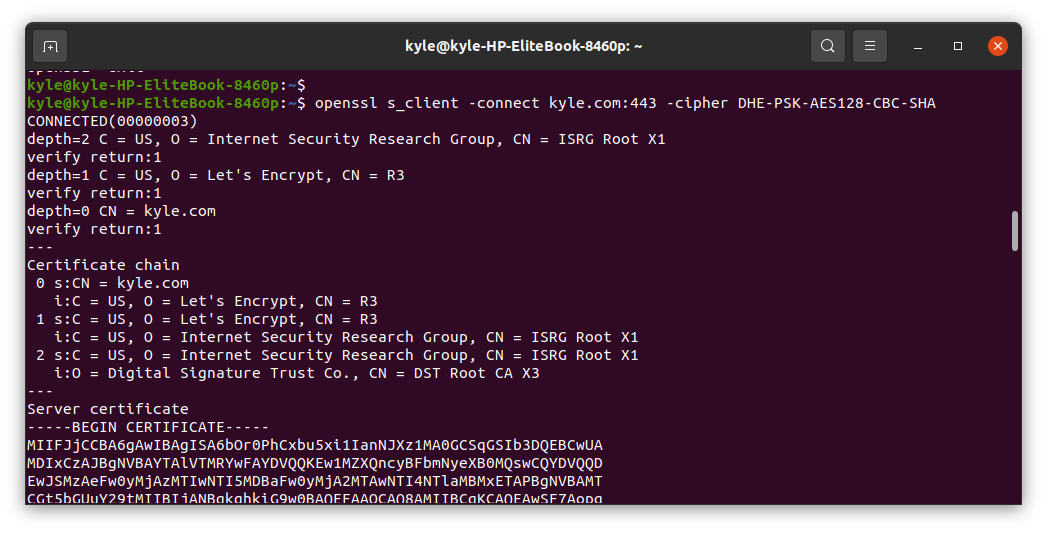
2. Print All Certificates
The SSL service presents certificate chains, and you can display all of them, which is helpful when you need to troubleshoot certificate issues such as misordering certificates.
The output will show the different certificates as reflected in the following image:
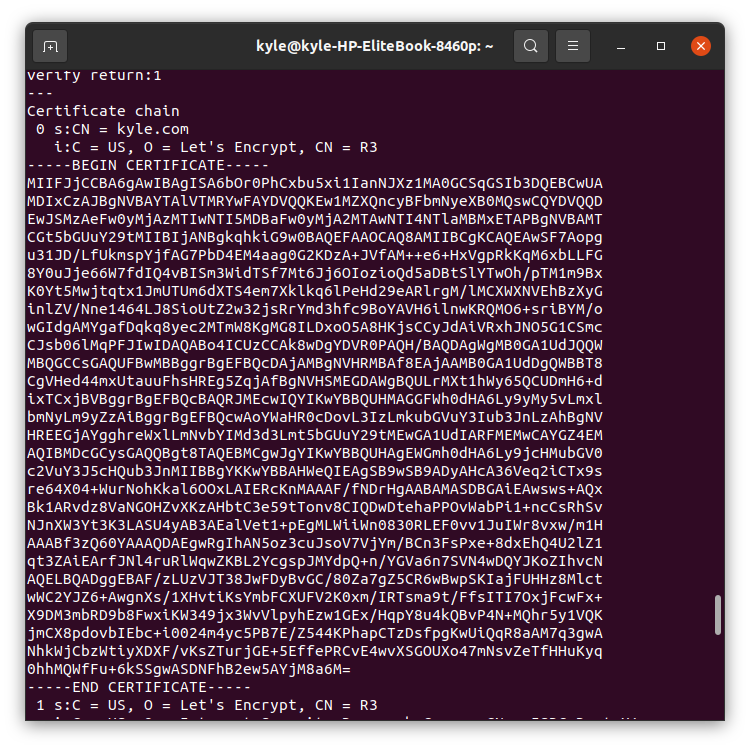
You can manually inspect each of the certificates that is returned by the server from the output.
3. Check the Validity of Certificate
Once you have the chain of certificates returned by the server, you can test how valid they are.
To confirm the validity, look for the Verification, and its output should read “OK”.
The -brief flag helps narrow the output by excluding some verbose details.
In our case, we confirm that our certificates are valid.

4. Check the Certificate Expiration Dates
Using the OpenSSL s_client, you can check the expiration dates of the website’s certificate from the command line. Here, you will need to combine two commands as reflected below:
The -noout flag suppresses the command from displaying the encoded certificate.
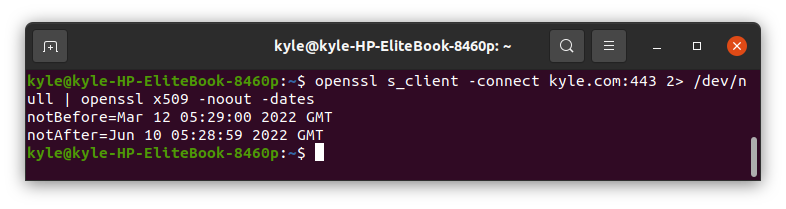
The output shows the range when the certificates will expire. As a system administrator, such details are vital as you get to know when you need to get a new certificate.
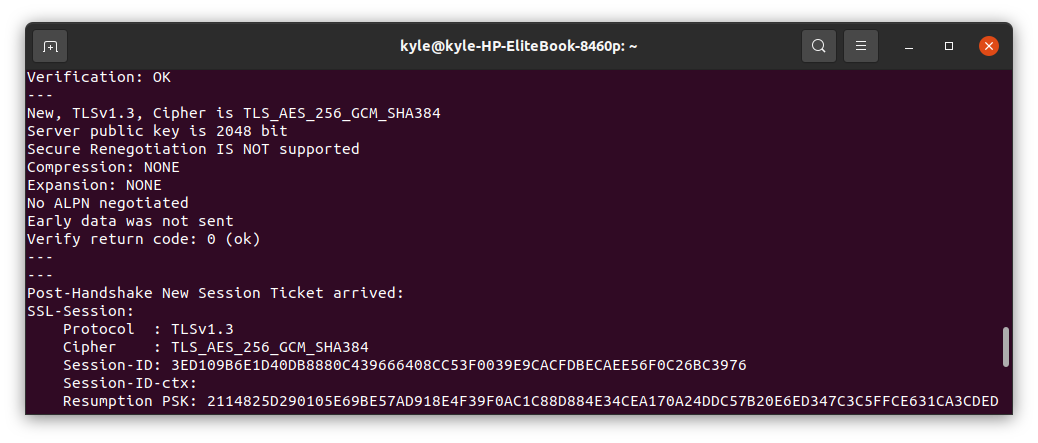
5. Verify the SSL Connection
To check the status of the SSL connection to your server, use the -verify_return_error flag.
If the connection is successful, the handshake will pass. But if you see errors, it means that the SSL Handshake has failed and no connection can be established.
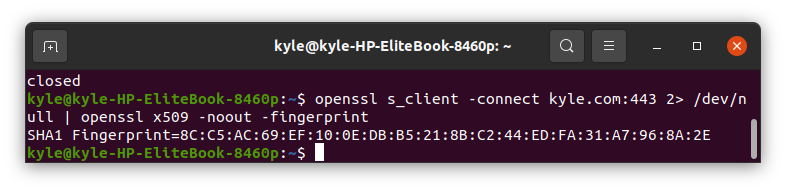
6. View the Fingerprint for the SSL Certificate
SSL certificates have a fingerprint. You can get the fingerprint of a certificate as shown in the following:
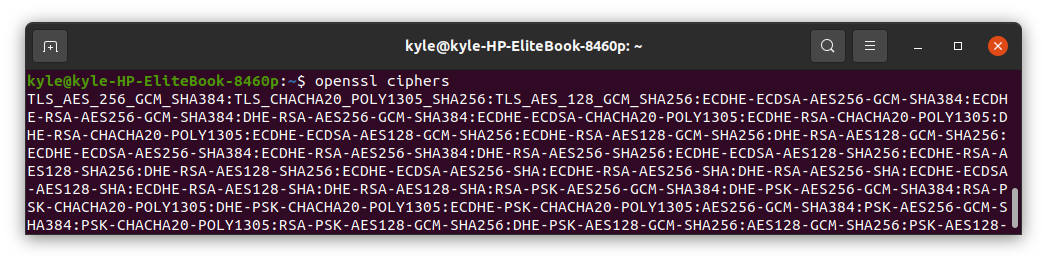
 7. Specify the Cipher
You can specify which cipher or encryption type to use for the certificate using the -cipher flag. For instance, we can specify to use the DHE-PSK-AES128-CBC-SHA. By doing so, the client-side will need to use the specified cipher suite for connection.
You can view the list of available ciphers using the following command:
The output should look similar to the following image:
8. Specify the SSL/TLS Version and Ciphers to Use
The s_client, by default, negotiates which protocol version for SSL/TL to use. Nevertheless, you can specify which versions to use using either of the following options:
- -ssl2: SSL version 2
- -ssl3: SSL version 3
- -tls1: TLS version 1.0
- -tls1_1: TLS version 1.1
- -tls1_2: TLS version 1.2
Furthermore, before you specify which ciphers to use, you can first check the supported versions. In the following example, we will check the tls1_3 versions.
The command is as follows:
The supported ciphers are:

If you want to specify a given SSL/TLS version for the connection, you only need to add it when testing your connection, like in the case below:
If you don’t want to use a given version, prepend a no_ to the name. An example of disabling tls1_1 would be no_tls1_1. In such a case, the other protocol versions will be used.
9. Send Protocol-Specific Message
The OpenSSL supports different protocols, such as FTP, IRC, SMTP, LDAP, pop3, IMAP, etc. When you need to test the connection using a specific protocol or specify which protocol to use for the communication, you can use the -starttls flag.
For instance, to test the hftp certificate, use the following command:
10. Verify the Hostname
To verify the hostname, use the -verify_hostname. If the hostname doesn’t match, you will get a verification error message like the one below:
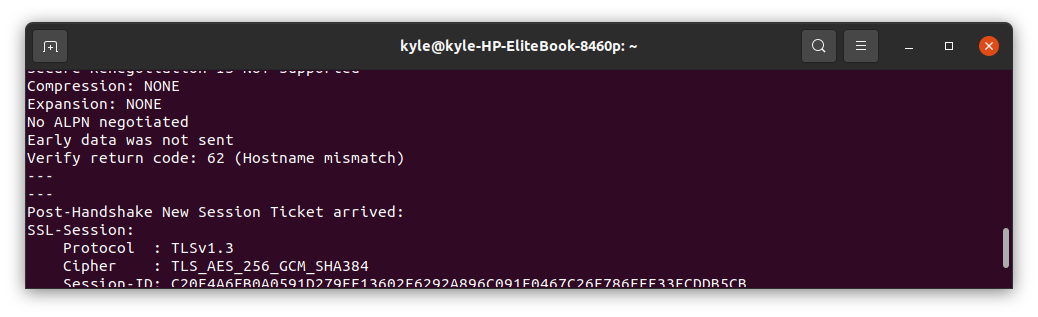
If that’s the case, you need to get a certificate with a SAN or CN that matches your domain.
Conclusion
The OpenSSL toolkit has endless options that you can use to serve your need. We’ve covered the common ones, but the main page is your best resource if you need to explore more. Learning the OpenSSL will make your life easier when dealing with servers and connections for any system administration tasks. Therefore, make a point to practice the command.