This post will assist you in installing NVM on an Ubuntu system. Additionally, we will demonstrate the installation of various node versions and other helpful examples.
What Is NVM?
It is a tool for Node Version Management. With the aid of the NVM utility, multiple Node.js versions can be installed on a single system. We can choose a specific version of the node for many applications. It also provides the ability to automatically select the node version that contains the configuration file or “.nvmrc”.
Node.js is a JavaScript runtime environment that is multiple operating systems compatible. It enables the programmers to develop scalable server-side apps using the same language that they use for web development.
NVM is a Node.js version manager that allows the users to install and manage multiple Node.js versions on Linux systems. A “node.js” developer who is working on several projects that require different Node.js versions often chooses to utilize NVM to install and switch between various versions rather than manually install and remove each needed version for each project. With the tool, the users can create their own applications. This tool will definitely save a substantial amount of your time and effort.
Prerequisites:
- Ubuntu 22.04, 20.04, or any other Debian-based distribution (fresh install recommended)
- SSH access to the server (or a terminal window if you are installing locally)
- Non-root sudo user account (recommended) or root user access
NVM Installation on Ubuntu
Step 1: Update Your System
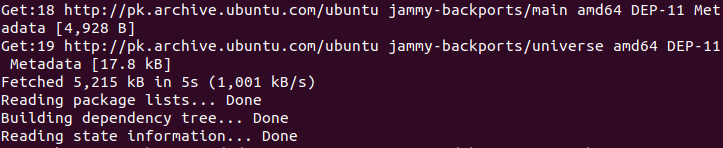
Before installing any new packages on our system, it is recommended to update the system using the “apt-get update” or the “apt update” command. Using the Ubuntu repository, this command will assist us in downloading and installing all presently available updates.
Output:
Step 2: Download and Install NVM for Node.js
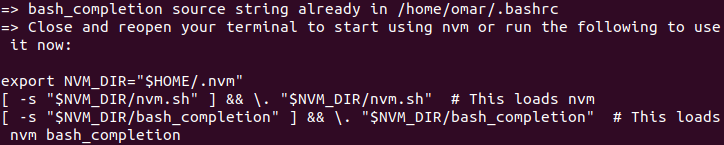
Now that our server is updated, let’s download and install NVM. The standard Ubuntu repository does not include NVM. To install a newly released stable NVM release, use this command:
Output:
Step 3: Verify the Installation
Once NVM has been successfully installed on our server, you can check the NVM version that is now running on your computer to confirm the installation.
Output:
![]()
Step 4: Using NVM to Install Node.js
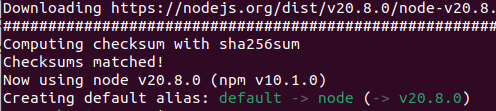
After installing NVM, we can now use the command to install Node.js. Using its official website, this command will assist us in downloading and installing the most recent version of Node.js. The following is a mention of this command:
Output:
Step 5: Verify the Node Version
The node’s version can be verified in Ubuntu. We’ll use the “node –version” command to display the most recent installed version on our machine.
Step 6: Install the Most Recent LTS Version Using –Lts
Applying the following command allows us to install the most recent LTS version of Node.js. The most recent LTS version will be found and installed for us using this command. The version does not need to be manually described.
Output:

Step 7: Install a Specific Node.js Version
Run the following command to install a specific version of Node.js. With the use of the following command, we install the Node.js version 11.5:
Output:

This command can be used to install any specified Node.js version.
Step 8: List Every Installed Version
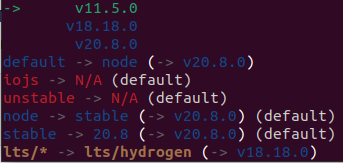
Running the following listed command will help us check every version of Node.js that is currently installed. The node’s different versions on our system are displayed using the following command:
Output:
Step 9: Switch the Node.js Version
The following listed command can be used if we want to switch/change the Node.js version. Using the following command, we switch the current version of Node.js to version 20.8.0:
Output:
![]()
Step 10: Set a Default Node.js Version
Set the default Node.js version using the following command, replacing NODE_VERSION with the version number that you desire to set as the default:
Make the Node.js version 18.16.0 as the default version:
![]()
Run this command to ensure that the default Node.js version has been successfully set:
![]()
This output should display the version of the default set Node.js version.
Step 11: Delete Node 11.5 from Your Machine
Use the following listed command if you want to uninstall a specific Node.js version. The following command uninstalls the 11.5 version from your system.
Output:
![]()
After the uninstalling process, we won’t see the Node 11.5 version in the list of installed versions.
Step 12: Installing a Stable Node.js Version
To install the most recent or most stable version of Node.js, use the following command:
Output:
![]()
You may have observed that no specific version has been described here. Therefore, if we are unsure of the most recent stable version, we can use this command to discover and install it.
Best Practices to Use the Node Version Manager
Here are a few NVM best practices:
- Set a default Node.js version. This ensures that your application runs on the correct Node.js version.
- Before executing an application, make sure that you’re using an appropriate Node.js version. This helps to prevent the compatibility issues by ensuring that your application runs on the intended version of Node.js.
- Uninstall the unused Node.js versions. This keeps your system clean and tidy.
- Upgrade to the latest version of NVM. This guarantees that you are utilizing the most recent NVM version with the most up-to-date features and bug fixes.
Conclusion
Installing and utilizing NVM on Ubuntu was covered in this post. We may use NVM to manage several Node.js versions on our system. This is helpful because it empowers us to work on different projects that require various Node.js versions while ensuring that our apps always run on the most recent or suitable version of Node.js. We also learned some best practices for using NVM such as setting a default Node.js version, switching to the correct Node.js version before running an application, uninstalling the unused Node.js versions, and upgrading to the latest version of NVM.