
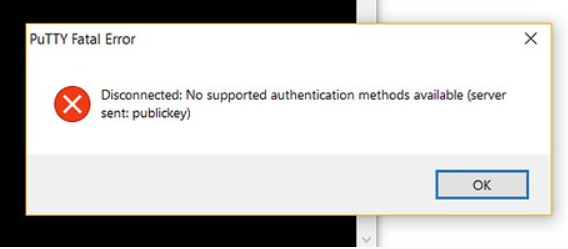
This error indicates that our SSH client (mostly PuTTY) has probably run out of ways and can’t authenticate us to an SSH server. This issue has various causes, the notable ones being that some settings may have been tweaked or error on the part of the user, while in other cases, the user may have TIS or keyboard authentication disabled.
We now dive into the process of authenticating a remote host to successfully enable system usage
Procedure to enable supported Authentication
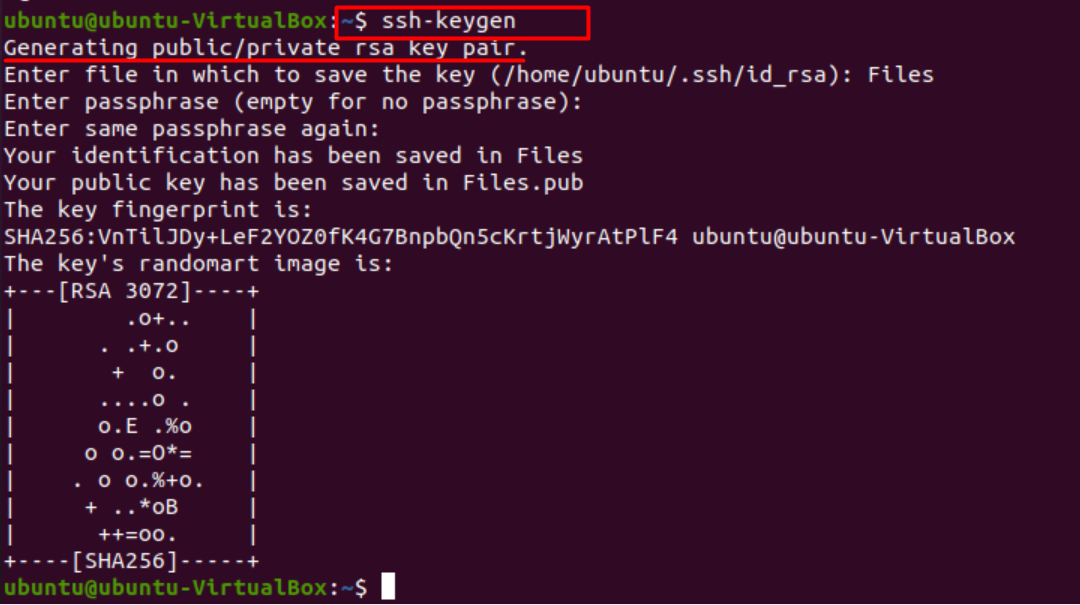
We start by generating a key pair using the command.
This command creates a 2048-bit keypair which is secure enough for most remote protocols, but we can generate a 3072-bit pair by typing in –b 3072 or a 4096-bit pair by typing –b 4096
After entering the command, we will see a message stating the generation of public-private key pair, and the terminal will prompt us to state the name of the file in which to save the key.
Save the key in .ssh/ subdirectory or choose an alternate path. If a key already exists, we will be asked to overwrite it; once we choose to do so, we won’t be able to use the previous key for authentication anymore. This step should be followed when the SSH fails to identify the host system or gives a “no authenticated support” error.
Having done that, the system will prompt us to enter a passphrase which is highly recommended for an extra layer of security that won’t let unauthorized users log in.
We will then see an output showing we have obtained the public-private key pair for authentication. Now we have to place the public key on our server to enable SSH-key-based authentication.
The next step is to copy the public key to our Ubuntu server. This can be done using a simple command.
We need to specify the remote host we would like to connect to using this command. We also have to provide the user account to which we have password SSH access. This is the account that will be containing our public SSH key.
The general syntax is.
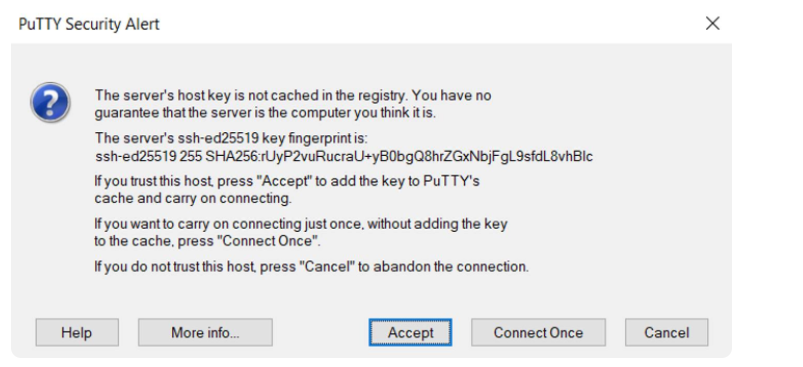
In the message prompted, type ‘y’ for yes, which will copy the key. Linking for the first time with a remote host, your system may not recognize the host, but that will subside once we press the ‘authenticate’ button. Now the remote system is one of the systems which we can use as a host. Afterward, our local account will be scanned by the utility for the id-rsa.pub key that was created earlier.
Once the key has been found, we will be prompted to enter the password for the account of the remote user.
Type in the password and press Enter. Doing so will enable the utility to connect us to the remote host using the provided passcode. It will also duplicate content of ~/ .ssh/id_rsa.pub key to file on the remote accounts home directory (~/.ssh) namely “authorized_keys”.
Once all the steps are performed correctly, we should see the following output.
Number of key(s) added:1
This indicates our key has been successfully added to a remote account.
Finally, we can log in to the remote host using the command.
Type ‘y’ and press Enter to access the remote account.
The process described above should work without giving any authentication problems.
In case one doesn’t feel like typing too many commands on the terminal and prefers a GUI for clear instructions, we recommend using PuTTY.
Resolve authentication support using PuTTY
Assuming one does not have PuTTY, we first go through the process of downloading it on our system. PuTTY is an SSH client that enables remote access to routers and servers and enables remote login. With support for various protocols and additional features like proxy sessions, language settings, and session management, it has gained popularity among a wide range of operating systems, including Windows and Ubuntu.
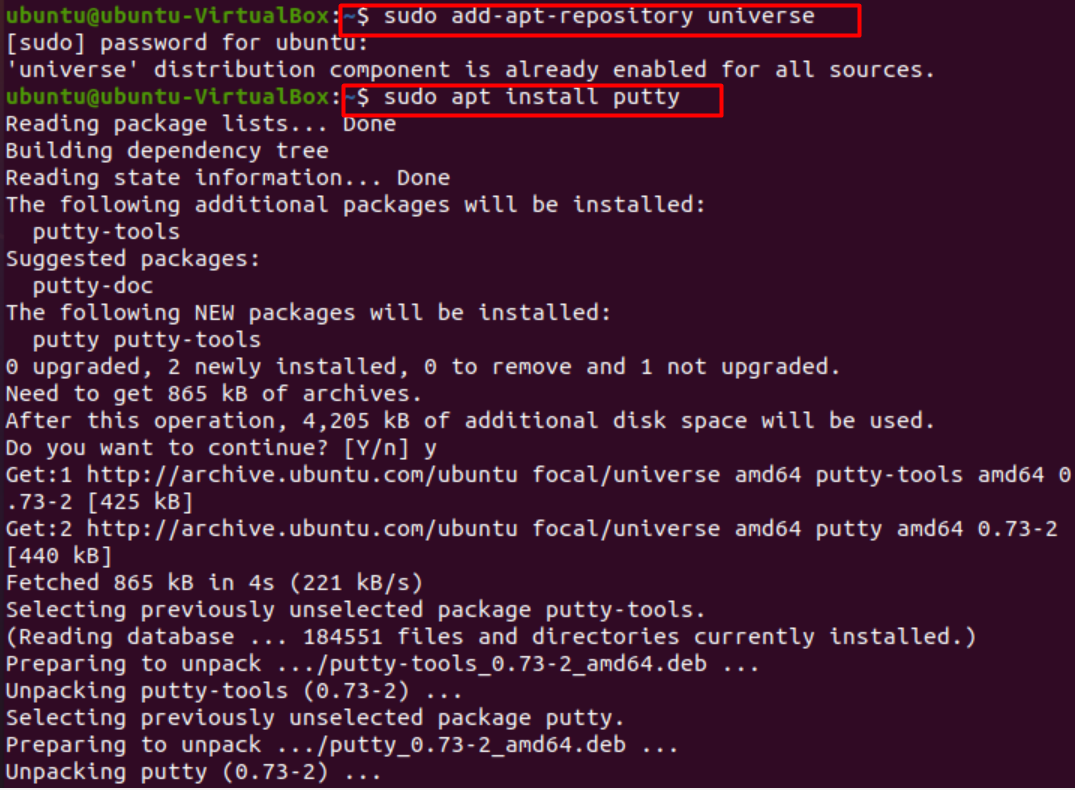
First and foremost, we open the terminal and enable the universe repository for our system using the following command.
Once that is done, we install PuTTY by issuing the following command.
Having PuTTY installed, you can check the version and verify your installation.

Finally, we launch PuTTY via terminal.
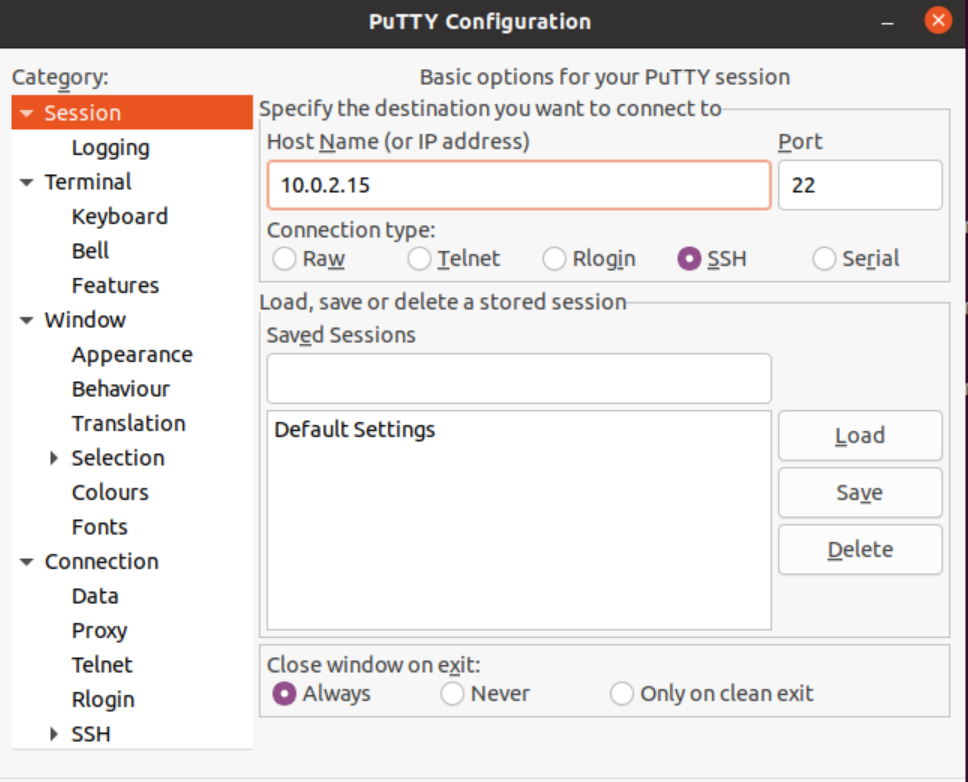
Once launched, we can generate public/private key pairs. Save these pairs in a file. Make sure the private key is kept safe.
Run tools like Pageant and add the private key that was saved. Make sure this is always running
Add the public key to the server in your account, which will be the remote host. We will also have to enter other credentials like a passcode. Afterward, we will be successfully authenticated.
Remedy:
For ease of use, we usually turn off our password authentication. However, to eradicate the no supported authentication error, we need to set the password authentication to “yes” This is done by following the steps given below.
- Open ssh_config file via terminal using
- Set value of password authentication to “yes”
- Now restart ssh server using command.
Note: While connecting to the host, you should provide the correct username and password you set. Otherwise, this minor error could also give the “no supported authentication methods available” error.
Conclusion
Managing a remote host can be a hassle as many problems can arise due to slight mismanagement in the keys and their authentication. In this article, we went over the authentication setting process for SSH and tackled the “no supported authentication” error. We hope our insights were beneficial in clearing your queries and any authentication error faced by you stands resolved.