What Is the nload Command in Linux?
nload is a CLI (Command Line Interface) tool used to monitor network traffic and track real-time bandwidth usage. It is a console application that monitors real-time bandwidth usage and network traffic. It provides insights into all the outgoing and incoming network traffic with graphs. Also, it provides useful information like min/max usage of the network, the total amount of data that has been transferred over the network, etc. This tutorial is designed to give you a walkthrough of the nload command in the Linux operating system.
Prerequisites for Using nload Command in Linux
The nload command will help you monitor your network. However, you need to ensure that your system meets the basic needs of prerequisites to use this command line tool. Here are some prerequisites that your system should meet:
- Ubuntu 22.04 system installed in the system
- Make sure you have root privileges with sudo access to the admin account
- The apt or apt-get package manager tool
- The command line terminal
Ensure that your Linux operating system fulfills all these prerequisites before using the nload command so that you do not encounter any bug or error while executing the command.
How To Install the nload Command?
Assuming that your system meets the needs of all the prerequisites, we will guide you on how to install the nload tool in your Ubuntu 22.04 system quickly. Start your Linux operating system. Open Ubuntu and then open the terminal to execute the commands. Type in the following command so that the nload tool will be installed in the system:
![]()
Press Enter to execute the command. If your system has an enabled password, then you need to provide the password to give the admin access to run the previous command. Once you provide access to the command, you will get the following similar result:
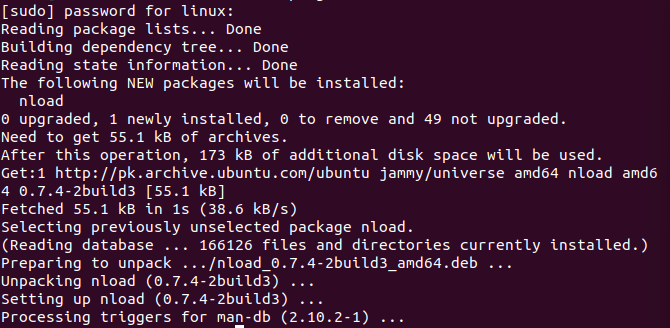
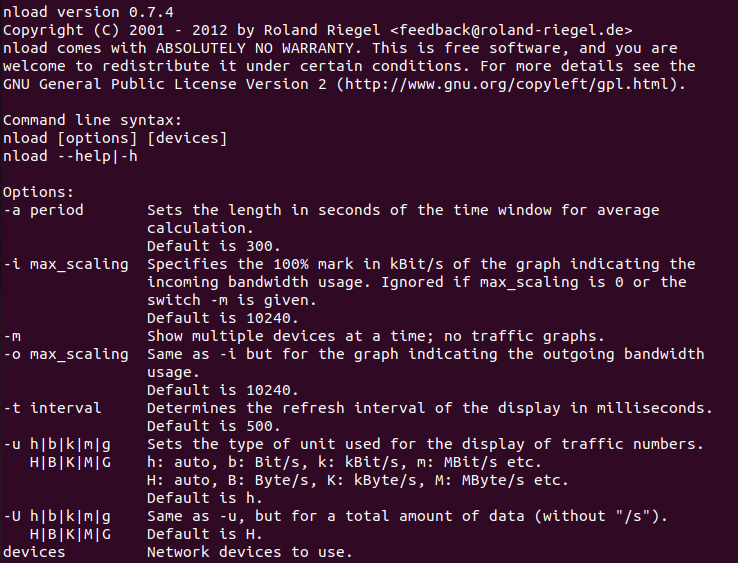
As you can see, the nload and all of its relevant directories and files have successfully been installed with the latest version, 0.7.4. Now, let us print the list of commands that can be used with the nload tool in CLI with the “nload –help” command. Here is the complete command:
![]()
After executing the –help command, you will see the following result. This will give you a complete list of options that can be used with nload:
How To Monitor the Network Using the nload Command
As we already know, the nload command gives incoming and outgoing network traffic information. So let us see how to use the nload command to view the details.
![]()
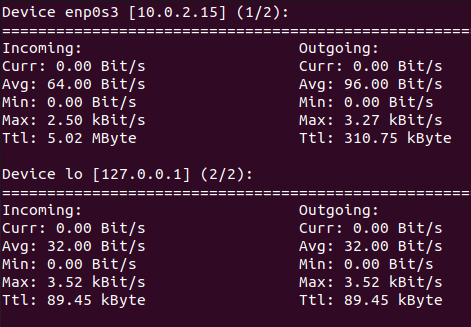
Type the “nload” command on the terminal and press enter to see a similar result:
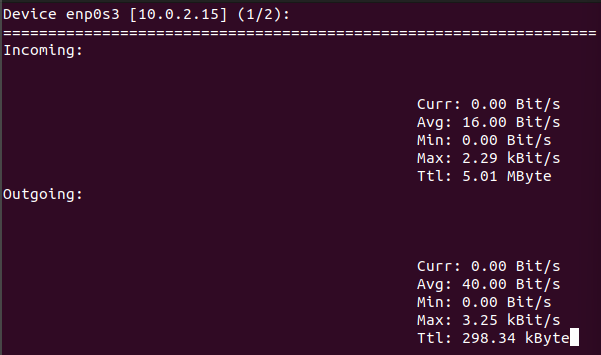
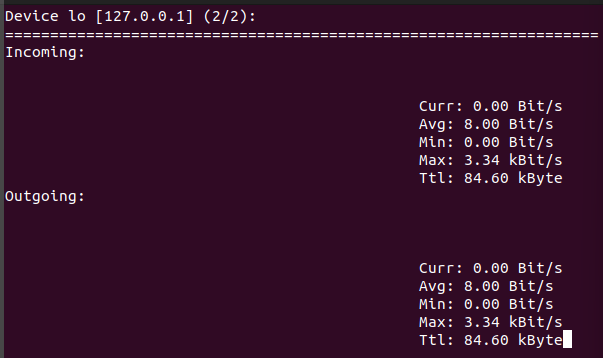
Note that the output shows Device enp0s3 [10.0.2.15] (1/2), indicating two devices on the network. You can also switch between the devices, and for that, all you have to do is, use the left or right arrow key on the keyboard. The previous output is the network report of the first device. Here is the network report of the second device:
If you want to get the details of both devices simultaneously, use the -m command with nload. See the following command:
![]()
The result of the -m command will show the result of the network on all the devices without any graph. Here is the following result:
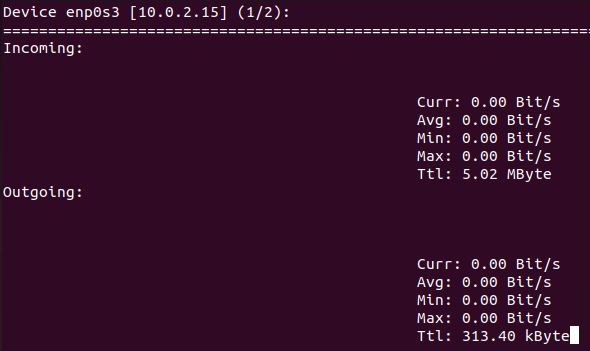
Set the Time Window With the -a Command
The -a flag with nload is used to set the length of the time window in seconds to calculate the average. By default, the length of the window is 300. Let us set the time window length to 30 seconds with -a flag. See the following command:
![]()
The result of the command is as follows:
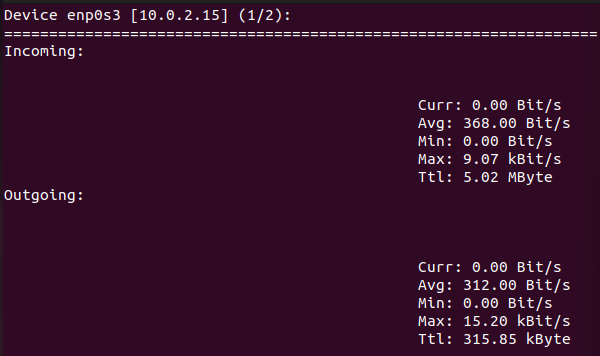
Set the Refresh Interval With the -t Flag
The nload command allows you to set the refresh interval as desired in milliseconds. The default refresh time interval is 500 seconds. You can set the refresh interval time window whatever you want by using the -t flag with nload. Let us set the refresh interval to 100 milliseconds with the following command:
![]()
Press Enter to run the nload -t command. The nload is the main command that will execute the further commands and flags associated with it. The -t flag is used to set the refresh interval time, and 100 milliseconds is the refresh time interval that needs to be set. See the following output:
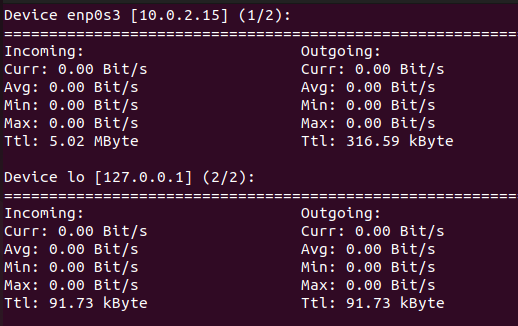
These commands can be combined in just one command and analyze the traffic according to your need with only one command. Let’s say you want to set a time window to 200 and set the refresh time interval to 400 milliseconds. See the next command to learn how you can accomplish this. Here, we are using the -m flag as well with all other commands to show the result for all the devices at once:
![]()
Note that three flags -m, -a, and -t are provided at the same time. When this command completes its execution, it should show all the devices’ results at once while setting the window time to 200 seconds and refresh time interval to 400 milliseconds. Let us confirm this by checking out the following output:
Conclusion
In this tutorial, we learned the need to monitor network traffic. We know about the nload tool provided in the Linux operating system used to monitor the network traffic. The nload is a command line tool that monitors the performance of network traffic by keeping an eye on the bandwidth. We also implemented some flags with the nload command to learn how the nload function and what kind of information it provides us.