
The simplicity of installation and configuration of Nginx on Ubuntu is one of its primary advantages. The methods to install and configure Nginx are covered in this article.
Prerequisites for Ubuntu Nginx Installation
You should be aware of a few system prerequisites before installing Nginx on Ubuntu.
- Ubuntu operating system: Although Nginx may be installed on all releases of Ubuntu, we suggest choosing the most recent LTS (Long-Term Support) edition for the most secure and stable experience.
- A sudo privileged user account: For Ubuntu, installing Nginx requires a user account with administrator rights. This enables you to execute the commands as a super user and modify the system files.
- Command-line basics: While command-line proficiency is not required, you should at least be familiar with using the Terminal to execute the commands.
- Sufficient system resources: To run efficiently, NGINX requires a minimum of 512 MB of RAM and one CPU core, but additional resources may be needed for larger or complicated websites or applications.
How to Install Nginx on Ubuntu
Step 1: Update Your Software
Before installing Nginx, you should upgrade your Ubuntu system to ensure that you have the most up-to-date software and security patches.
$ sudo apt-get upgrade
Output:
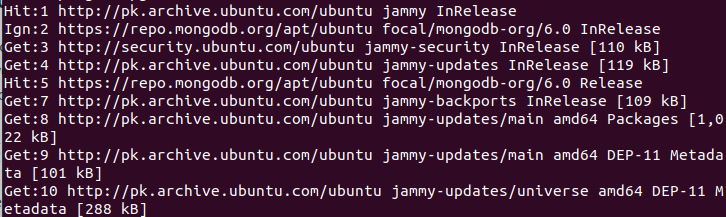
The “update” command updates your system’s package lists, and the “upgrade” command installs any readily available updates.
Once the update is complete, you may proceed to the installation of Nginx on Ubuntu.
Step 2: Install Nginx
Now, enter this command in the Terminal to install Nginx on Ubuntu:
Output:

You can run the subsequent command to determine the installed version of Nginx after the installation is finished:
Output:
![]()
Note: If you encounter any problems when installing, you can find further information in the log files in the /var/log/nginx/ directory.
Your Ubuntu system now has Nginx installed and is ready for usage. Let’s proceed to the following part now.
Step 3: Configure Nginx
After installing Nginx, you can set it up to serve your web content. Nginx automatically serves any content in the /var/www/html directory. You can check Nginx’s functionality by entering the IP address of your server into any web browser.
A new configuration file must be created in the /etc/nginx/sites-available directory to set up Nginx to serve your content. To create a file, we have access to the text editors like Vim or Nano.
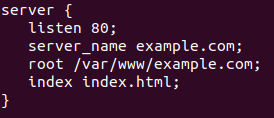
This file contains your server block which configures your website. Here is a simple server block example:
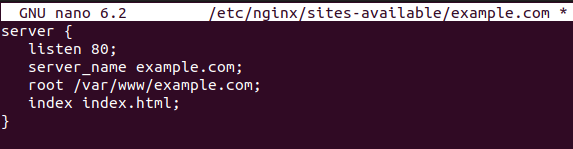
Using the /var/www/example.com directory as the content source, this configuration makes the server listen on port 80. The “Example.com” and /var/www/example.com can be changed to your domain name and the location of your website’s content, respectively.
You have to create a symbolic link to enable or activate your configuration file after it is created.
Finally, verify the configuration and restart Nginx:
Output:
![]()
If there are no issues, the site should now be operational and accessible through the domain name.
Step 4: Configure SSL/TLS
SSL/TLS encryption should be used to secure the website if you accept or serve a sensitive data to the users. You may accomplish this by getting an SSL/TLS certificate and setting up Nginx to use it.
To help you secure your website, “Let’s Encrypt”, a not-for-profit certificate authority, provides free SSL/TLS certificates. To install “Let’s Encrypt” on your server, run the following commands:
Output:

Employ the following instructions to acquire a certificate that is related to a relevant domain whenever the “Let’s Encrypt” client is installed:
The “Let’s Encrypt” client will be launched and Nginx will be set up to use the freshly acquired SSL/TLS certificate.
You can also consider these advanced Nginx configuration options for Ubuntu 22.04.
Customize the Server Blocks
In the previous section, we built a simple server block that delivers contents from a particular directory. However, you might need to provide a content for several domains or subdomains from the same server. Nginx allows you to create multiple server blocks, each of which can be used to configure a different domain or subdomain.
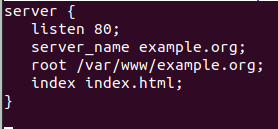
Consider the scenario where you own the “example.com” and “example.org” domains. One server block for each domain can be made and stored in the /etc/nginx/sites-available directory. Then, you may activate each server block by making symbolic links in the /etc/nginx/sites-enabled directory.
For “example.com”, use this command:
Configuration:
For “example.org”, use this command:
Configuration:
To activate each server block:
$ sudo ln -s /etc/nginx/sites-available/example.org /etc/nginx/sites-enabled/
Activate Caching
To enhance the performance of your website, Nginx can also be utilized as a cache server. Nginx can boost the website performance and scalability by caching the frequently accessed content such as static images and HTML pages. Visitors will see a faster response time as a result of the lighter stress on your web server.
The subsequent settings must be incorporated to your server block in order to activate caching.
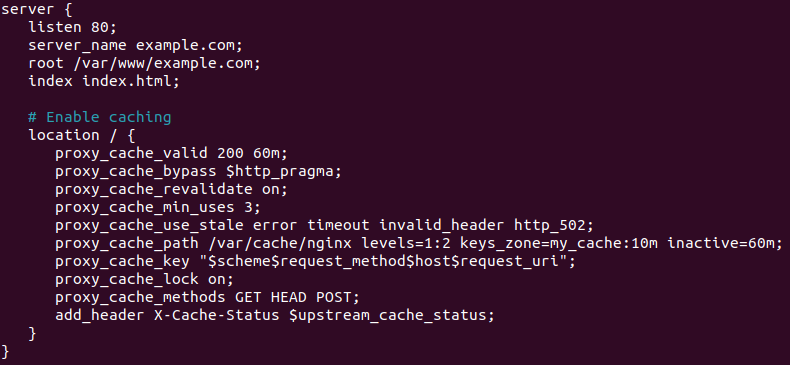
This configuration caches all requests for 60 minutes, but you can customize the cache settings to meet the specific needs of your website.
Load Balancing
Distributing traffic among several web servers using Nginx as a load balancer increases scalability and dependability. Add the subsequent configuration to your server block to turn on the load balancing:
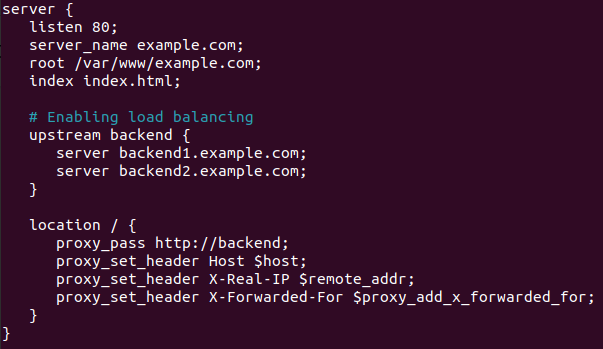
This configuration defines an upstream group named backend with two servers, “backend1.example.com” and “backend2.example.com”. The location block then proxies the requests to the backend group, distributing traffic across the two servers.
This is just one example of Nginx’s many advanced configuration options. You can find further ways to adapt and optimize Nginx for your specific needs by reading the provided documentation and discussion boards.
Conclusion
The installation and configuration of Nginx on Ubuntu are demonstrated in this article. Nginx was installed once the system was updated. After that, we tested the setup and set up Nginx to serve the web content. Finally, we used “Let’s Encrypt” to secure our website with SSL/TLS encryption.
Remember that this is only a basic configuration and you can use a variety of other variables and modules to customize Nginx to your particular requirements.