
In this descriptive post, network configuration of Debian 11 is explained using command line and GUI as well.
Why Network Configuration is important
The primary task of network administrators is to monitor several activities over a network and network configuration allows them to track any changes that are affecting the performance of the network. With the help of tracking changes administrators can reduce the downtime of a network. In case if any system update causes hindrance to performance of the network; then you can fall back to previous configuration that worked well. Moreover, network security can also be optimized, and it helps to save the previous network configuration settings. For instance, a dynamic IP is used by most internet users, you can set static IP and it is helpful in several businesses where you have to remember the IP addresses of internal as well as external devices. And a business using VPN networks can get advantage of static IP to provide remote work access to their employees.
How to configure network settings in Debian 11
This section will present the process of network configuration of Debian 11: primarily there are three fundamental requirements for network settings:
- Configuring IP address
- Changing Hostname
Configuring IP: You can use “nmtui” command on Debian 11 to configure IP address; type and execute the following command in your terminal:
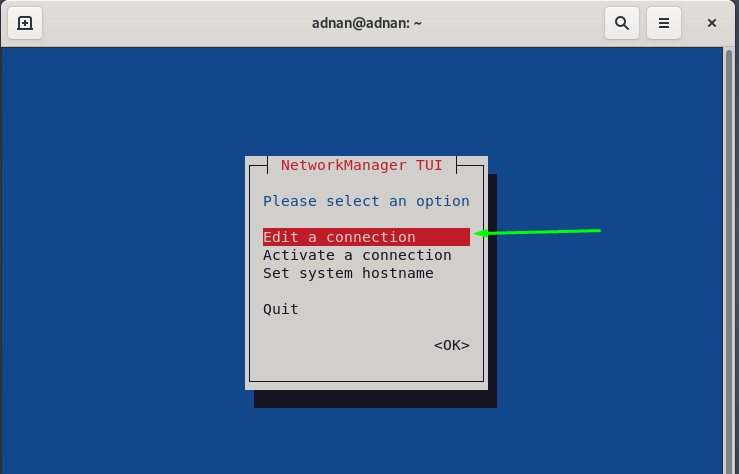
The following interface you will see and select the option “Edit a connection”:
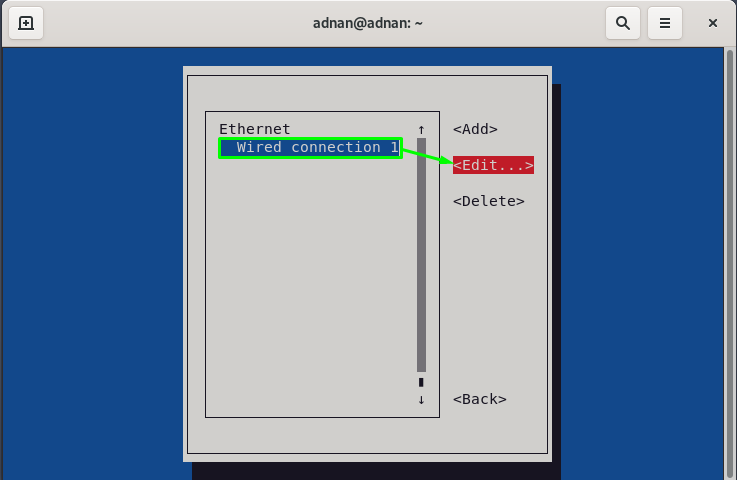
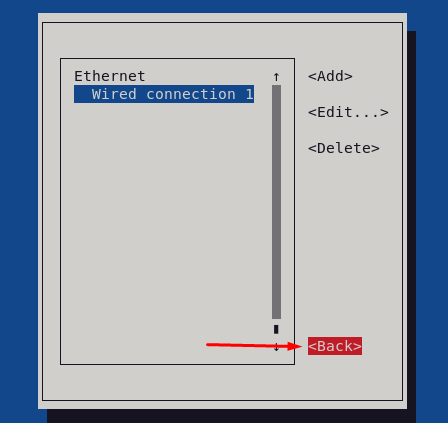
After that select your ethernet connection and hit enter on “Edit” option:
Note: Use the “tab” key to navigate to several options and hit “enter” to select/edit that option.
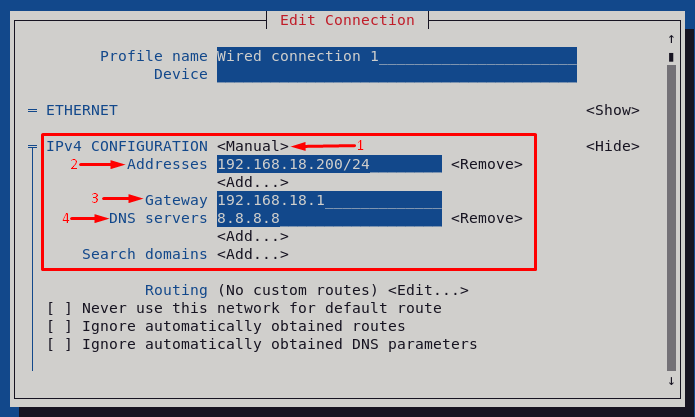
Navigate to IPv4 CONFIGURATION option and to open its settings, press enter on “<Show>” option:

Once you have navigated to the settings; you can configure IP address by following few steps mentioned below:
Set the IPv4 Configuration method to “manual”:
Change the IP address in the “Addresses” option: 192.168.18.200
Set the gateway in “Gateway” option: 192.168.18.1
Lastly, input the DNS server address: 8.8.8.8
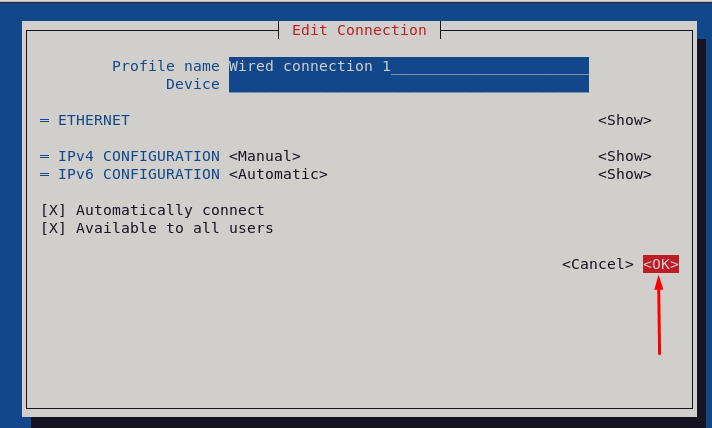
Scroll down and hit enter on “OK”:
After that, navigate to “Back” option:
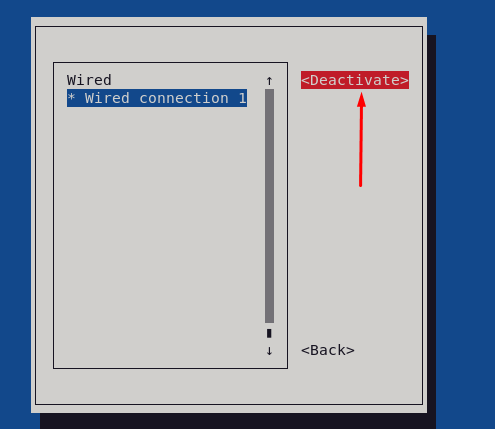
Choose the option “Activate a connection”:

Lastly, choose “Deactivate” to deactivate the connection:
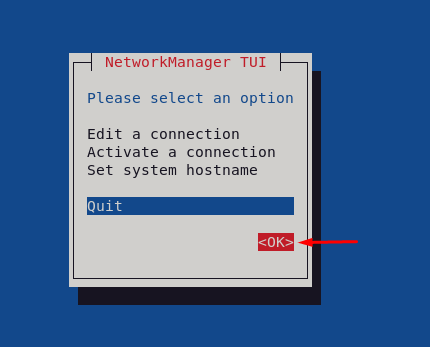
After that, choose “Activate a connection” to start the connection again and navigate to “OK”:
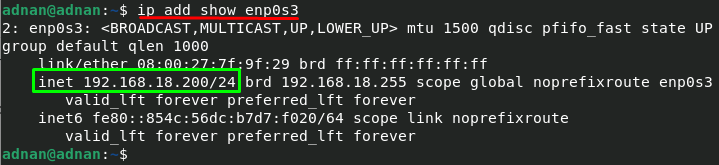
As we have changed the IP of interface “enp0s3” so, the following command will show the newly set IP address of the selected network interface:
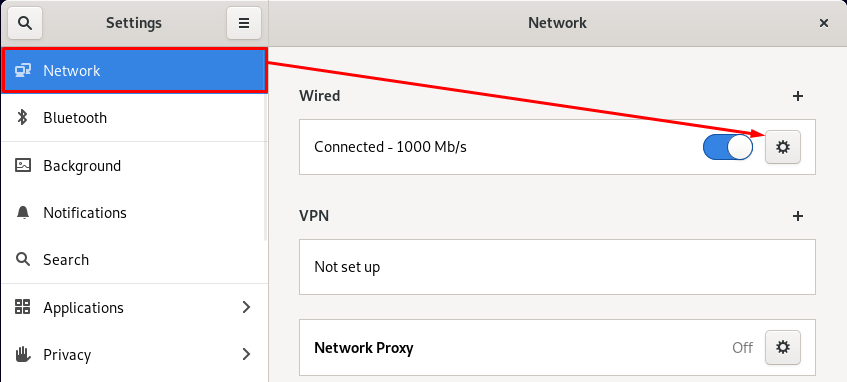
Changing IP address using GUI : Firstly, click on “Activities” and type “settings” in search bar; you will see the settings icon in search results; click on it to open settings:

Once “Settings” is opened; click on “Network” placed on left side and navigate setting gear icon:
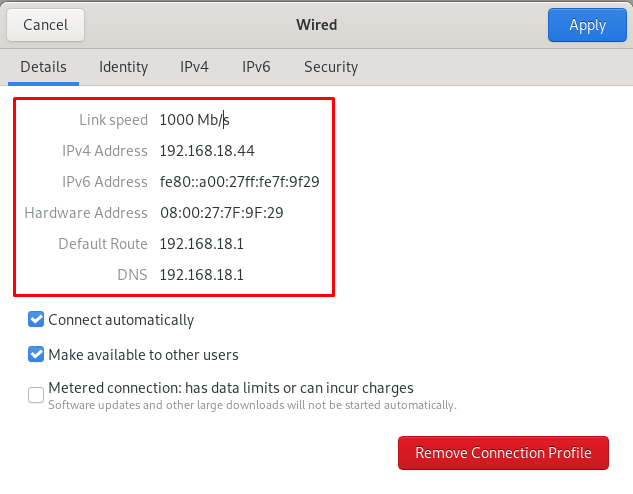
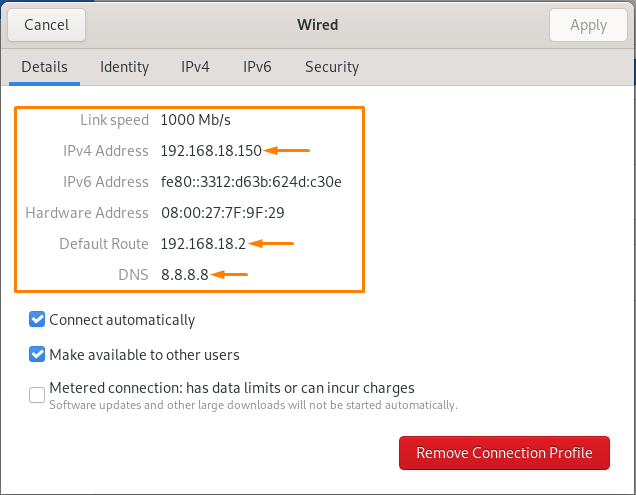
You will see a new window that contains the current IP address, gateway, DNS server, Netmask, as shown in the image below:
Now, move to “IPv4” tab to make some changes: perform the following steps carefully:
Step 1: Firstly, change the IPv4 method from Automatic to Manual:
Step 2: Move to “Addresses” section, and write the IP address, Netmask and Gateway:
Step 3: After that, turn off the automatic DNS toggle button and put the DNS value:
Note: We have used the following values in this section:
IP address: 192.168.18.150
Netmask: 255.255.255.0
Gateway: 192.168.18.2
DNS: 8.8.8.8
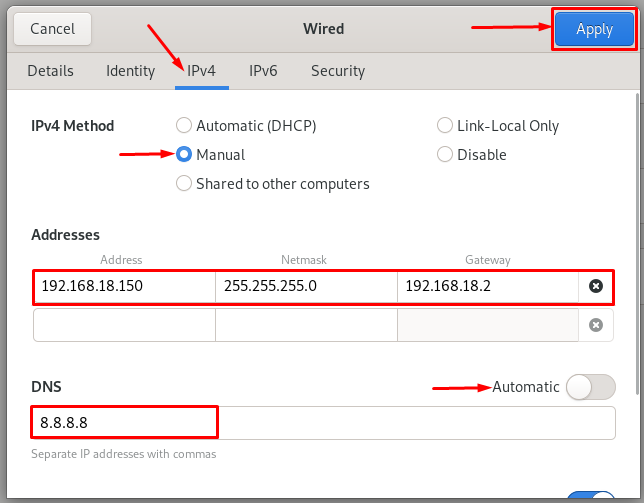
After inserting values, apply the changes by clicking on “Apply” button:
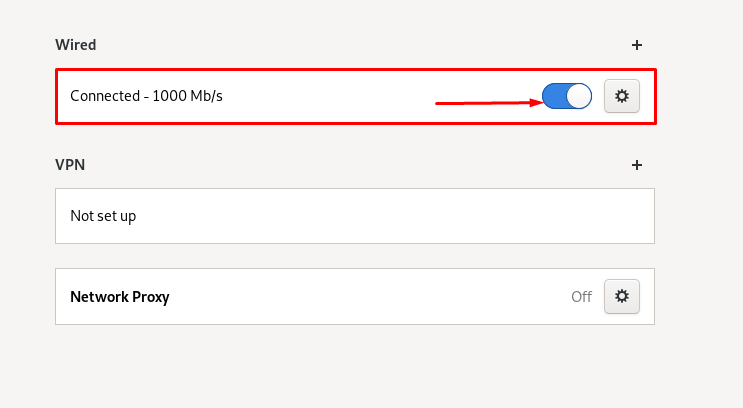
Turn OFF/Turn ON the button to allow computer to use new data:
Once you have done this; click on the gear icon and look for details; it is observed that the values are changed now:
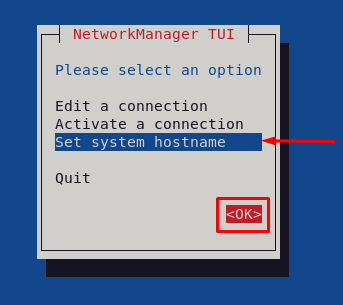
Changing hostname using terminal : Run the network manager in terminal by issuing the following command:
The interface shows three options; choose “Set system hostname” and navigate to “OK” to proceed:
Your current hostname will be displayed and can be edited:
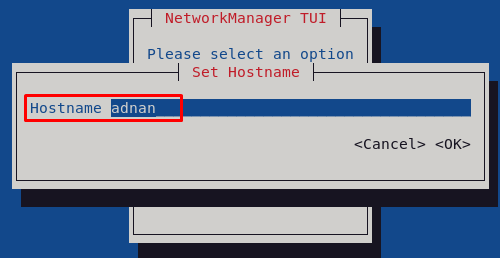
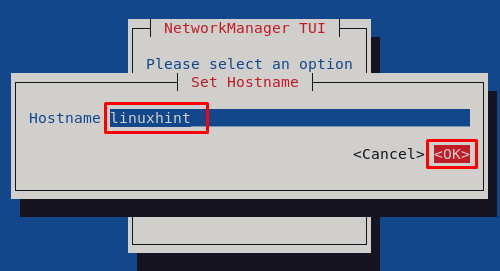
Type new hostname by replacing the old one: For instance, our old hostname was “adnan” and we have changed it to “linuxhint”: Hit enter on “OK” to complete this step:
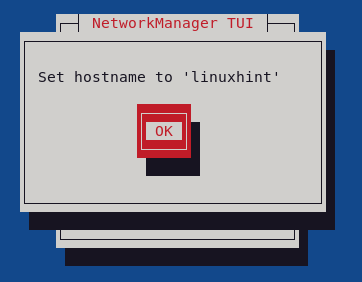
After changes, you have to confirm the change by putting the password and then clicking on Authenticate:
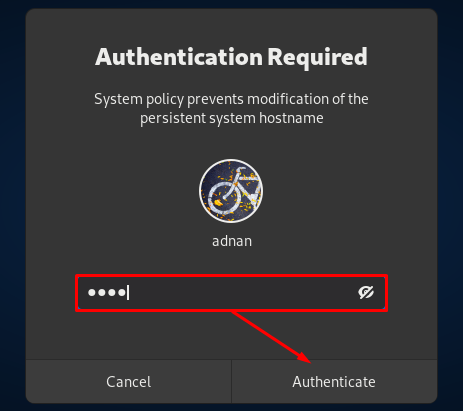
After successful authentication, it will display a message, set the hostname to ‘linuxhint’, navigate to “OK” to finish the process:
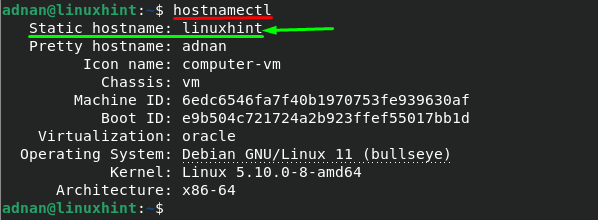
The hostname must be changed after completion of the process:
You can verify the changes by using the command mentioned below:

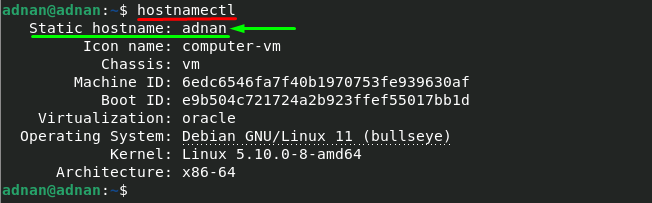
Changing hostname using hostnamectl command : There is another command in Debian 11 that can be used to change as well as check the hostname in Debian 11. Use the following command to check your current hostname:
It is observed that the current hostname in “linuxhint”; for instance, the command mentioned below will change the hostname to “adnan”:
![]()
Restart the terminal and run the following command to check the hostname:
Conclusion
Debian is an open-source distribution of Linux OS that can be used for networking purposes as well. It allows you to configure the network settings as per the user requirements and settings. In this guide, we have described the network configuration on Debian 11; two basic configurations are performed. This guide provides the step-by-step process to change the IP address as well as the hostname on Debian 11. Terminal enthusiasts can use nmtui command to configure network settings whereas the graphical method is also described in this post.