This tutorial will discuss various ways of resolving the “mvn command not found” error when invoking the maven utility in Unix systems.
Now, let’s get started.
Cause #1 – Apache Maven Not Installed on Target System
The “mvn command not found” error mainly occurs when Apache Maven is not installed on your system.
Before invoking Maven, you need to ensure that the binary is available on your system path.
Let us discuss how we can install and set up Apache Maven on your Linux system.
Start by updating your system packages by running the following command:
$ sudo apt-get upgrade
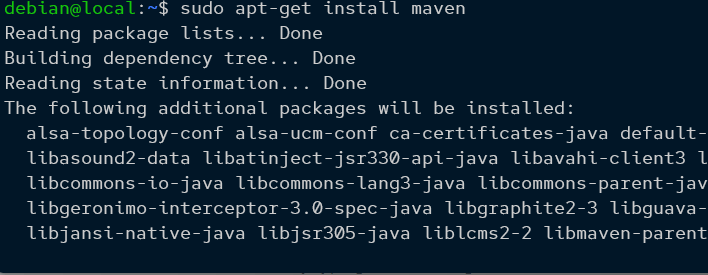
Next, install Maven by running the following apt command:
Once installed, you can check the Maven version by running the command provided below:
The previous command should return the installed Maven version as shown in the sample output below:
Maven home: /usr/share/maven
Java version: 11.0.15, vendor: Debian, runtime: /usr/lib/jvm/java-11-openjdk-amd64
Default locale: en_US, platform encoding: UTF-8
OS name: "linux", version: "5.10.102.1-microsoft-standard-wsl2", arch: "amd64", family: "unix"
Congratulations! You have Maven installed on your system.
On macOS, you can install Maven with Homebrew by running the command shown below:
Once installed, you can check the installed version by running the mvn -version command.
Cause #2 – Missing Environment Variables
The second common cause of the “mvn command not found” error is the missing environment variables.
If you have installed Apache Maven using the provided archive, you will need to set up the necessary environment variables; otherwise, Maven will not work.
Navigate into the /etc/profile.d/ directory and create a file called maven.sh, as shown below:
$ sudo touch maven.sh
Next, edit the file with your favorite text editor and add the following entries:
export MAVEN_HOME=/home/maven/
export M2_HOME=/home/maven/
export PATH=${M2_HOME}/bin:${PATH}
Replace the JAVA_HOME with the path to your JDK installation and MAVEN_HOME, and M2_HOME with the directory where Maven is located.
Once completed, save and close the file.
The next step is to make the file executable by running the command:
Finally, apply the changes to your terminal profile by running the following command:
Once completed, run the following command to verify that Maven is installed:
And with that, you have successfully installed and added Maven to your system’s path.
Conclusion
This guide covered various techniques for resolving the “mvn command not found” error in Unix systems. In addition, causes were discussed, such as the Apache Maven not being installed in the target systems and missing variables in the environment.


